Table of Contents
Section 1 — Introduction
Privacy Keeper automatically detects and blurs faces and license plates in equirectangular (360°) panoramic images. Processing runs on your NVIDIA GPU for maximum speed, with automatic fallback to CPU.
The application is organised as a left sidebar with one page per task: Process, Watermark, Mask, EXIF, CLI, License & Account, Settings and About. Light and dark themes are available (light is the default), and the interface is available in English and German.
1.1 What Happens to Your Images
Blurred images are written to the output folder; your originals are never modified. Each run also writes a timestamped log to a log sub-folder of the output folder (privacy_keeper_YYYY-MM-DD_HH-MM-SS.log) with system info, settings, per-image counts and performance.
1.2 Performance
A full-resolution Mosaic 51 panorama (12,288 × 6,144 px) takes roughly 6 seconds on an NVIDIA RTX 3090 — about 14,000 panoramas per day. Lower-resolution cameras are proportionally faster. CPU processing is many times slower.
Section 2 — System Requirements
- Windows 10 or Windows 11 (64-bit)
- 8 GB RAM minimum, 16 GB recommended
- 4 GB free disk space
- Input: equirectangular panoramas in JPEG (.jpg / .jpeg), up to 32,000 × 16,000 px (32K)
- For GPU acceleration: NVIDIA GPU with CUDA 12.x support (GTX 10xx or newer)
- For GPU acceleration: CUDA Toolkit 12.9.1 and cuDNN 9.20.0 installed
Section 3 — Installation
3.1 Installing CUDA and cuDNN
GPU acceleration is optional — the application falls back to CPU if CUDA is not installed.
Step 1 — CUDA Toolkit 12.9.1
Download from: https://developer.nvidia.com/cuda-12-9-1-download-archive
Select: Windows → x86_64 → exe (local)
Step 2 — cuDNN 9.20.0
Download from: https://developer.nvidia.com/cudnn-9-20-0-download-archive
Run the installer — no manual copying needed.
3.2 Installing Privacy Keeper
Run the Privacy Keeper installer and follow the on-screen instructions. On first launch you will sign in and activate (Section 4).
Privacy Keeper checks for updates each time it starts and installs them automatically — no manual reinstall is needed.
Section 4 — Getting Started
4.1 First Launch
Start Privacy Keeper from its shortcut. The window opens maximised with the left sidebar; click any item to switch pages. The Manual, theme and language controls are at the bottom of the sidebar.
Test data: Download the Fort Myers Beach test dataset to verify your installation.
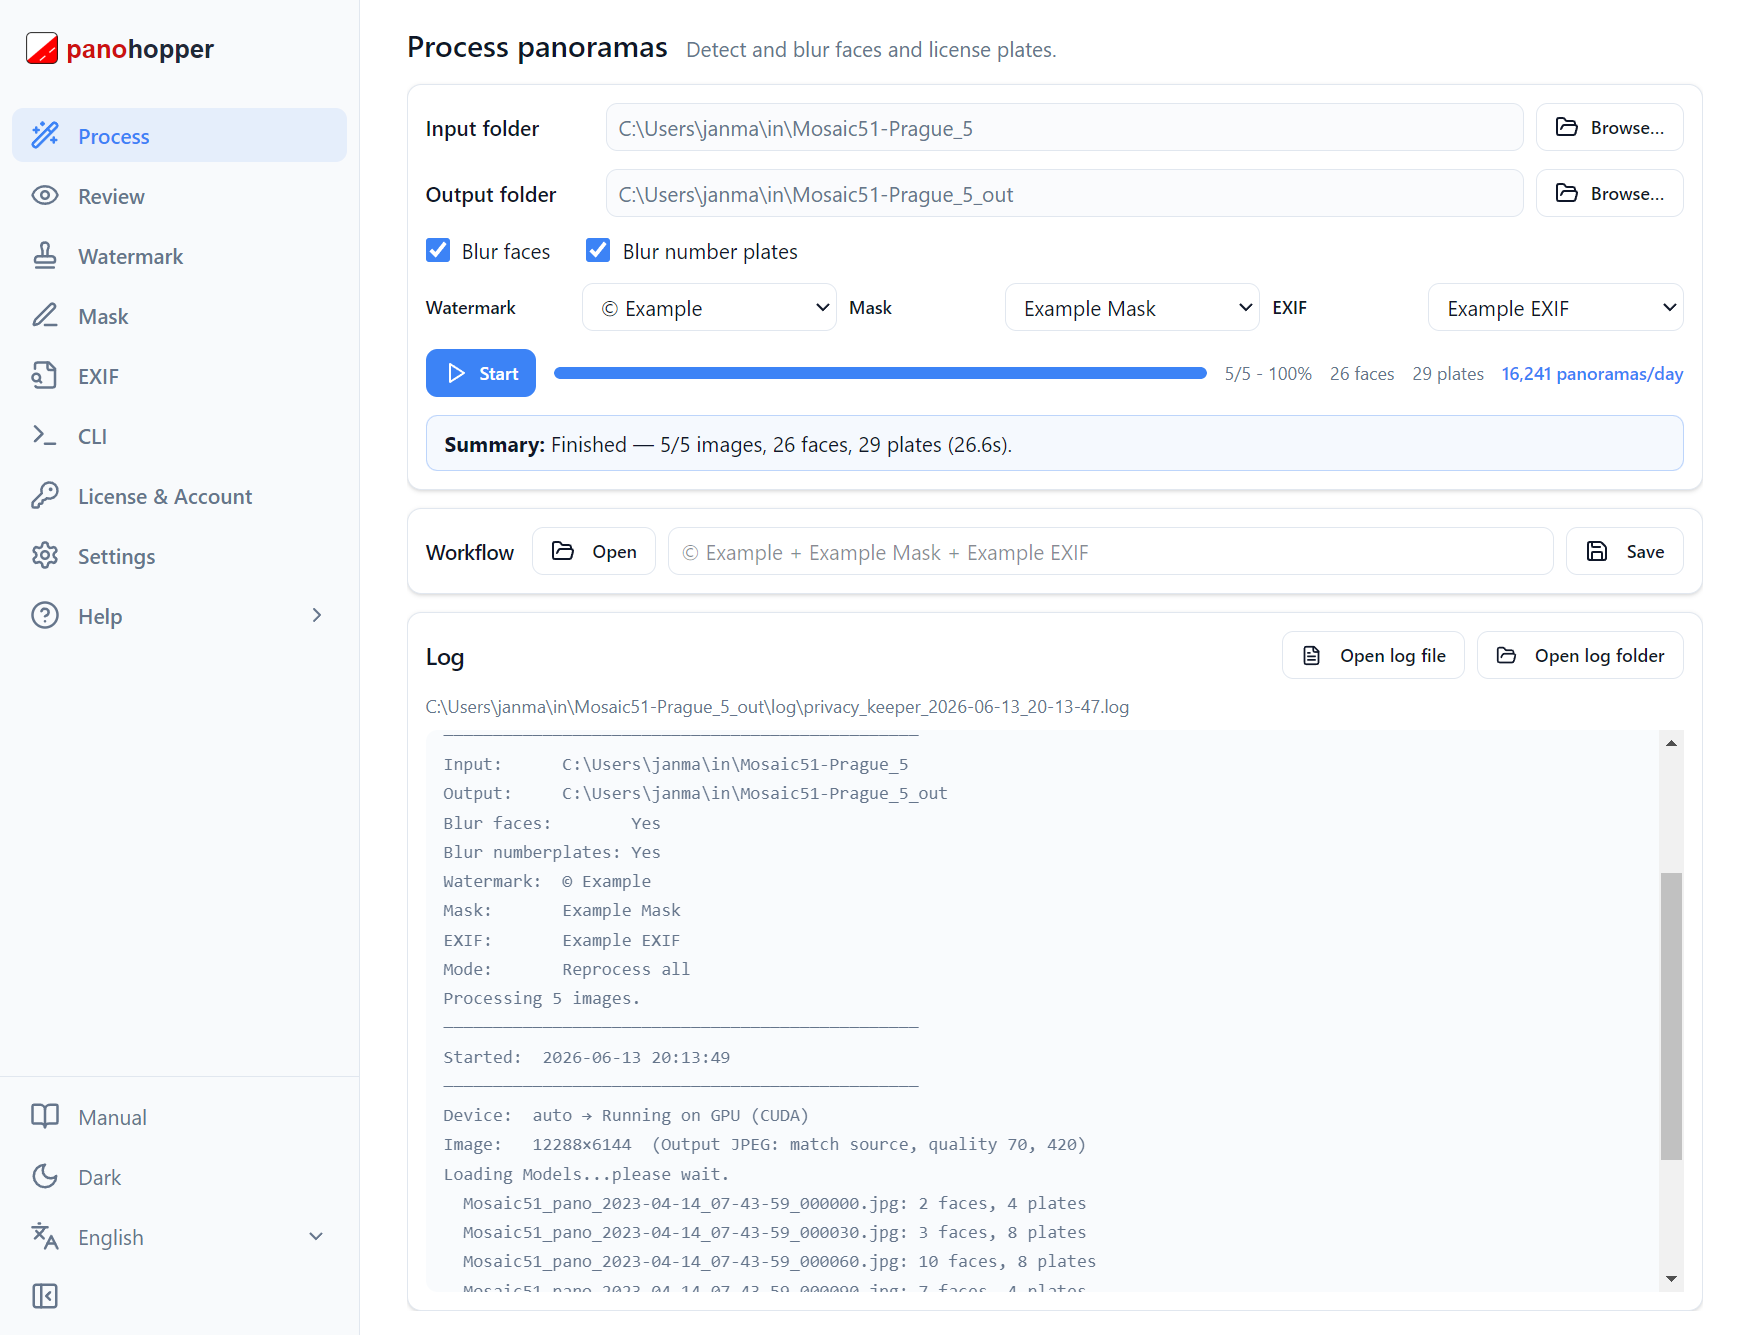
The Process page — the home screen, with sidebar navigation and the Watermark / Mask / EXIF dropdowns.
4.2 Signing In and Activating
A valid license is required. Click Sign in with browser; your browser opens to complete sign-in, then returns you to the app. If no license is active here, click Activate this computer. See Section 11.
4.3 Selecting Folders
Input folder: Click Browse… and choose the folder with your panoramic JPEGs (.jpg / .jpeg). Equirectangular panoramas up to 32,000 × 16,000 px (32K) are supported.
Output folder: Auto-set to the input folder name plus _out. Override at any time; created automatically if missing.
4.4 Light and Dark Theme
Privacy Keeper offers a light theme (the default) and a dark theme. Switch between them with the theme button at the bottom of the sidebar; your choice is remembered between sessions.
The Process page in the light theme (the default).
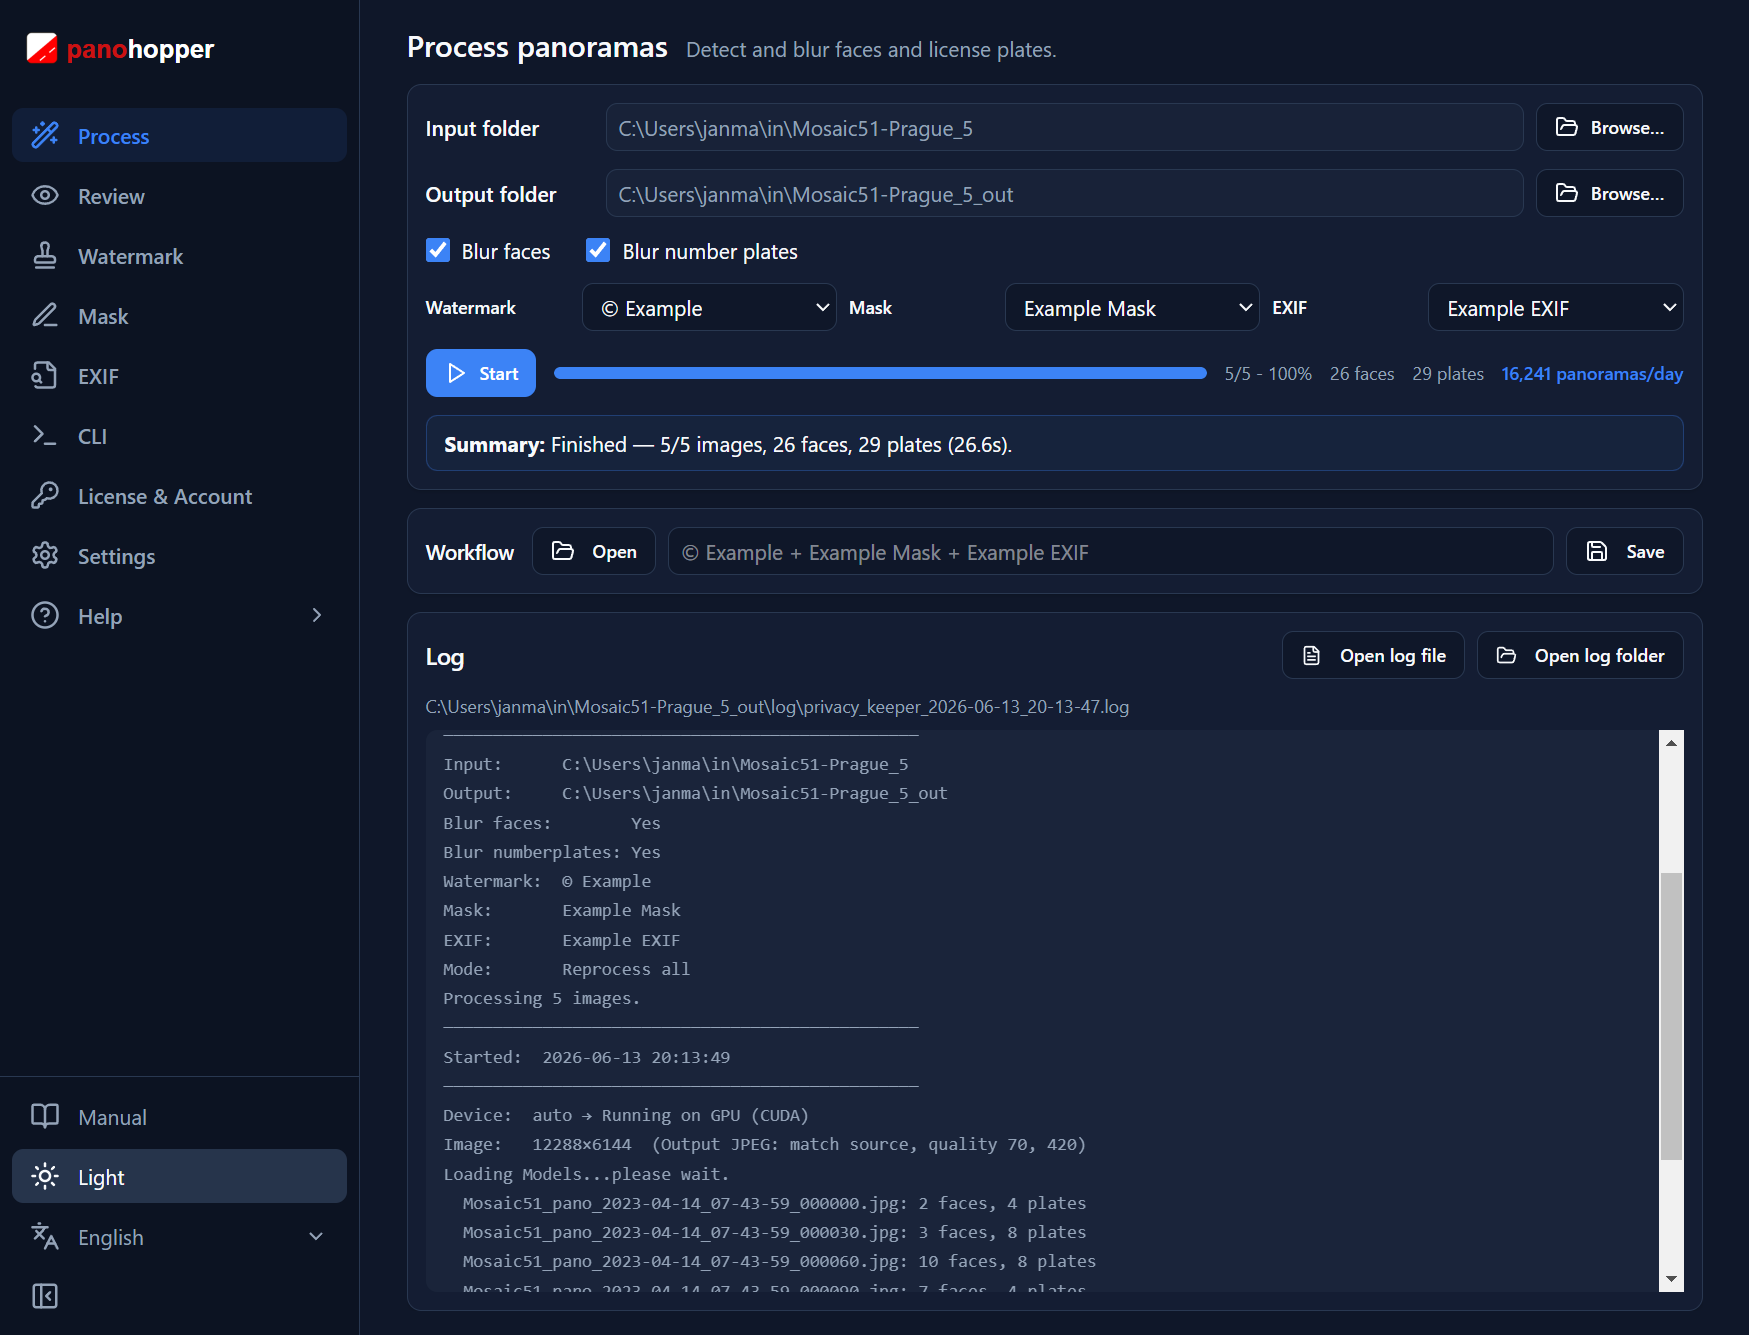
The same page in the dark theme.
Section 5 — Processing Images
5.1 Choosing Watermark, Mask and EXIF
Three dropdowns below the folder fields select which saved preset is applied to the whole run:
- Watermark — a tiled text watermark (default © Example), or None.
- Mask — a saved polygon mask, or None.
- EXIF — a metadata preset, or Copy All.
5.2 Starting a Job
- Select input and output folders.
- Choose Watermark / Mask / EXIF (or leave defaults).
- Click Start.
If the output folder already contains matching images, a dialog offers Skip existing or Reprocess all.
The Process page. The live log appears at the bottom with Open log file / Open log folder buttons.
5.3 Progress and ETA
The progress bar shows count and percentage. An estimated time remaining (ETA) appears after the first image; the finished run reports throughput in panoramas per day.
5.4 The Log
The log streams live and is written line-by-line to a log sub-folder of the output folder, so it is safe to inspect during long jobs. The pane text is selectable; the buttons open the file or its folder.
5.5 Reviewing Results
Open Review after processing to inspect output panoramas and detections. Move between images, hide or show detections, remove incorrect detections, add missed faces or number plates, draw freeform blur polygons, and reprocess edited images.
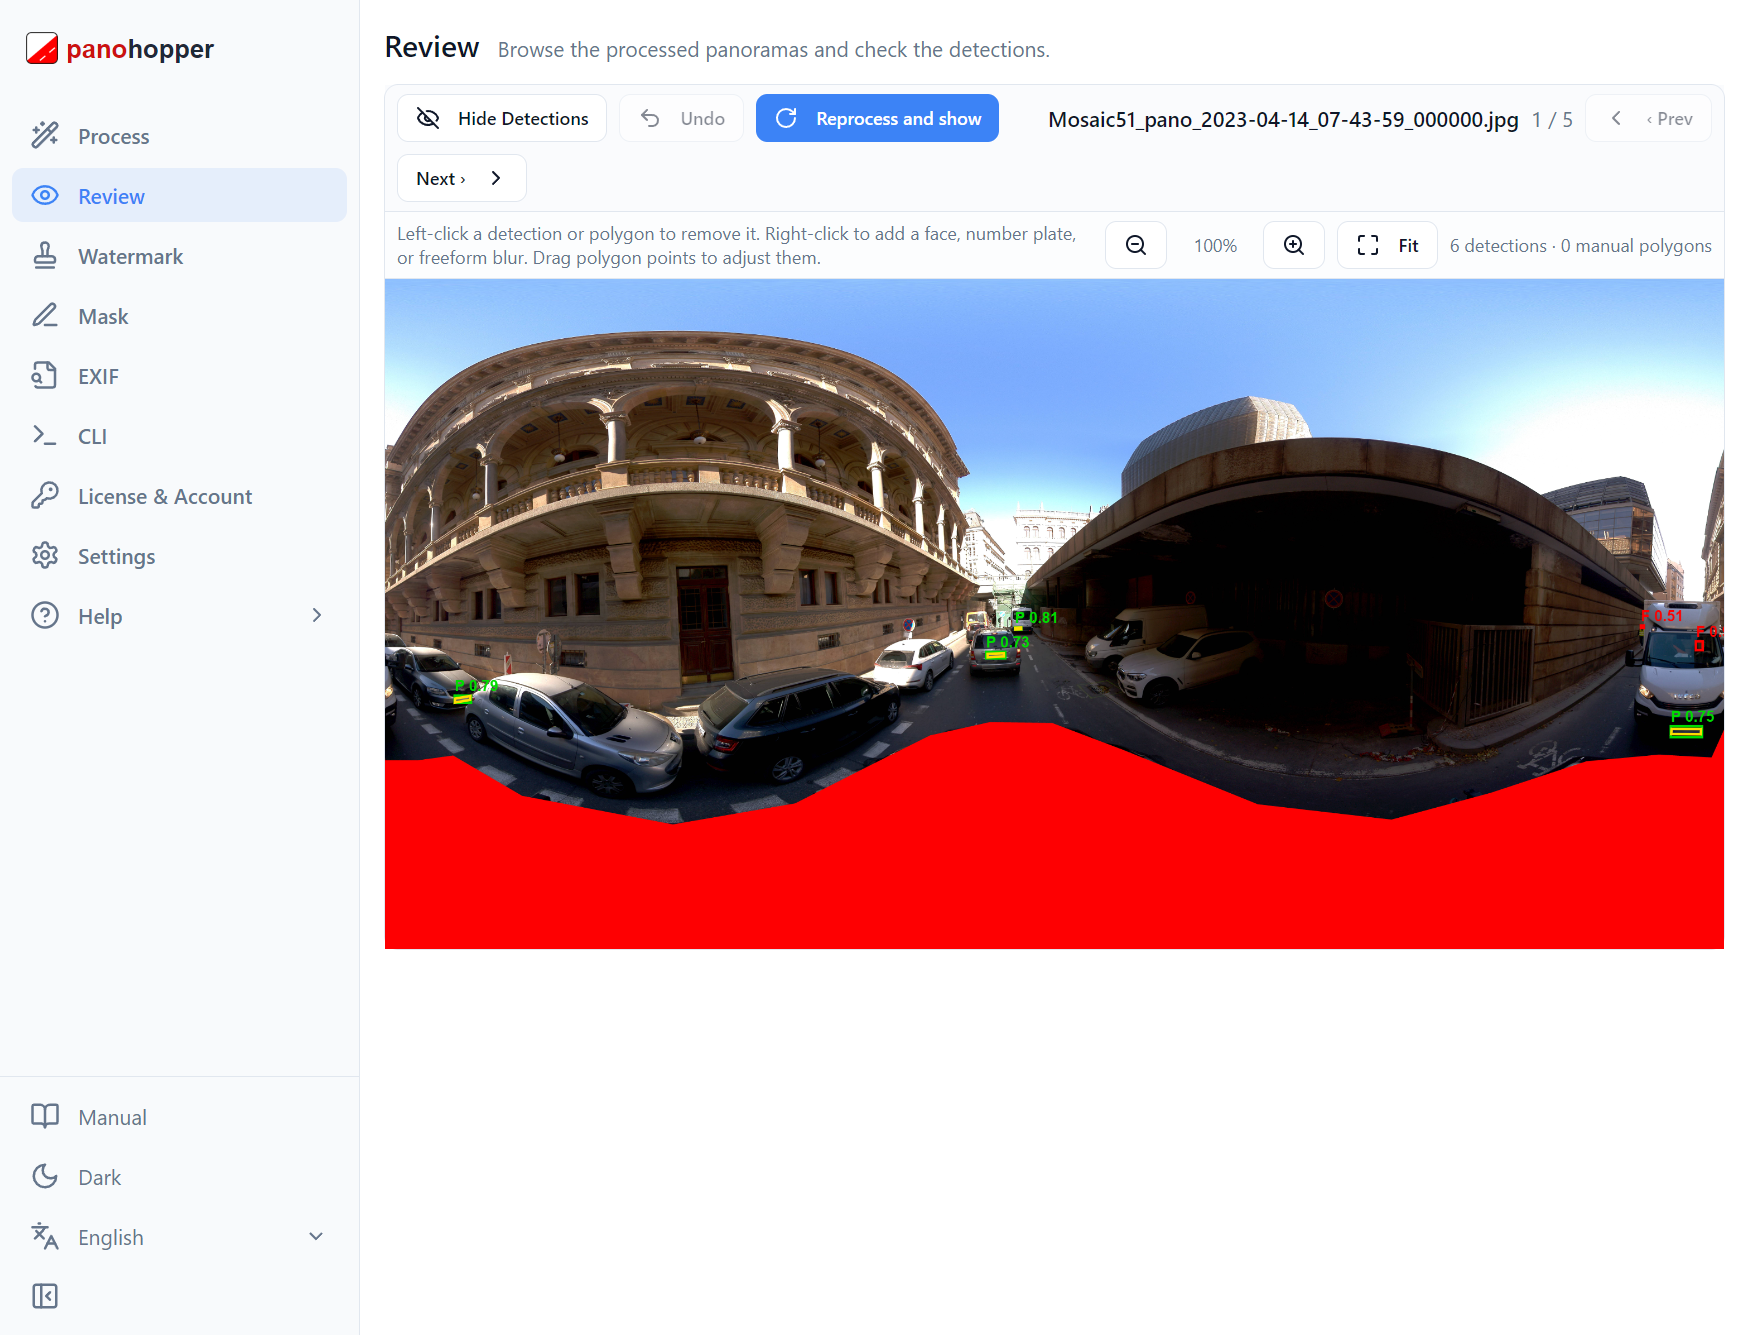
The Review page showing a processed panorama with editable detections.
5.6 Saving and Loading a Workflow
A workflow is the entire current job saved as a named file: the input and output folders, the Watermark / Mask / EXIF selections, and all Settings (device, JPEG quality, detection and blur). In the Workflow panel, Save stores the current setup (the name defaults to the chosen Watermark + Mask + EXIF) and Open loads one back. This is the same configuration the CLI page shows as workflow.json. Workflows are stored in ~\.panohopper\Workflows\.
Section 6 — Watermark
The Watermark page composites repeating text across every output image after blurring.
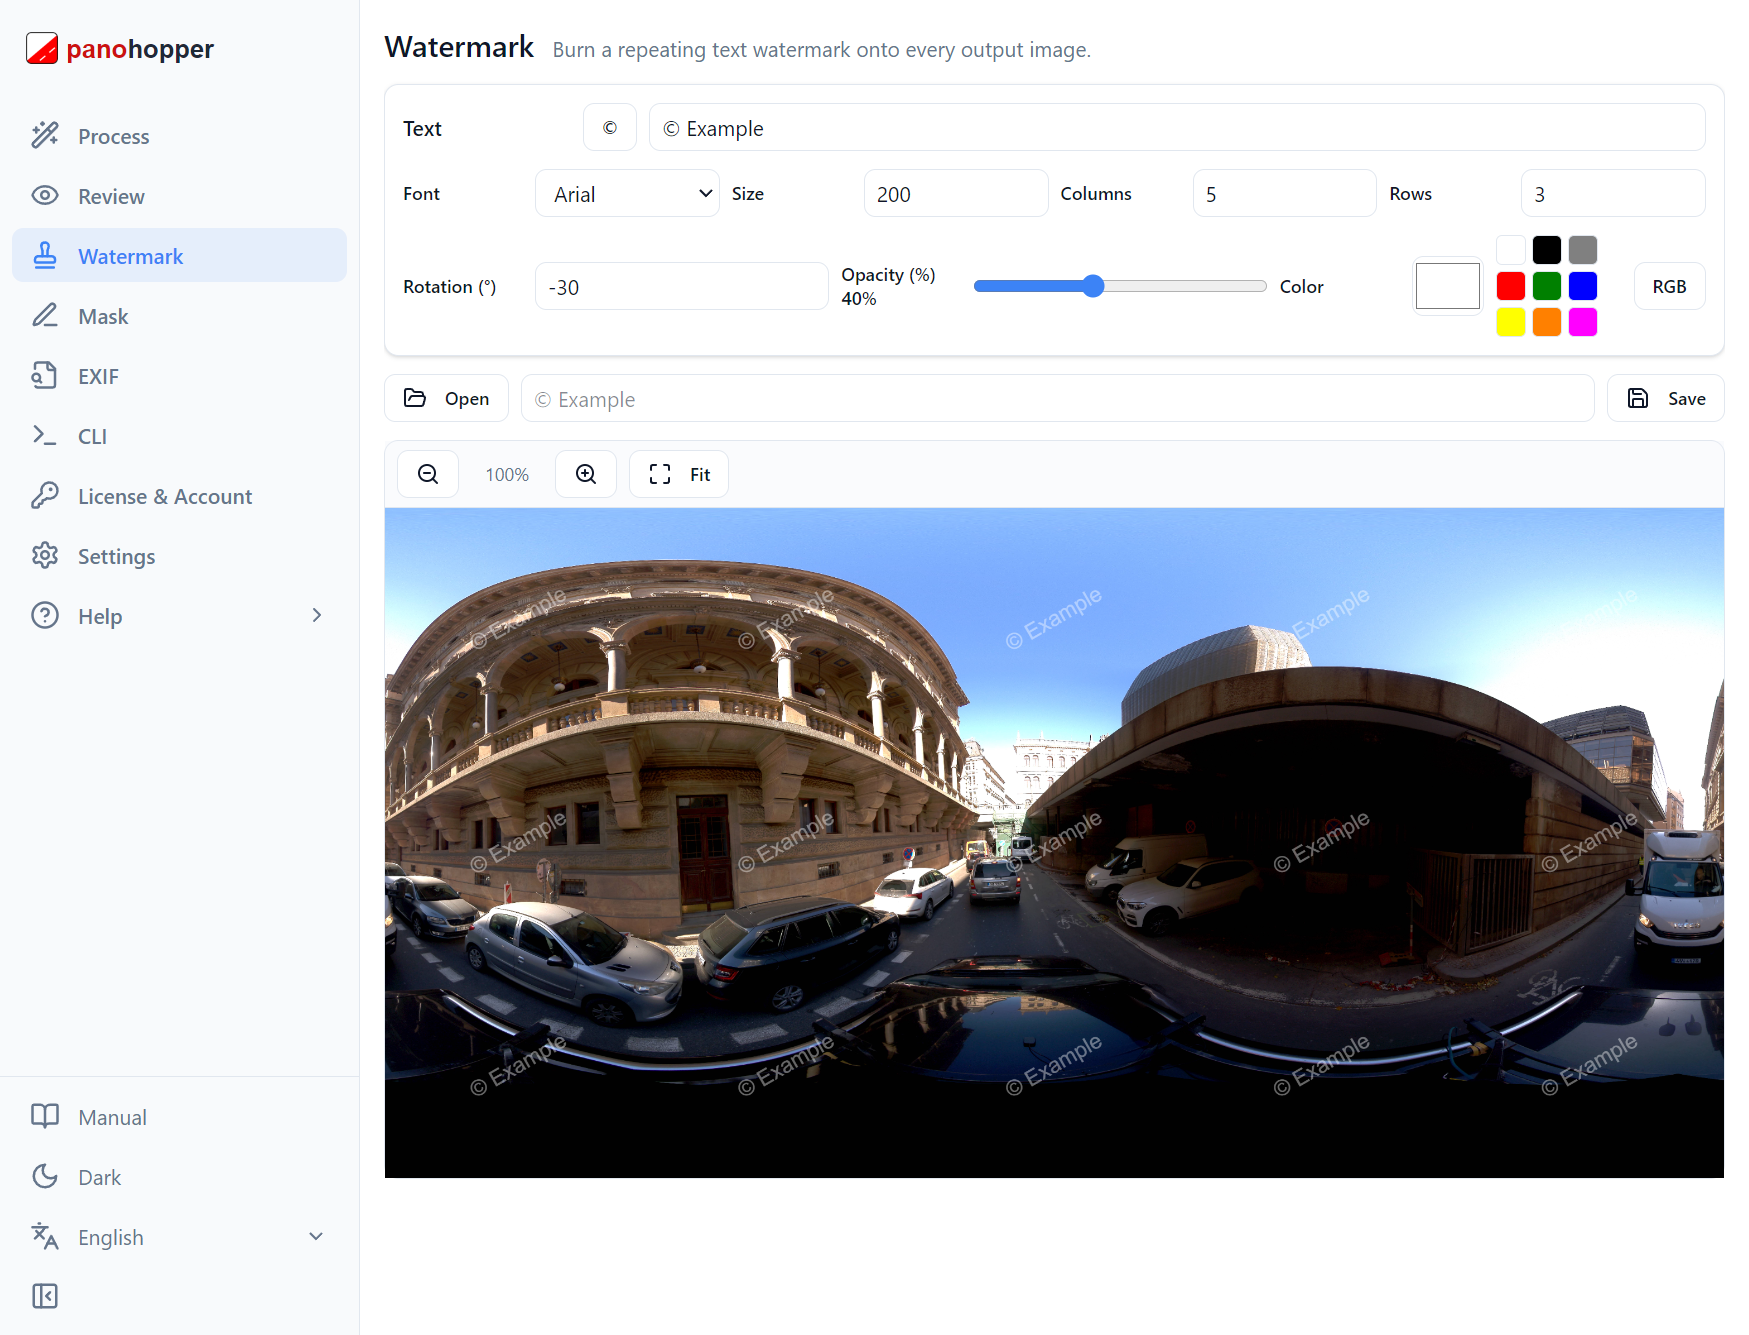
The Watermark editor with a live, zoomable, true-scale preview.
6.1 Configuring the Watermark
Tick Enable watermark, then set the options. The preview updates live at the watermark’s true size; use the zoom controls (− / + / Fit) to inspect it.
| Option | Description |
|---|---|
| Text | The watermark text. The © button inserts a copyright symbol. |
| Font | Arial, Times New Roman, Courier New or Segoe UI. |
| Size | Text size in output-image pixels (steps of 10). |
| Columns / Rows | How many times the text tiles across and down the image. |
| Rotation | Tile angle in degrees. |
| Opacity | Transparency (0–100%). |
| Color | Native picker, basic swatches, or the RGB button for exact values. |
6.2 Saving and Loading Presets
Save stores a named preset (the name defaults to the text); Open loads one. Presets live in ~\.panohopper\Watermarks\. Select one on the Process page to apply it.
Section 7 — Mask Editor
The Mask page lets you draw a filled polygon that is burned into every output image — for permanently hiding a fixed area.
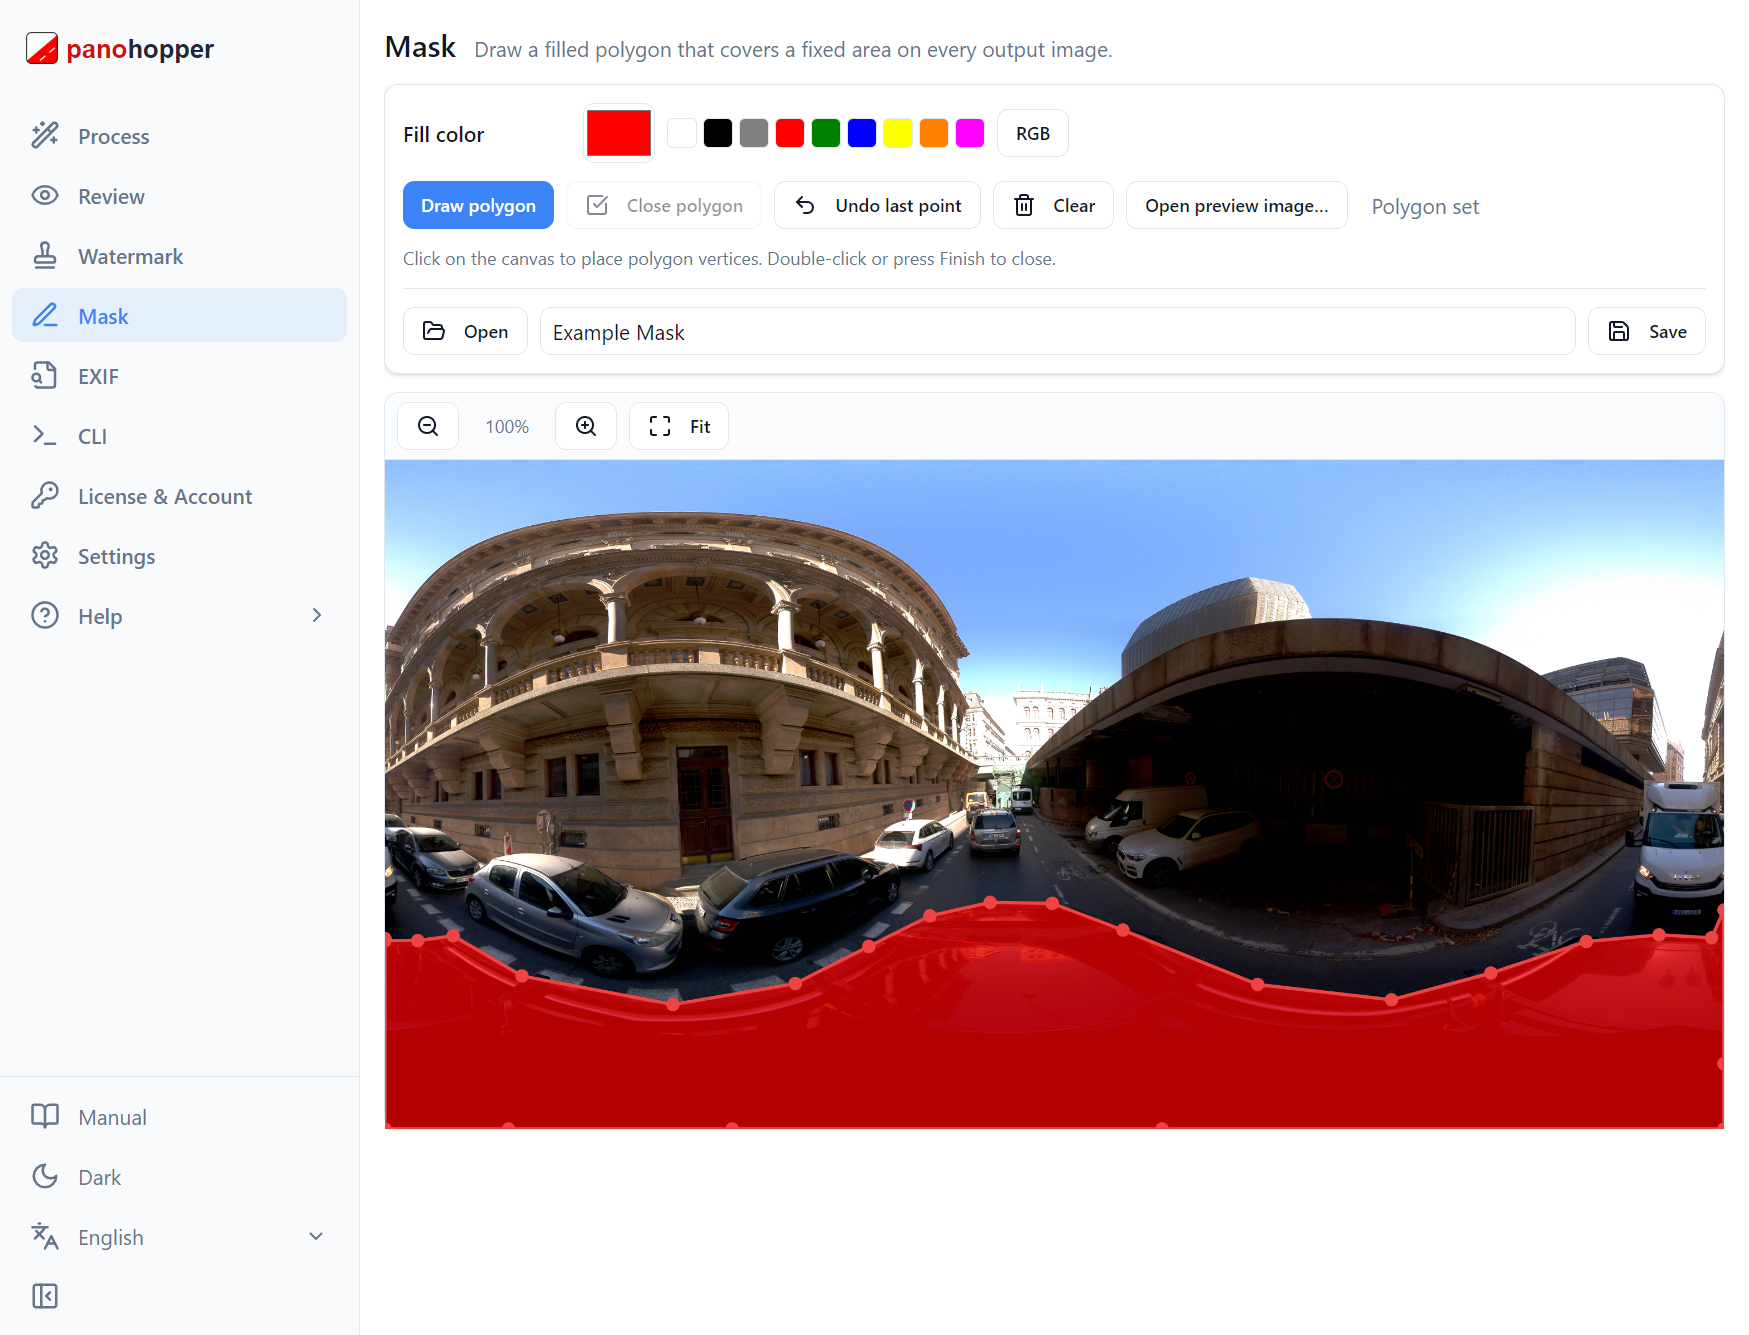
The Mask editor. Click to place polygon points; points near an edge snap to the image border.
7.1 Drawing a Mask
- Tick Enable mask and pick a fill colour (swatches or the RGB button).
- Click Draw polygon, then click the preview to place points (points near an edge snap to it).
- Double-click or Close polygon to finish. Use Undo last point or Clear to correct.
7.2 Saving and Loading Masks
Save / Open store and load masks. Polygons are stored as fractions of the image size, so they apply correctly at any resolution. Masks live in ~\.panohopper\Masks\.
Section 8 — EXIF Editor
By default Privacy Keeper copies all EXIF metadata from each source image. The EXIF page lets you instead build a preset that overrides or drops specific tags.
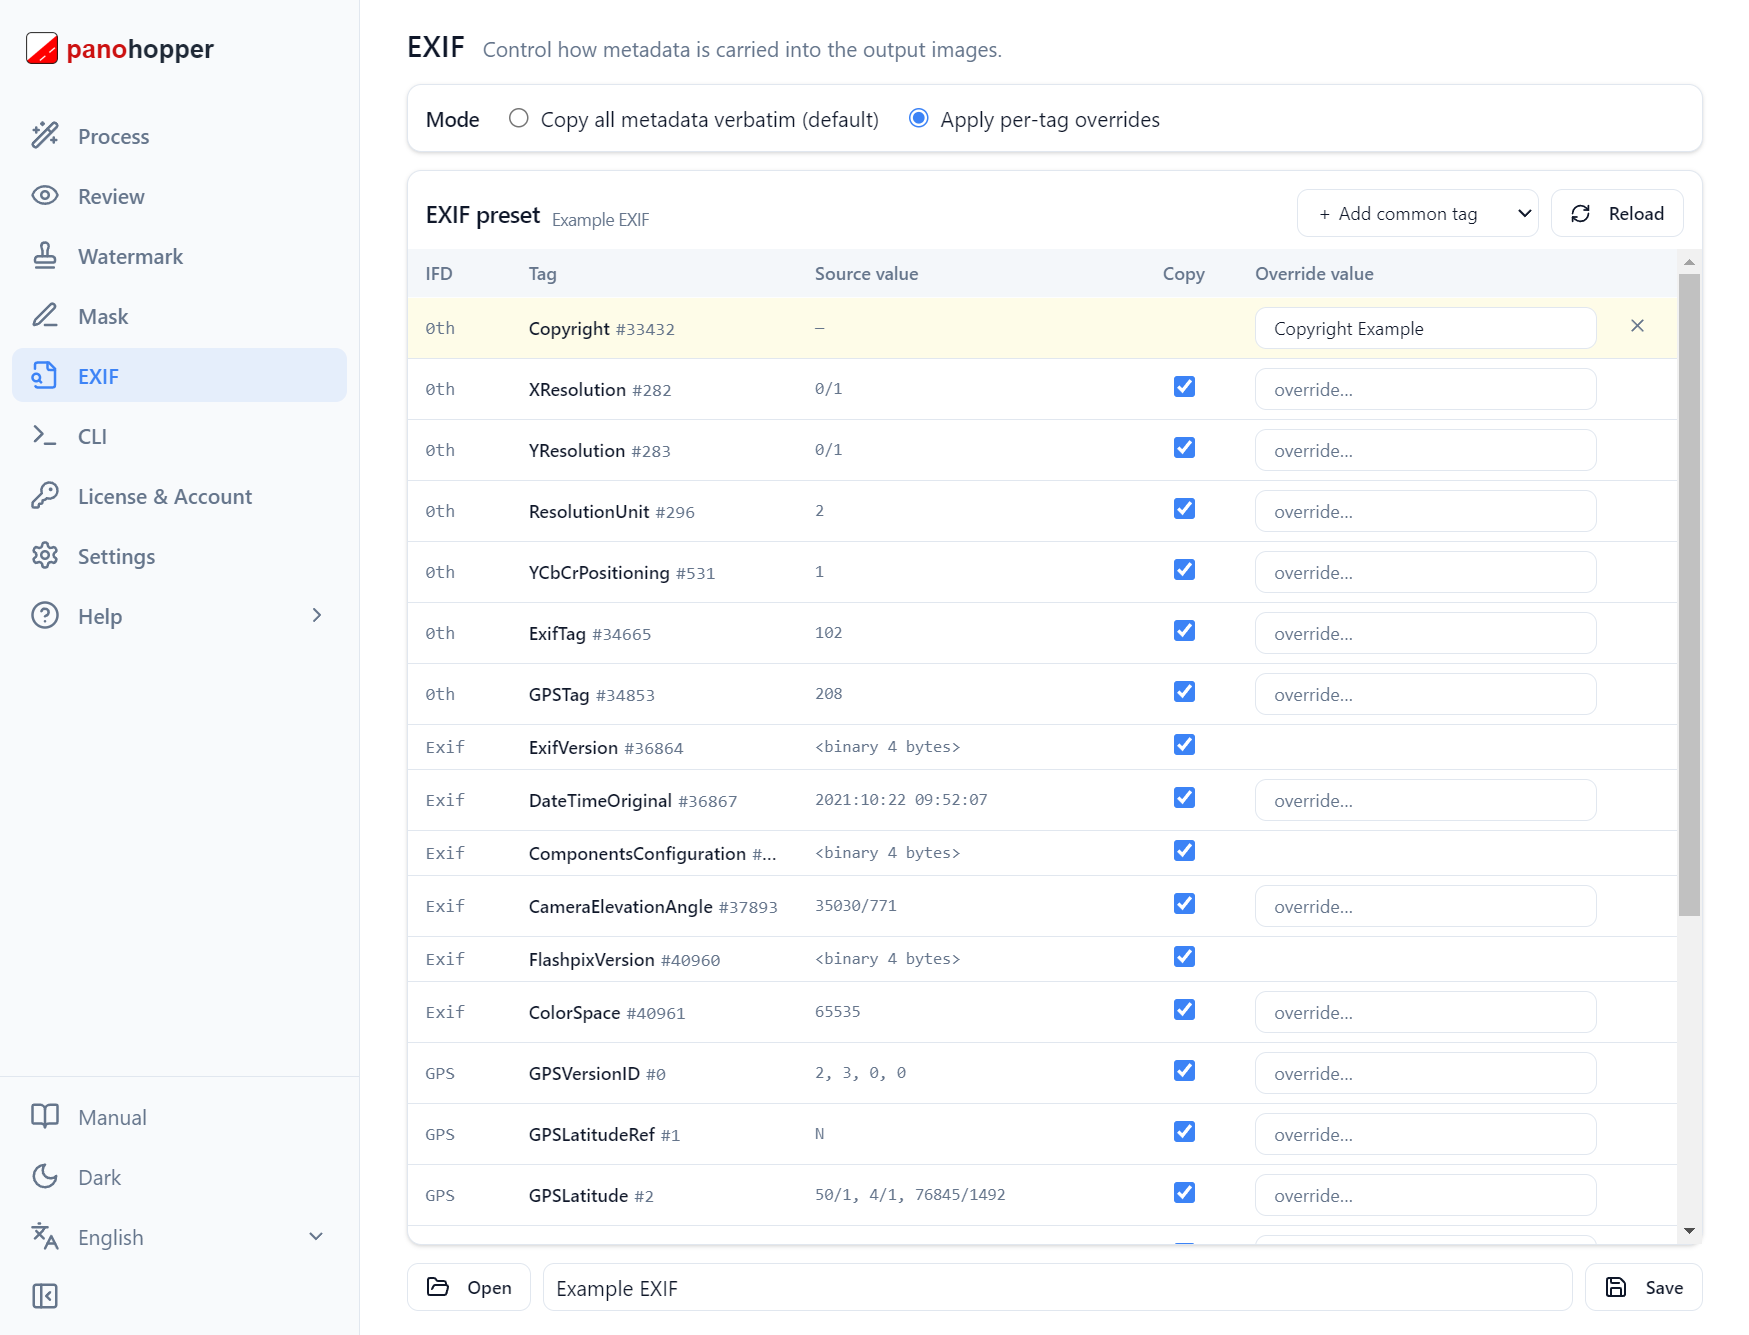
The EXIF editor showing the source metadata table with Copy and Override columns.
8.1 Copy All vs. Overrides
Choose Copy all metadata verbatim (default) or Apply per-tag overrides. In override mode the first input image’s metadata is shown as a table:
- Untick Copy to drop a tag from the output.
- Type a value in Override to replace a tag.
- Use Add common tag (Copyright, Artist, Software, …) — added tags appear at the top.
8.2 Saving and Loading Presets
Save stores a named preset (the name defaults to the tag you added); Open loads one. Presets live in ~\.panohopper\EXIF\. Select a preset — or leave Copy All — on the Process page.
Section 9 — Settings
The Settings page holds everyday options plus an Advanced settings section, hidden by default. Each section has its own Reset to defaults button.
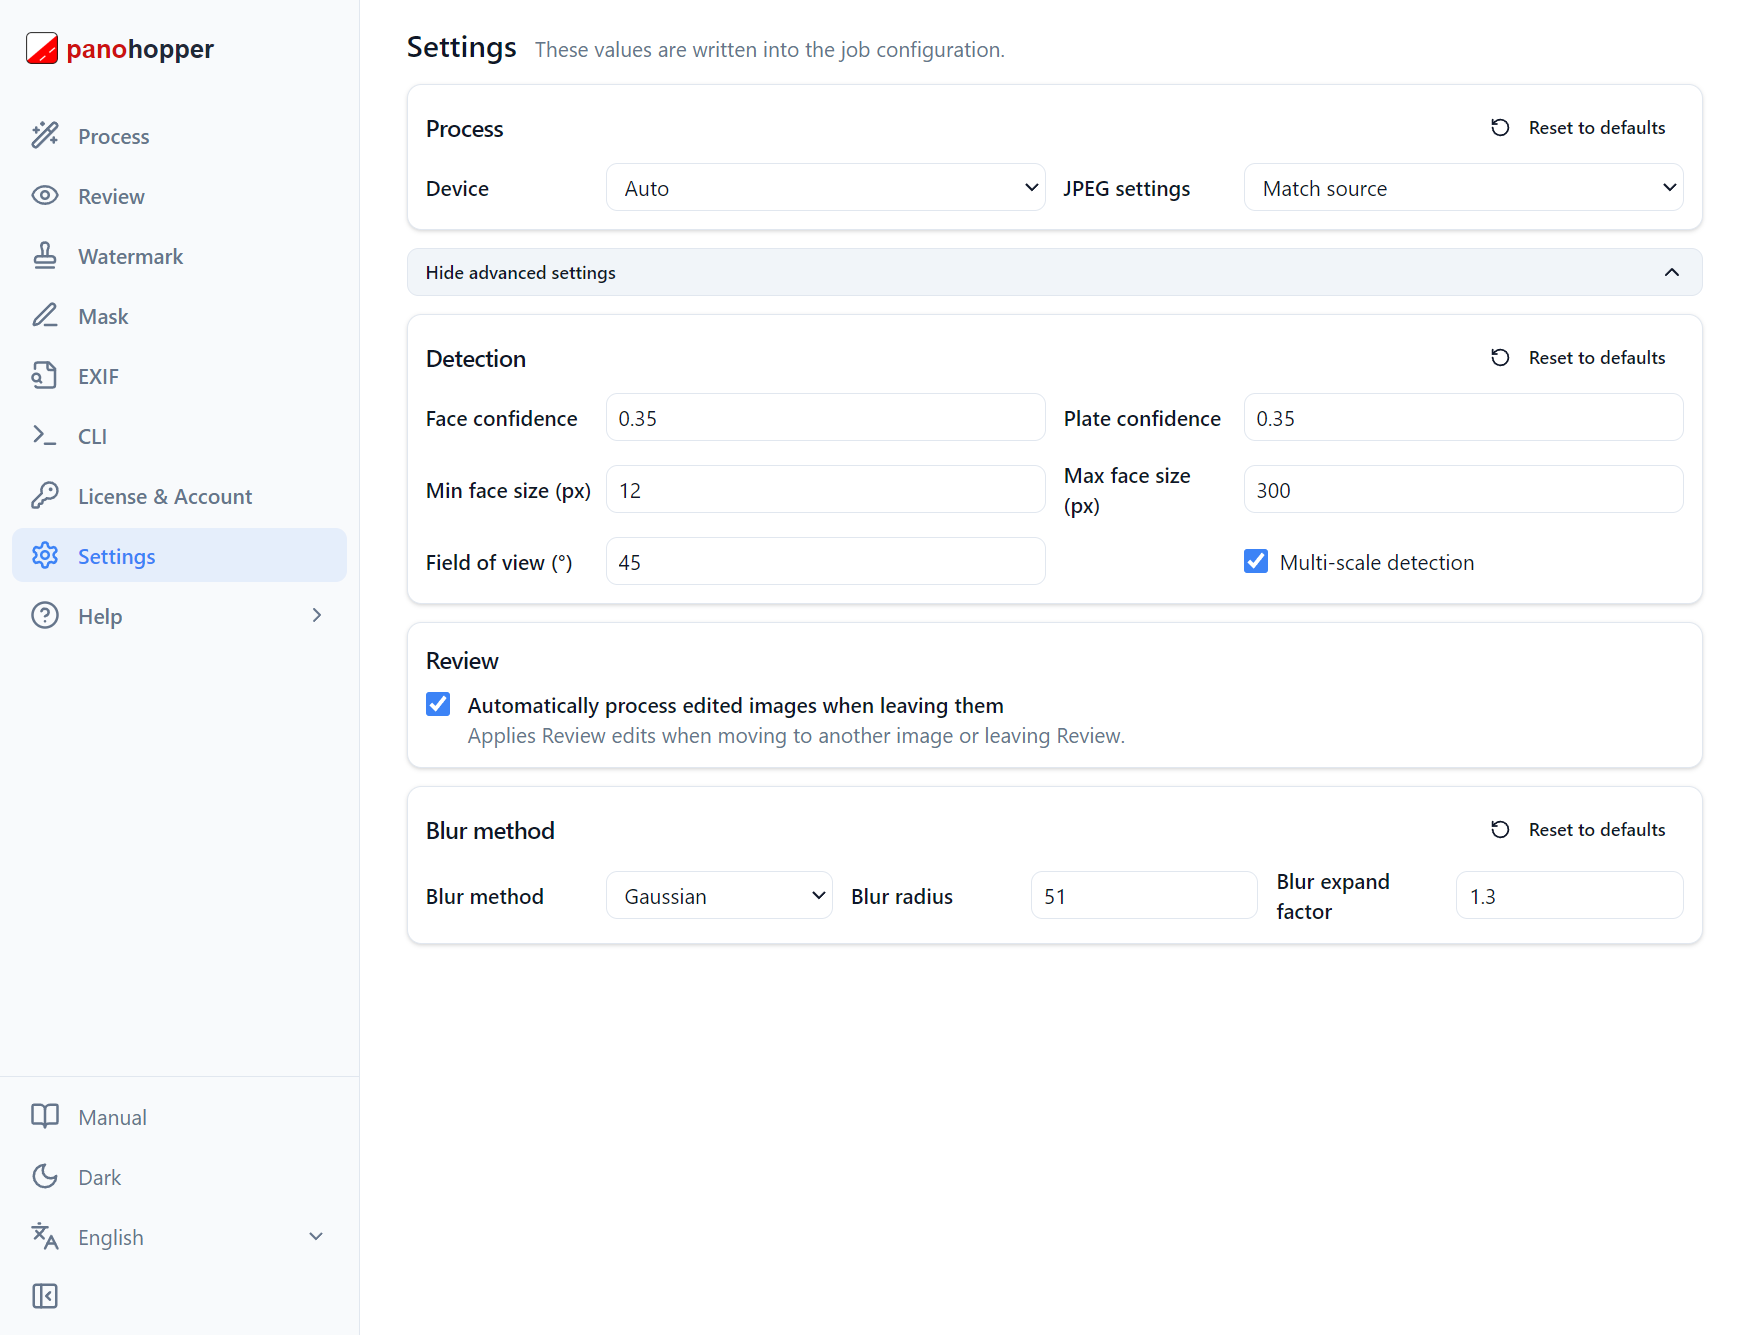
The Settings page. Device and JPEG quality are always visible; detection and blur live under Advanced settings.
9.1 Basic Settings
| Setting | Default | Description |
|---|---|---|
| Device | Auto | Auto uses the GPU when available, otherwise CPU. Can be forced to GPU or CPU. |
| JPEG quality | 95 | Output JPEG quality (1–100). |
9.2 Advanced Settings
| Setting | Default | Description |
|---|---|---|
| Face confidence | 0.35 | Minimum face score (0–1). |
| Plate confidence | 0.35 | Minimum plate score (0–1). |
| Min / Max face size | 12 / 300 px | Faces outside this size are ignored. |
| Field of view | 45° | FOV of the projection patches. |
| Multi-scale | Enabled | Second pass at a narrower FOV for close faces. |
| Blur method / radius / expand | Gaussian / 51 / 1.3× | How detections are obscured. |
Section 10 — Command Line (Mass Production)
Configure a job in the app, then reproduce it head-less from the command line for large batches. The CLI page has two tabs.
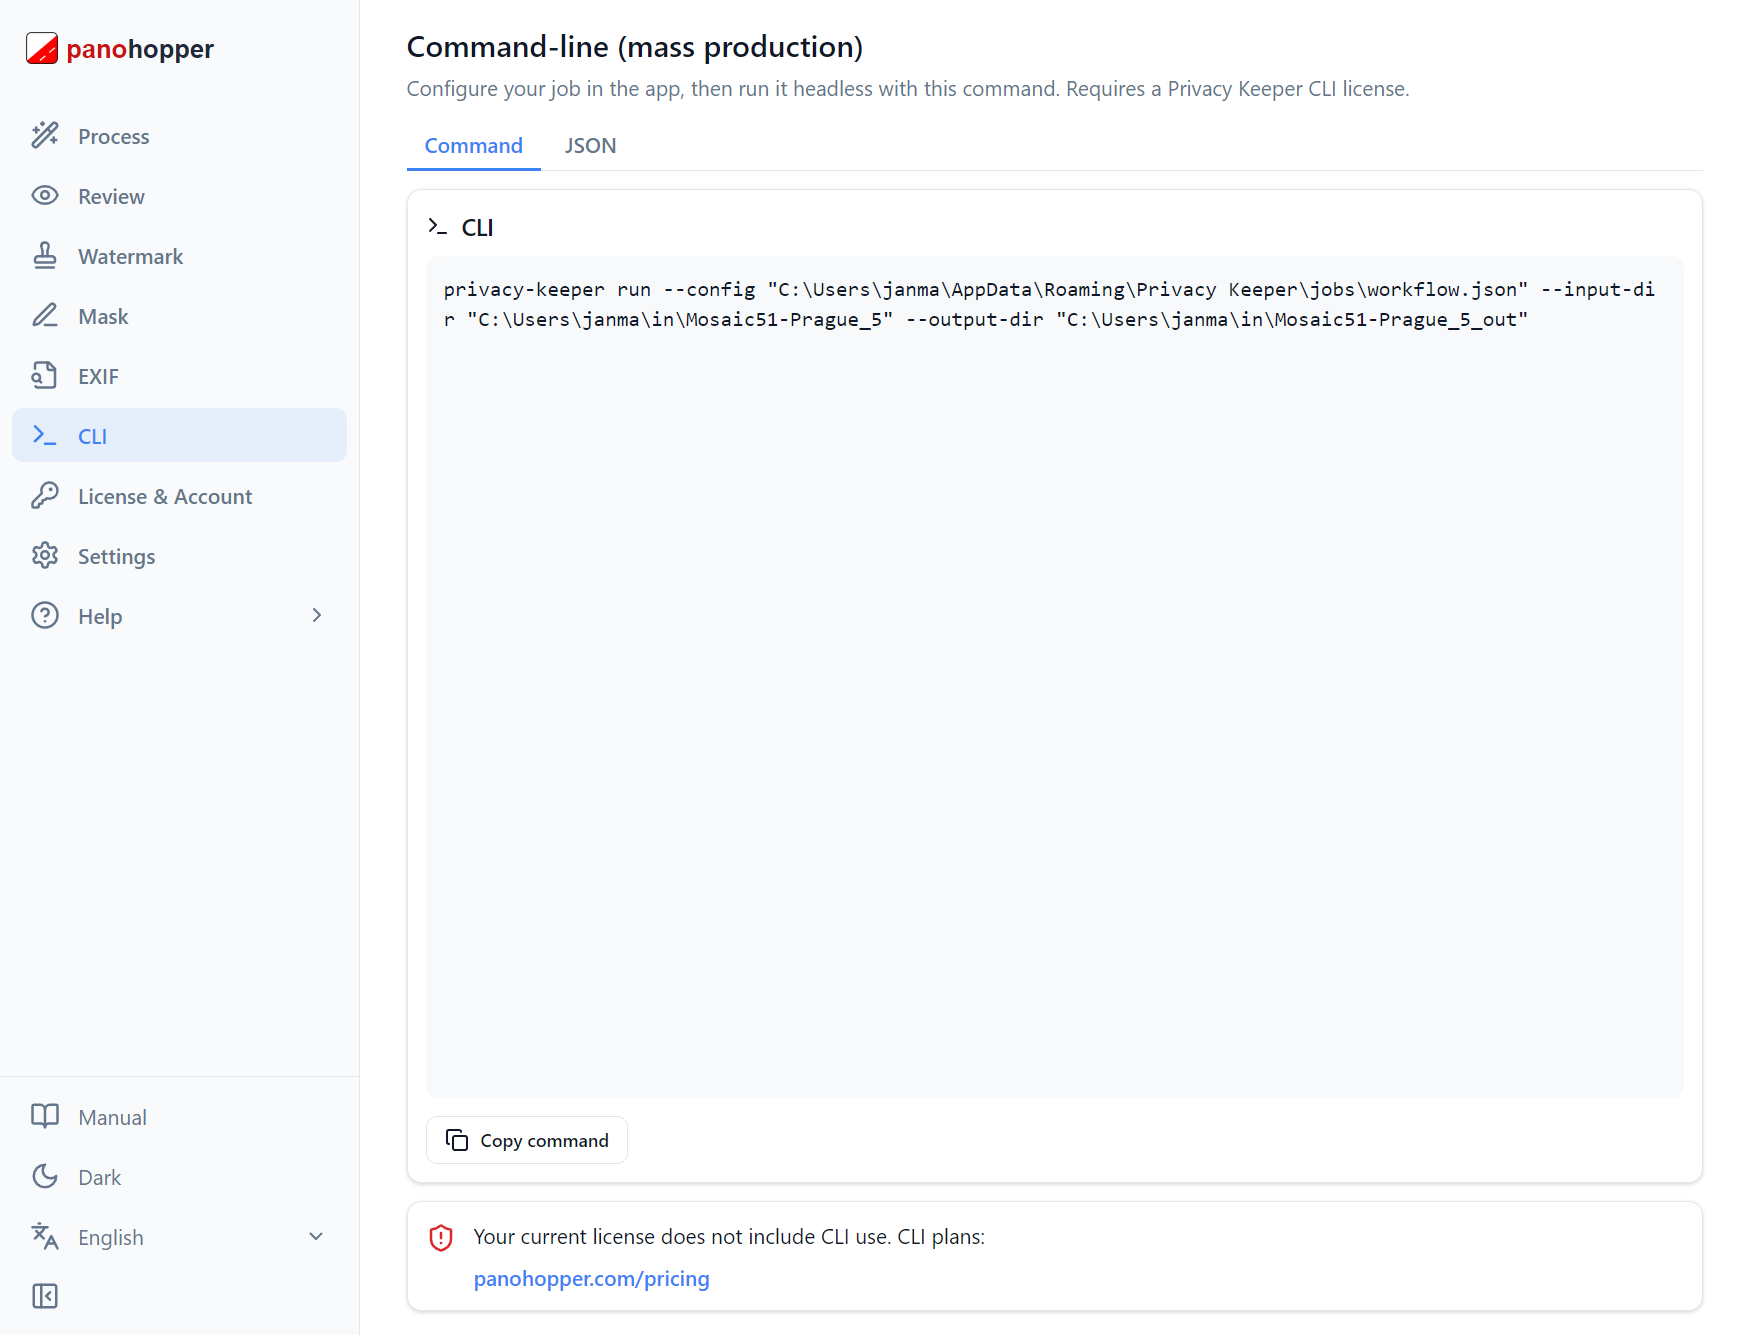
The CLI page, Command tab — the exact command for your current settings.
10.1 Command and JSON
The Command tab shows the exact privacy-keeper run --config <workflow.json> command, with a copy button. The JSON tab shows the full workflow configuration (folders, device, thresholds, blur, JPEG quality and the mask/watermark/EXIF settings) to copy and save as a .json file.
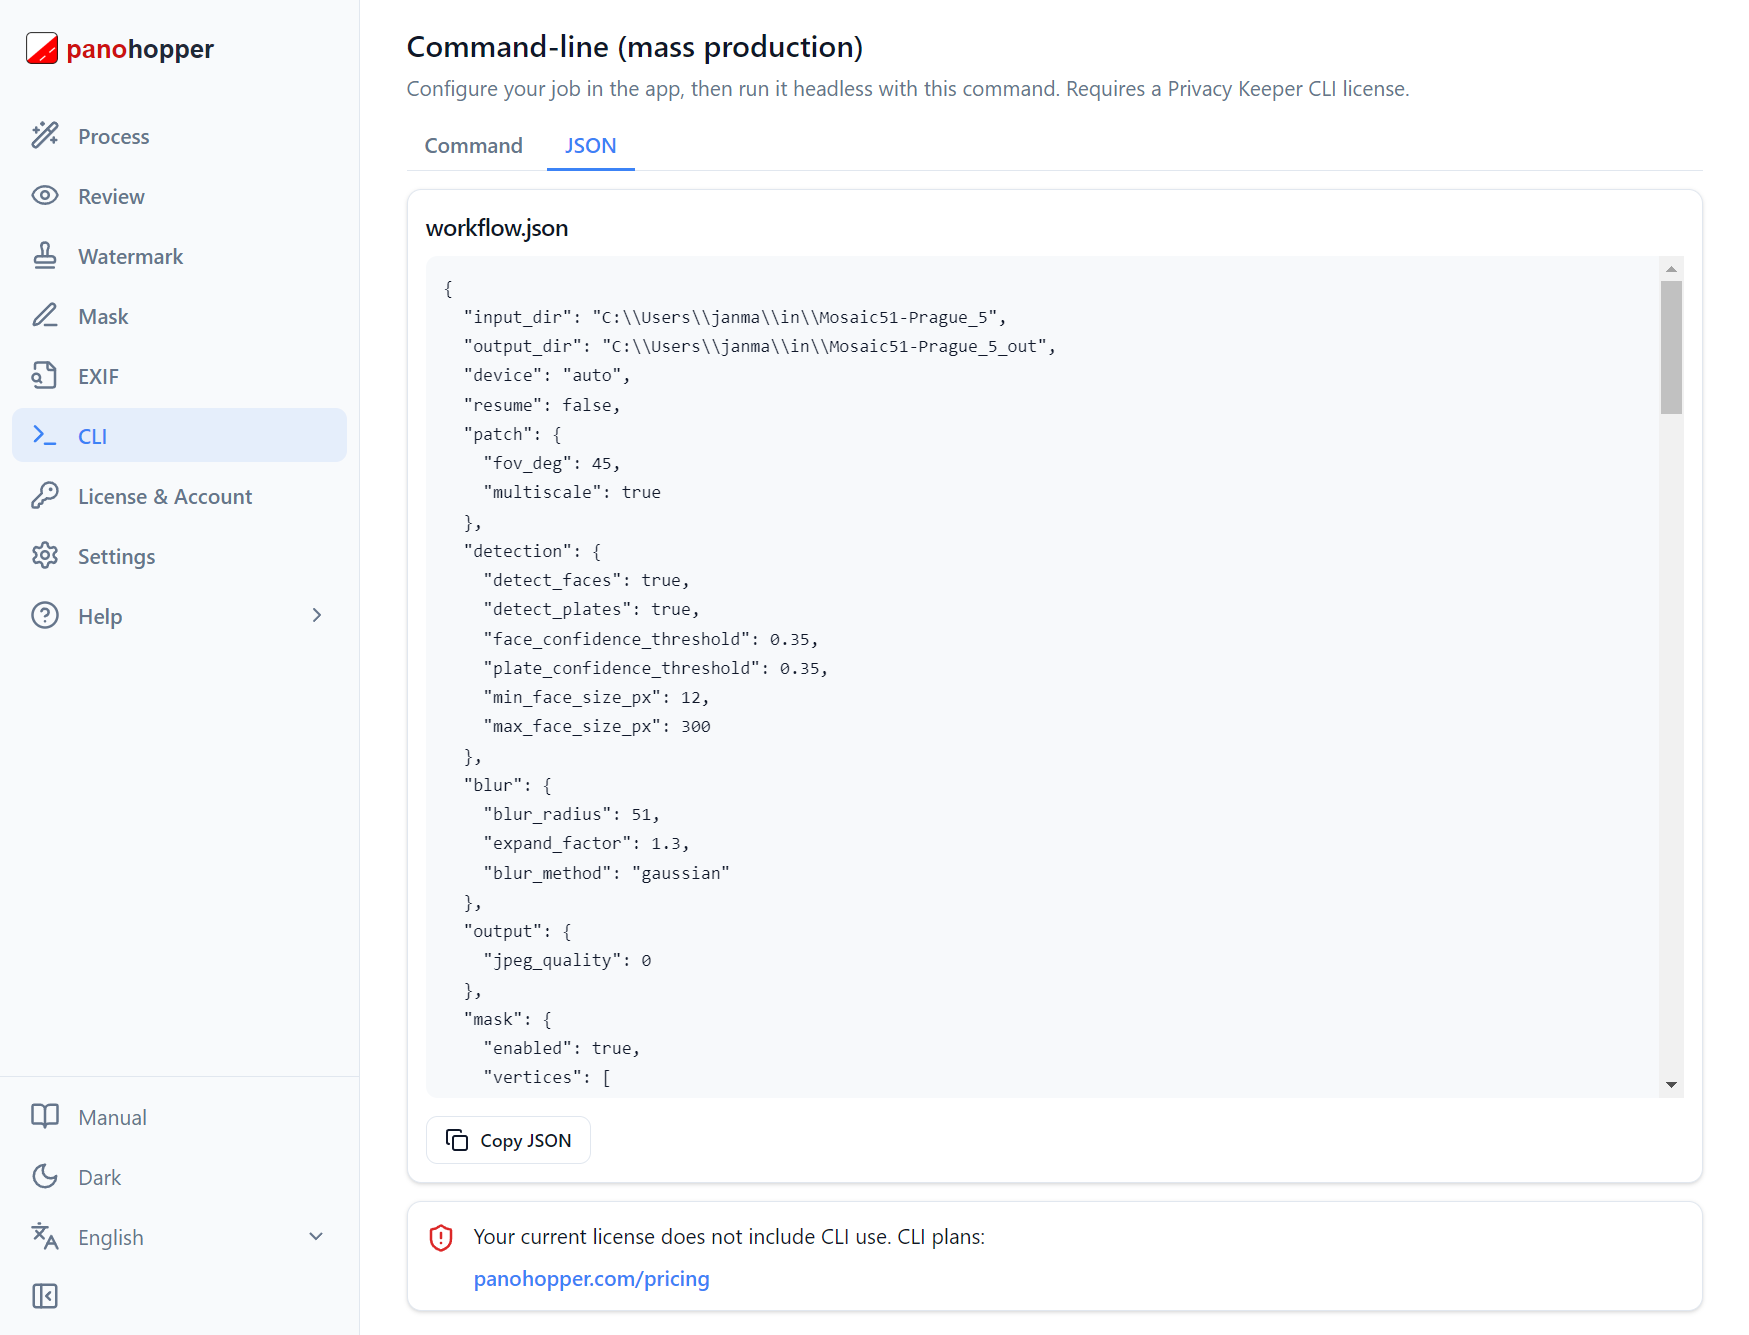
The JSON tab — the full job configuration, ready to copy and save as a .json file.
10.2 CLI License
Head-less processing requires a Privacy Keeper CLI license. The page shows whether yours includes CLI use and links to the CLI plans if not.
Section 11 — License & Account
Privacy Keeper requires a valid license tied to your account and computer. The License & Account page manages sign-in, activation and your subscription.
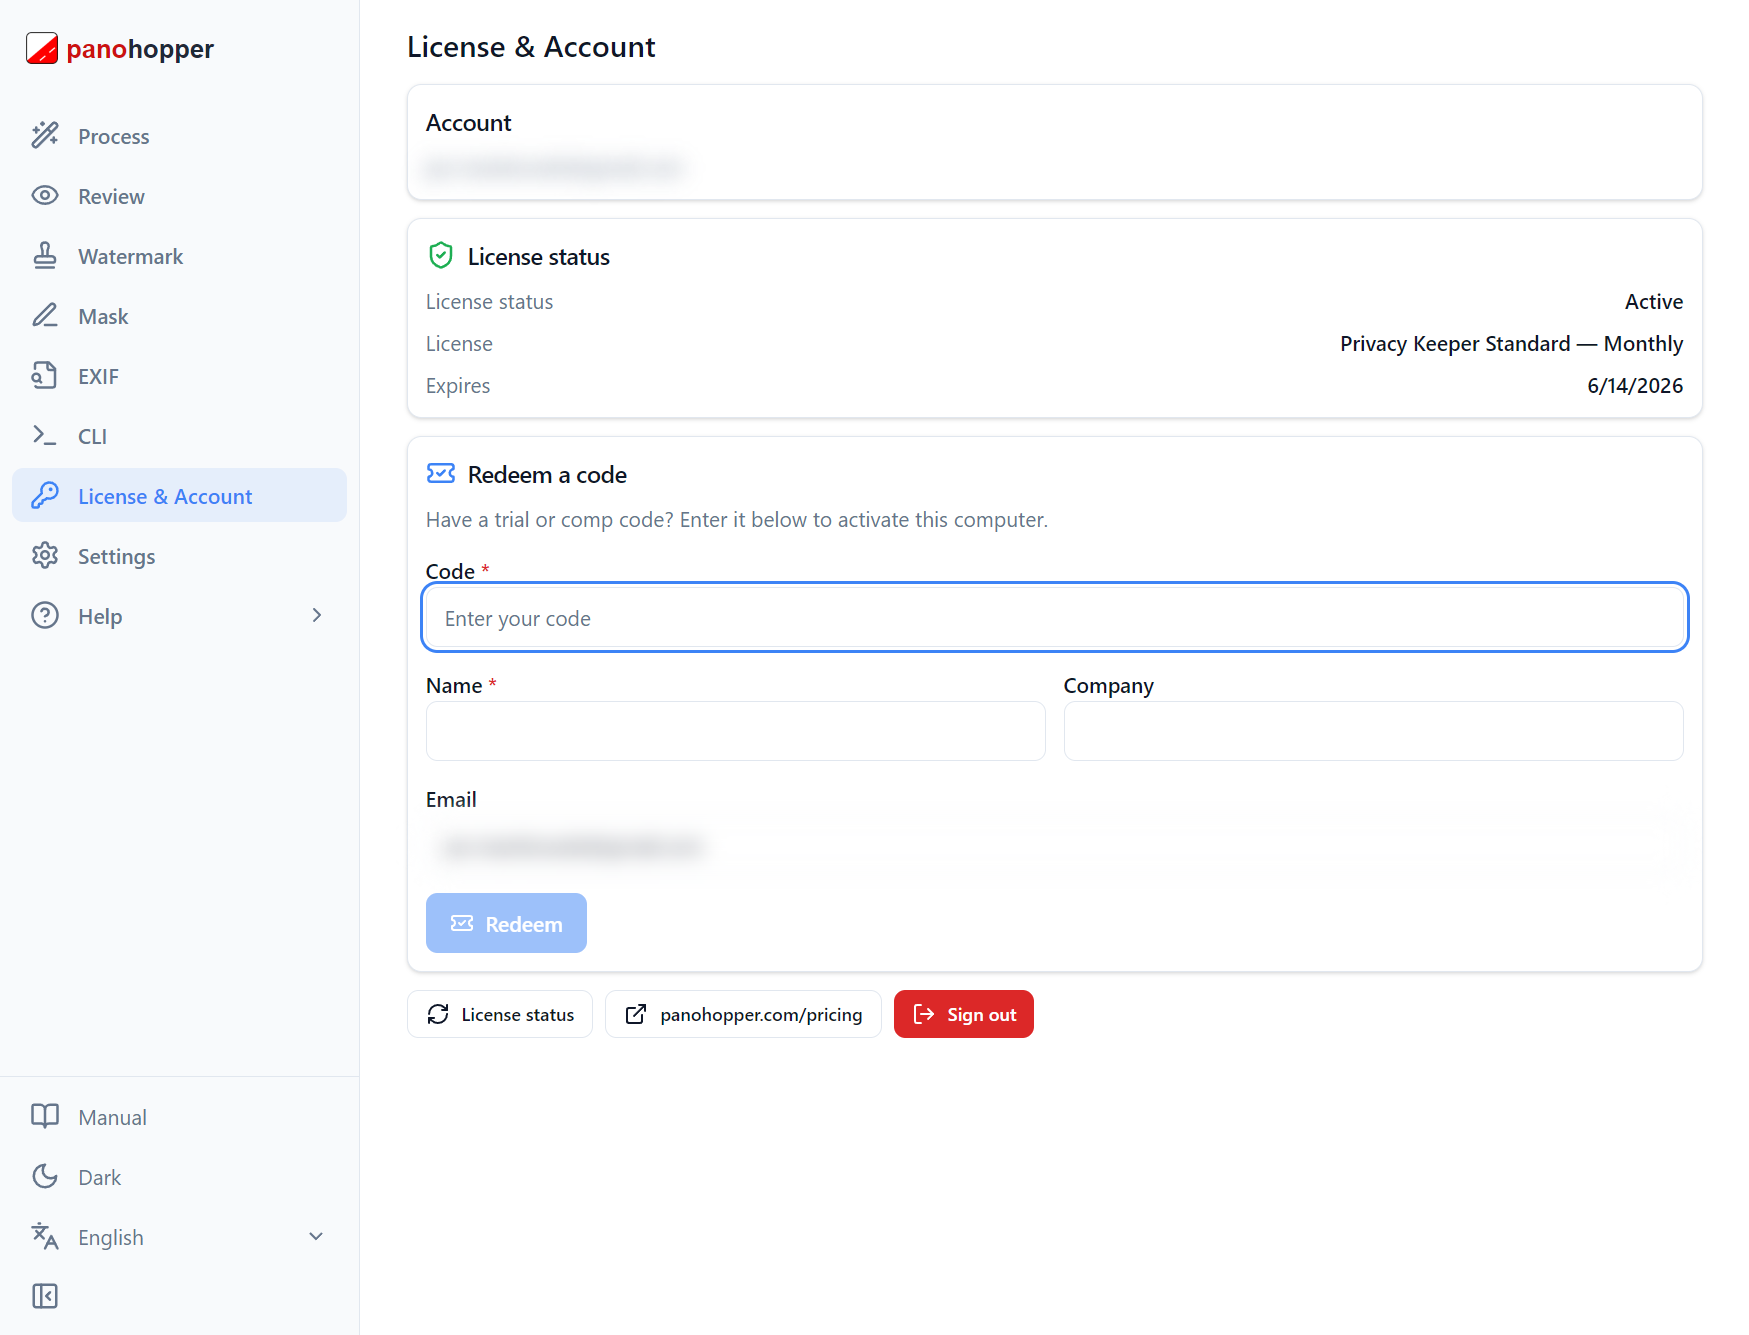
The License & Account page showing the signed-in account, license status and product.
11.1 Signing In and Activating
Click Sign in with browser: your browser completes sign-in securely (the app never sees your password) and returns you to the app. If no license is active here, click Activate this computer. Your account, product and expiry are then shown.
11.2 Single Seat and Takeover
A license is valid on one computer at a time. Activating on a second computer takes the seat over; the first is asked to take it back at its next check. Sign out releases the app here; Buy a license opens the pricing page.
Section 12 — GPU Acceleration
Privacy Keeper uses your NVIDIA GPU for fast detection. The Device setting controls this:
- Auto — GPU if CUDA is available, otherwise CPU (recommended).
- GPU — forces GPU.
- CPU — forces CPU.
If a GPU is present but CUDA/cuDNN is missing, the run falls back to CPU; the log header confirms which device is used.
12.1 Processing Speed
Measured on an NVIDIA RTX 3090, full-resolution 12,288 × 6,144 px Mosaic 51 panoramas:
| Mode | Hardware | Time per image | Panoramas per day |
|---|---|---|---|
| GPU | NVIDIA RTX 3090 (24 GB VRAM) | ~6 seconds | ~14,000 |
| CPU | Modern multi-core CPU | Many times slower | Fallback only |
Lower-resolution cameras are proportionally faster.
Section 13 — Troubleshooting
No images found
Ensure the input folder contains .jpg / .jpeg files directly (not in subfolders).
GPU not used
Install CUDA 12.9.1 and cuDNN 9.20.0 (Section 3). Until then the app runs on CPU.
Faces or plates not detected
Lower the relevant confidence threshold (e.g. 0.20) under Advanced settings; keep Multi-scale on.
Too many false detections
Raise the confidence threshold (e.g. 0.55) under Advanced settings.
License “in use by another computer”
The seat was activated elsewhere. Click Take over to move it here (Section 11).
Output metadata unexpected
Check the Process EXIF dropdown — it should be Copy All unless you intend an override preset.
Section 14 — Support
Open Help → Open Support Ticket to contact PanoHopper support from the app. Describe the issue under Please help with:.
For a processing issue, leave This is about the current processing selected. Choose the affected panorama; the preview lists the matching input and output image, workflow.json, all non-image files in the output folder, and the output log folder. Large text files are reduced to their first 200 and last 200 lines. The selected files are uploaded only when you open the ticket and are retained privately for 30 days.
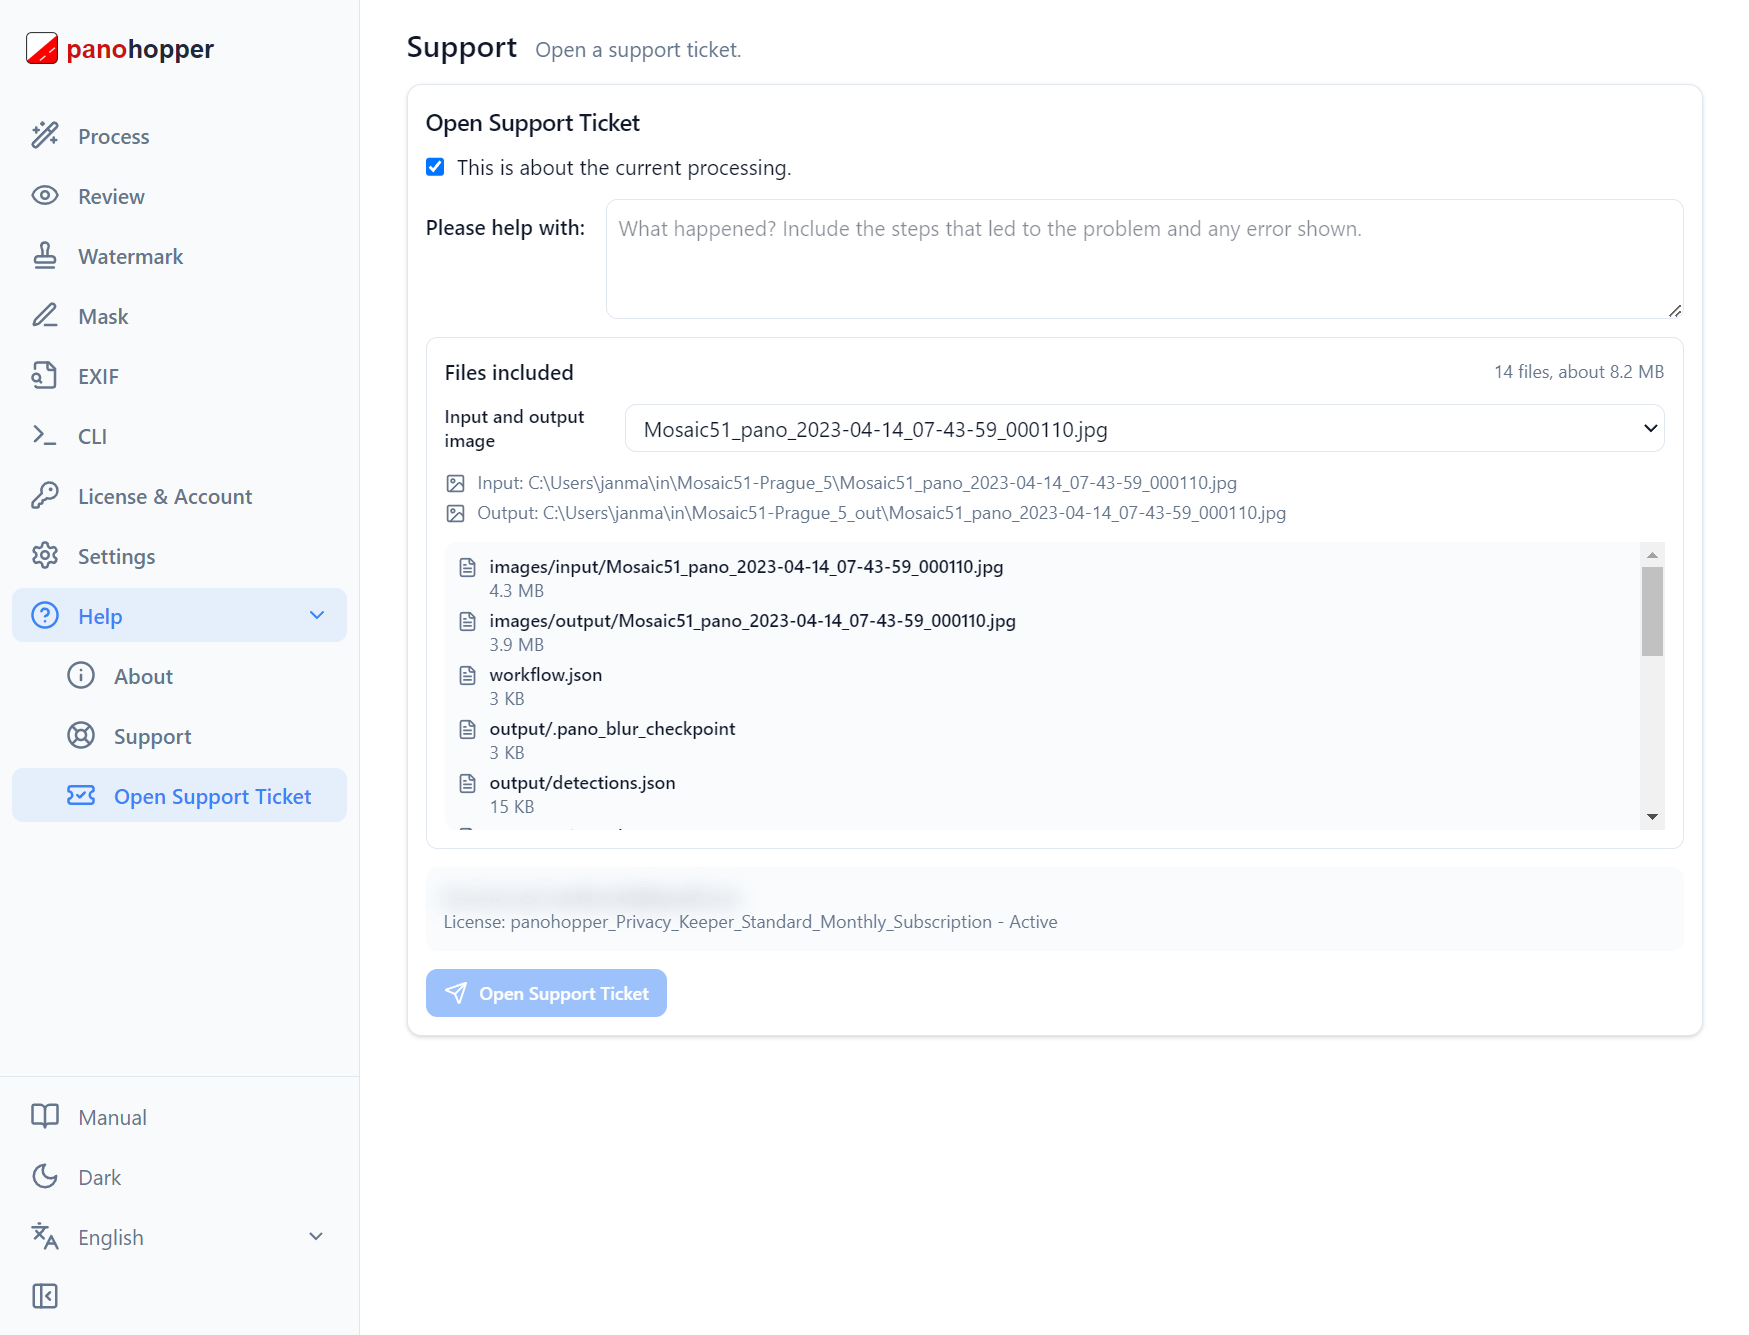
The in-app support ticket page with the current processing files ready for review.
Website: www.panohopper.com
Email: info@panohopper.com
Re-open this manual any time from the Manual button at the bottom of the sidebar. The About page shows the version and detected hardware.
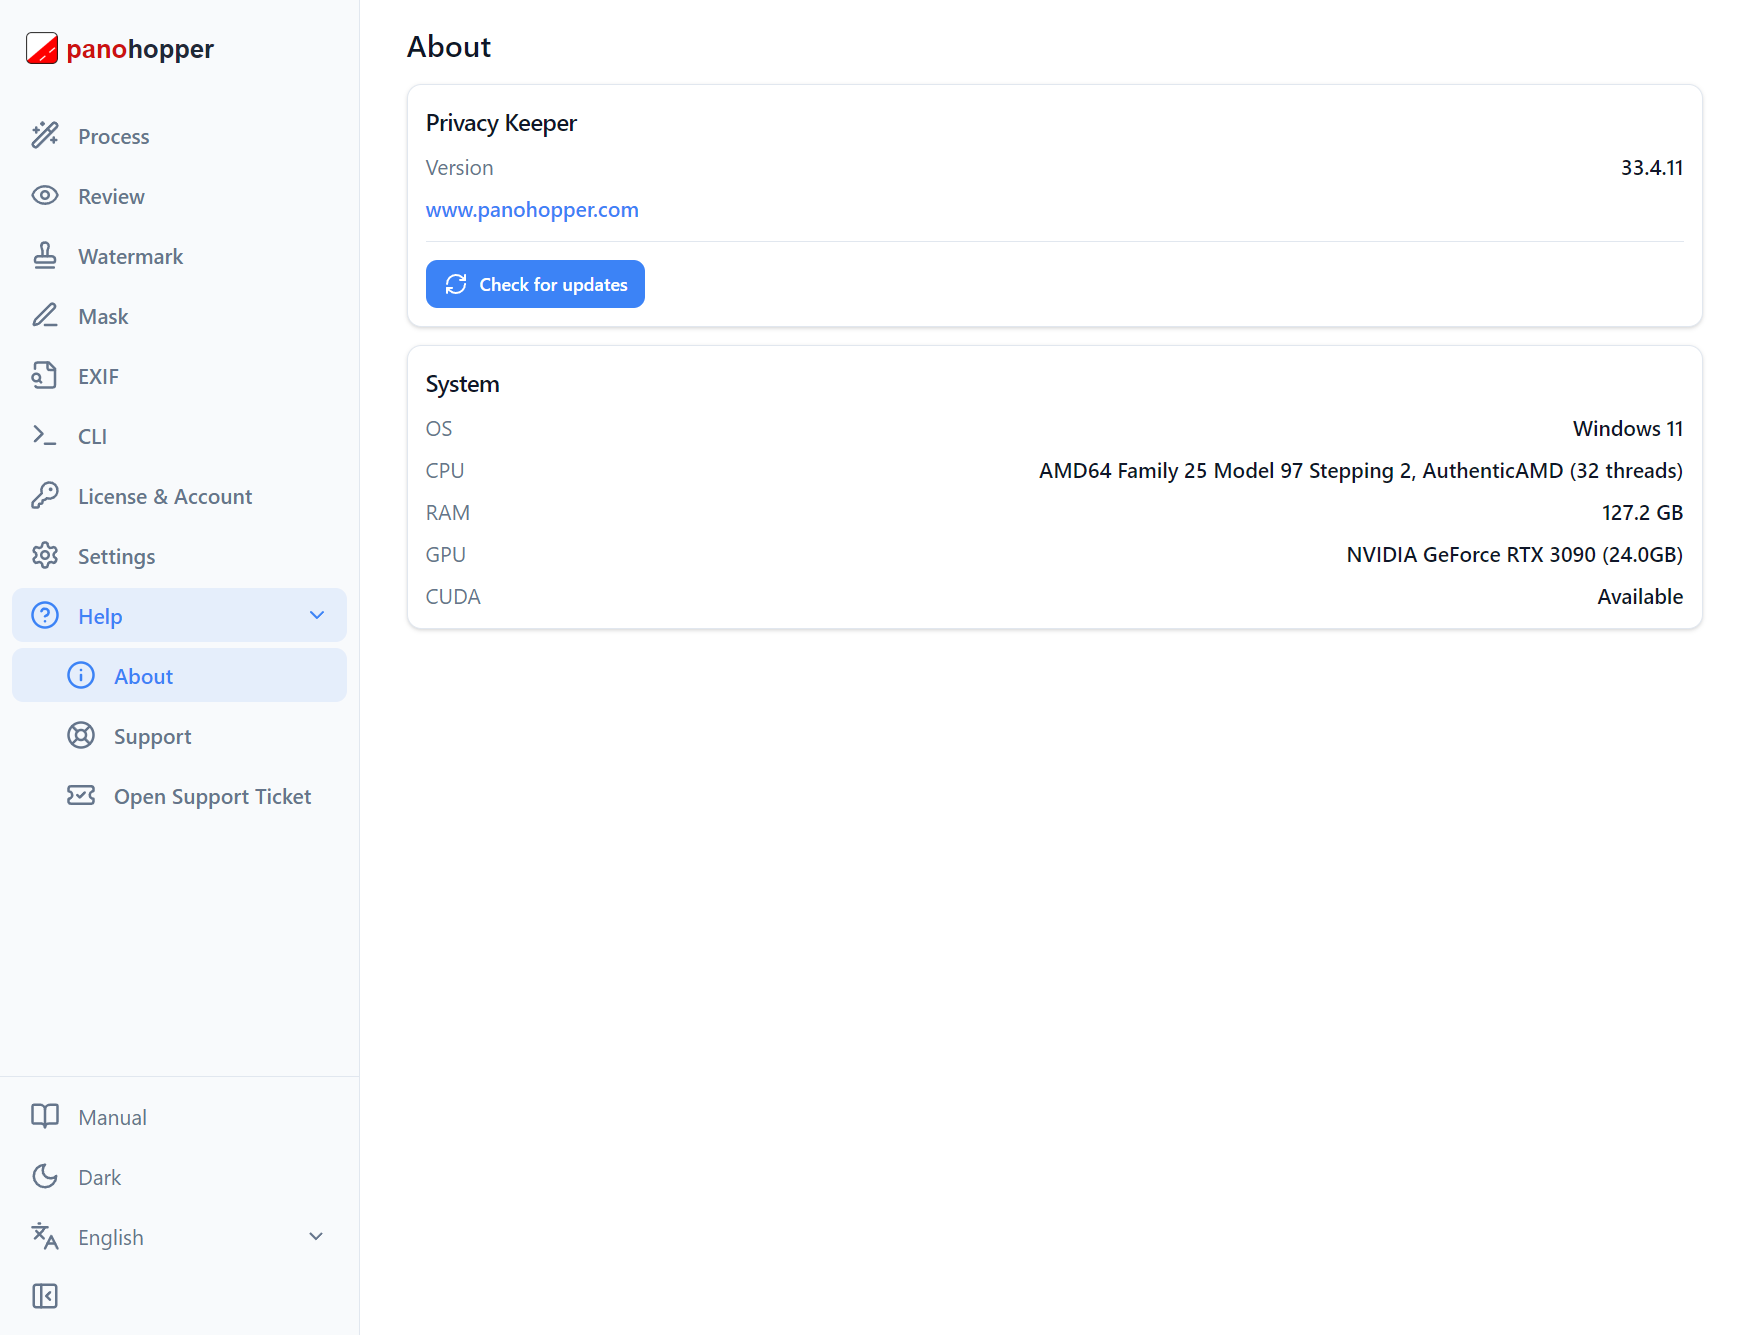
The About page — version and detected system information.