Contents
- 1 Introduction
- 2 Requirements and installation
- 3 Workflow
- 4 Import
- 5 Projects
- 6 Tours
- 7 Map
- 8 Streetview Window
- 9 Duplicate Remover
- 10 Imagery
- 11 Timeline
- 12 Player
- 13 Export
- 14 Publishing on Amazon Web Services
- 15 Cloud player
- 16 Tools
- 17 Preferences
- 18 Manual, License and Help
- 19 Open a Support Ticket
- 20 Troubleshooting
- 21 Good housekeeping
- 22 Player API
1 Introduction
Creator 8 turns the recordings of the Applied Streetview 360° camera into streetviews and publishes them as a streetview player: On your PC, on your own web server or in the Amazon cloud.
1.1 Main features
- Large projects: From a few streetviews to country-size projects with millions of streetviews.
- Fast stitching on the graphics card: The stitcher for NVIDIA RTX 20 series and newer graphics cards turns the six photos of each recording into a 360° streetview. No CUDA installation is needed.
- Three players: Player 3 (free and open source, default), Player 2 (krpano) and the Legacy player. See Preferences → Player.
- Clean data: Remove duplicates and unneeded streetviews, fix directions and altitudes, add road names from OpenStreetMap, level the camera, brighten shadows. See Map, Duplicate Remover and Tools.
- Timelines: Show the same streets recorded at different dates. See Timeline.
- Publishing: To any web server (static files, no database) or with one click to the Amazon cloud. See Export and Publishing on Amazon Web Services.
- Your own map and branding: About 40 map providers, your own map tiles or Mapbox styles, your logo, watermarks and a nadir logo.
- Integration: Link your assets to the player with a simple web address, or control it from your own web pages. See Player API.
- Privacy: Everything runs on your PC; nothing is uploaded unless you publish.
1.2 What is new in Creator 8.2.0
| Area | Change |
|---|---|
| Stitcher | New stitcher on the graphics card for NVIDIA RTX 20, 30, 40 and 50 series. Even sky colour between the lenses, no blown-out highlights, sharper details. |
| Players | Choice of Player 3 (default), Player 2 and Legacy in Preferences → Player. |
| Layout | Dark layout (default) or Light layout, the look of earlier Creator versions, see Preferences → General. 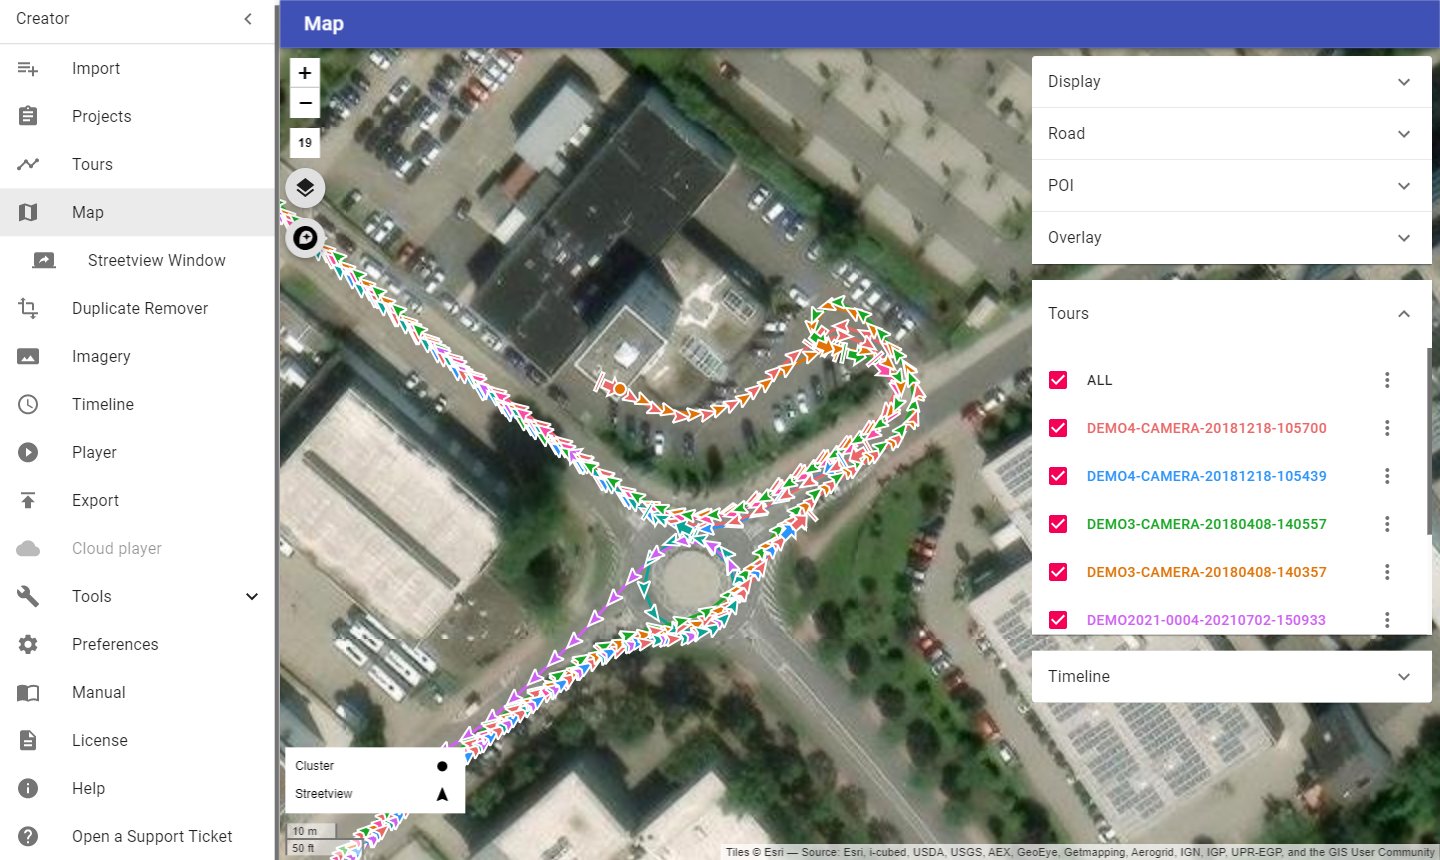 |
| Player maps | No more "Map data not yet available" tiles when zooming in; the last available map level is enlarged. |
| Support | Open a Support Ticket sends your request with logs directly to the support team. |
| Requirements | Works with Windows 11 PCs with NVIDIA RTX 20, 30, 40 and 50 series graphics cards. GTX 10 series and older graphics cards are no longer supported; keep using Creator 8.1.0 on those PCs. |
The full list of changes is in Help → About → Release notes.
1.3 About this manual
- Menu names are written like this: Menu → Tools → Skip.
- Blue text is a link to another part of the manual.
- The screenshots show the demo project Demo2-3-4-2021 in the Dark layout.
2 Requirements and installation
2.1 Requirements
| Part | Requirement |
|---|---|
| Operating system | Windows 11, 64-bit |
| Graphics card | NVIDIA RTX 20 series or newer (RTX 20, 30, 40, 50) or GTX 16 series, with an up-to-date NVIDIA driver. No CUDA installation is needed. |
| Memory | 16 GB RAM or more recommended |
| Disk | SSDs for the input and output folders give the best speed. Separate drives for input and output help. A NAS works, but can be slow. |
| Internet | Needed for map tiles, publishing to Amazon, road names from OpenStreetMap, the altitude tool and support tickets. Stitching works offline. |
Help → NVIDIA graphics card shows the graphics card of your PC and the list of compatible cards.
Note: GTX 10 series and older graphics cards can't run the new stitcher. Keep using Creator 8.1.0 on those PCs.
2.2 Installation
- Run the installer
Creator.8.2.0.exeand confirm the Windows prompt for administrator rights. - Accept the licence agreement and click Install.
- On the last page, leave Run Creator 8 ticked and click Finish.
Creator is installed for the current Windows user, with a desktop icon and a Start menu entry Creator 8. You can install Creator 8 next to older Creator versions; just don't run them at the same time.
Only one Creator can be open at a time. If you start Creator while it is already open, the open window comes to the front.
2.3 First start
Create these folders before you start, for example on your data drive:
| Folder | Purpose |
|---|---|
| In | your recordings |
| Out | everything Creator creates: Players, streetview tiles, panoramas |
| Camera calibration files | the .pto files of your cameras |
| Creator backups | project backups |
Then set them in Preferences → Folders. Optional folders that help to stay organised: Masks, Logos, Export.
2.4 Windows settings for speed
- Graphics preference: On laptops and PCs with several graphics adapters, open Windows Settings → System → Display → Graphics, add Creator 8 and set it to High performance.
- Virus scanner: Add your In and Out folders as exclusions in Windows Security → Virus & threat protection → Exclusions (and in other virus scanners). This can make Creator up to three times faster.
2.5 Updating from an earlier Creator
- In the old Creator: Projects → Backup all (in Creator 6 and 7: Projects → More → Backup all).
- In Creator 8: Projects → Import backups.
Backups contain only Creator's own data (projects, tours, settings), not the recordings. See Projects.
3 Workflow
Follow the menu from top to bottom and skip what your project doesn't need. You can go back and forth at any time to review and adjust.
| Step | Menu | What you do |
|---|---|---|
| 1 | Import | Create a project from a folder of recordings. |
| 2 | Tours | Check the tours; add more recordings. |
| 3 | Map | Check positions; deactivate unwanted streetviews; add road names and POIs. |
| 4 | Duplicate Remover and Tools → Skip | Remove streets recorded twice and thin out dense recordings. |
| 5 | Imagery | Add watermarks and masks; level the camera; adjust brightness. |
| 6 | Timeline | Optional: Group tours by date. |
| 7 | Player | Set up the player's look and behaviour; check it in the preview. |
| 8 | Export | Create the streetviews and the player; publish. |
3.1 Project size
Start with a small project (fewer than 100 streetviews in a few short tours) to learn Creator. Changes then take seconds.
3.2 Large projects
- Split country-size projects into smaller projects, for example by city or county.
- Process each project, then combine the players with Tools → Merge Players.
- Recordings of different Applied Streetview cameras can be in the same project; Creator picks the right camera calibration file for each tour.
- Add new recordings to an existing project on the Tours page with Add.
- Move or copy tours between projects on the Tours page.
4 Import
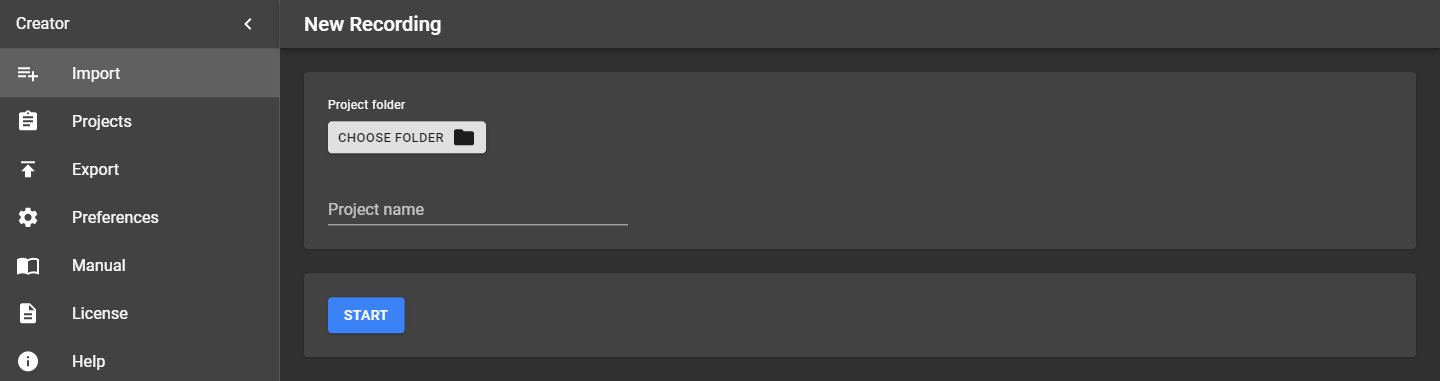
Menu → Import creates a new project from a folder of recordings (New Recording).
| Field | What to enter |
|---|---|
| Project folder | The folder that holds your tour folders. It must contain at least one tour. |
| Project name | Taken from the folder name; you can change it. Project names must be unique. |
Click Start to create the project. Creator then opens the Tours page.
4.1 Applied Streetview camera recordings
| Item | Format |
|---|---|
| Photos | 6 JPEG photos per streetview, 2560 × 1920 pixels (4:3), without EXIF data |
| Tour folder | One folder per tour, with the subfolders 1 … 6 (photos of the six lenses) and 7 (position and log data, panoramas.csv) |
| Project folder | One or more tour folders |
Each tour needs the camera calibration file of its camera, <camera serial number>.pto. Creator looks
for it in the camera calibration files folder first, then in the project folder
(the folder that holds the tour folders). See Troubleshooting → Camera calibration files.
4.2 Adding recordings later
To add new tours to an existing project, use Add on the Tours page instead of Import.
5 Projects
Menu → Projects lists all projects. Click a project's name to open it; the menu then shows the project pages (Tours, Map, Imagery …).
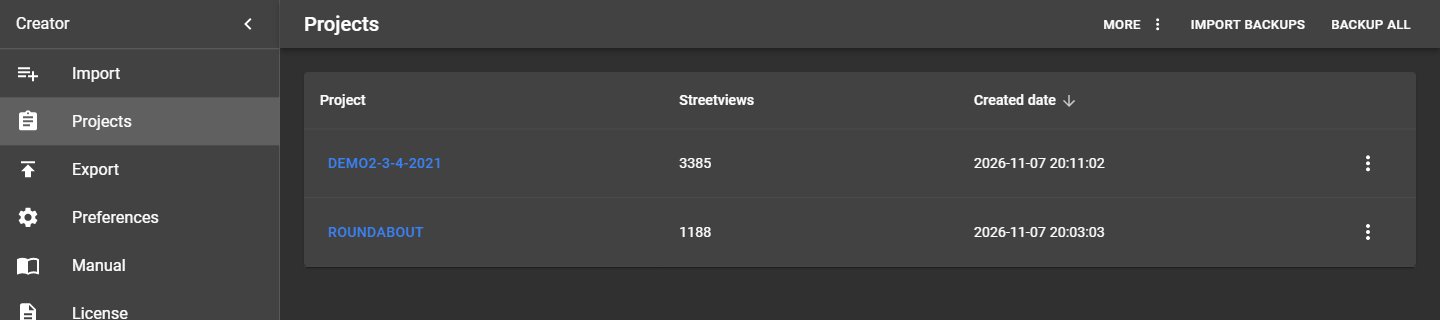
| Column | Meaning |
|---|---|
| Project | Project name; click to open the project |
| Streetviews | Number of streetviews in the project |
| Created date | When the project was created; click the column title to sort |
5.1 Project menu
The ⋮ button at the end of each row opens the project menu:
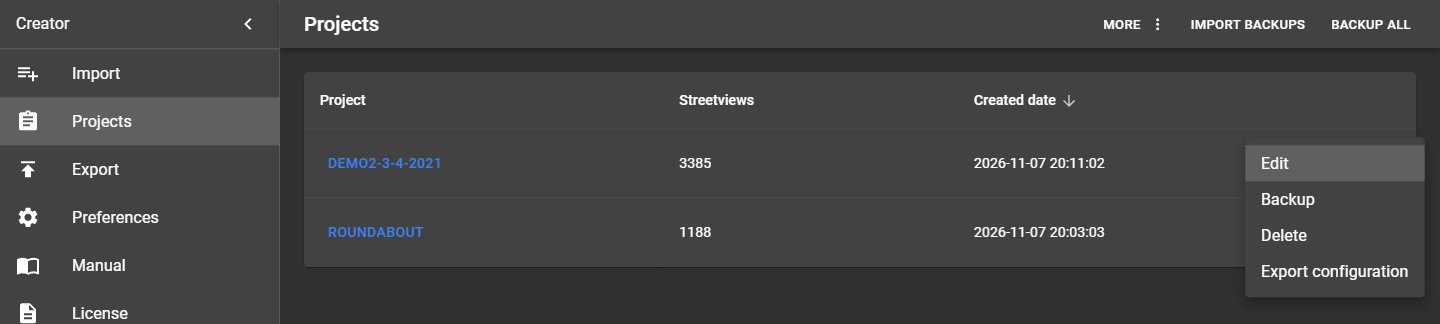
| Item | What it does |
|---|---|
| Edit | Change the project name or folder (opens the project page shown below). |
| Backup | Save a backup of this project. |
| Export configuration | Save the project's settings (player, imagery, map) as a file, for example to start a new project with the same settings. |
| Delete | Delete the project from Creator. Your recordings and created files are not deleted. |
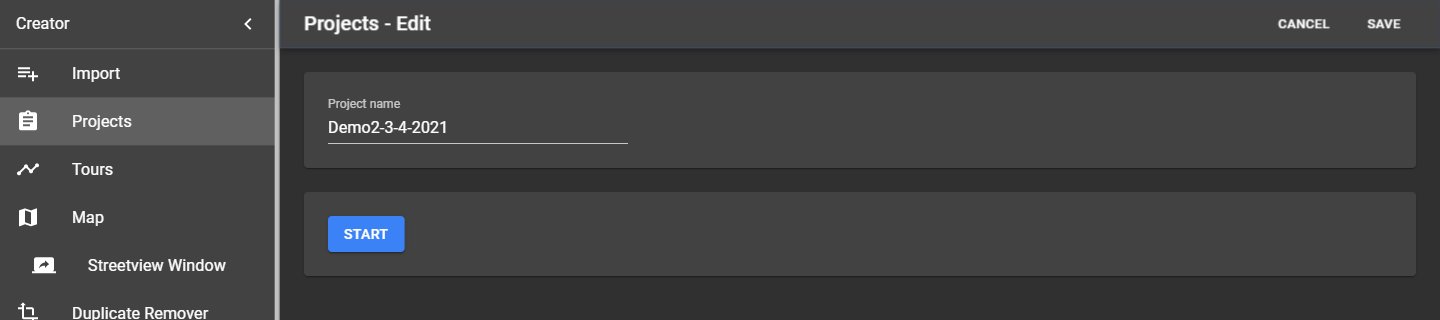
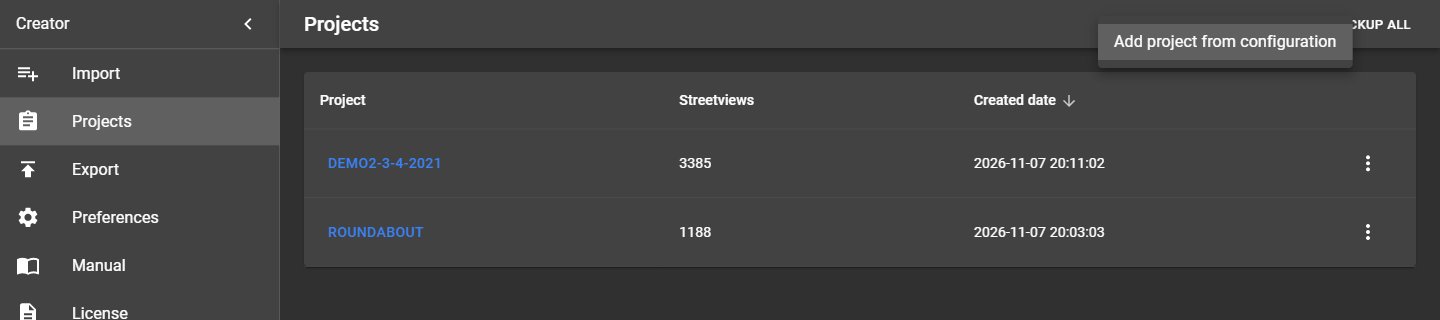
5.2 Buttons in the top right corner
| Button | What it does |
|---|---|
| More → Add project from configuration | Create a project from a configuration file saved with Export configuration. |
| Import backups | Restore one or many project backups, also from Creator 3, 5, 6 and 7. |
| Backup all | Back up all projects at once. Each backup goes into a new subfolder named after the date and time, in the backup folder. When finished, Open opens that folder. |
Note: Backups contain only Creator's data (projects, tours, settings, leveling, deactivated streetviews). Recordings and created files are not part of a backup; back them up separately. Creator never changes or deletes your recordings.
6 Tours
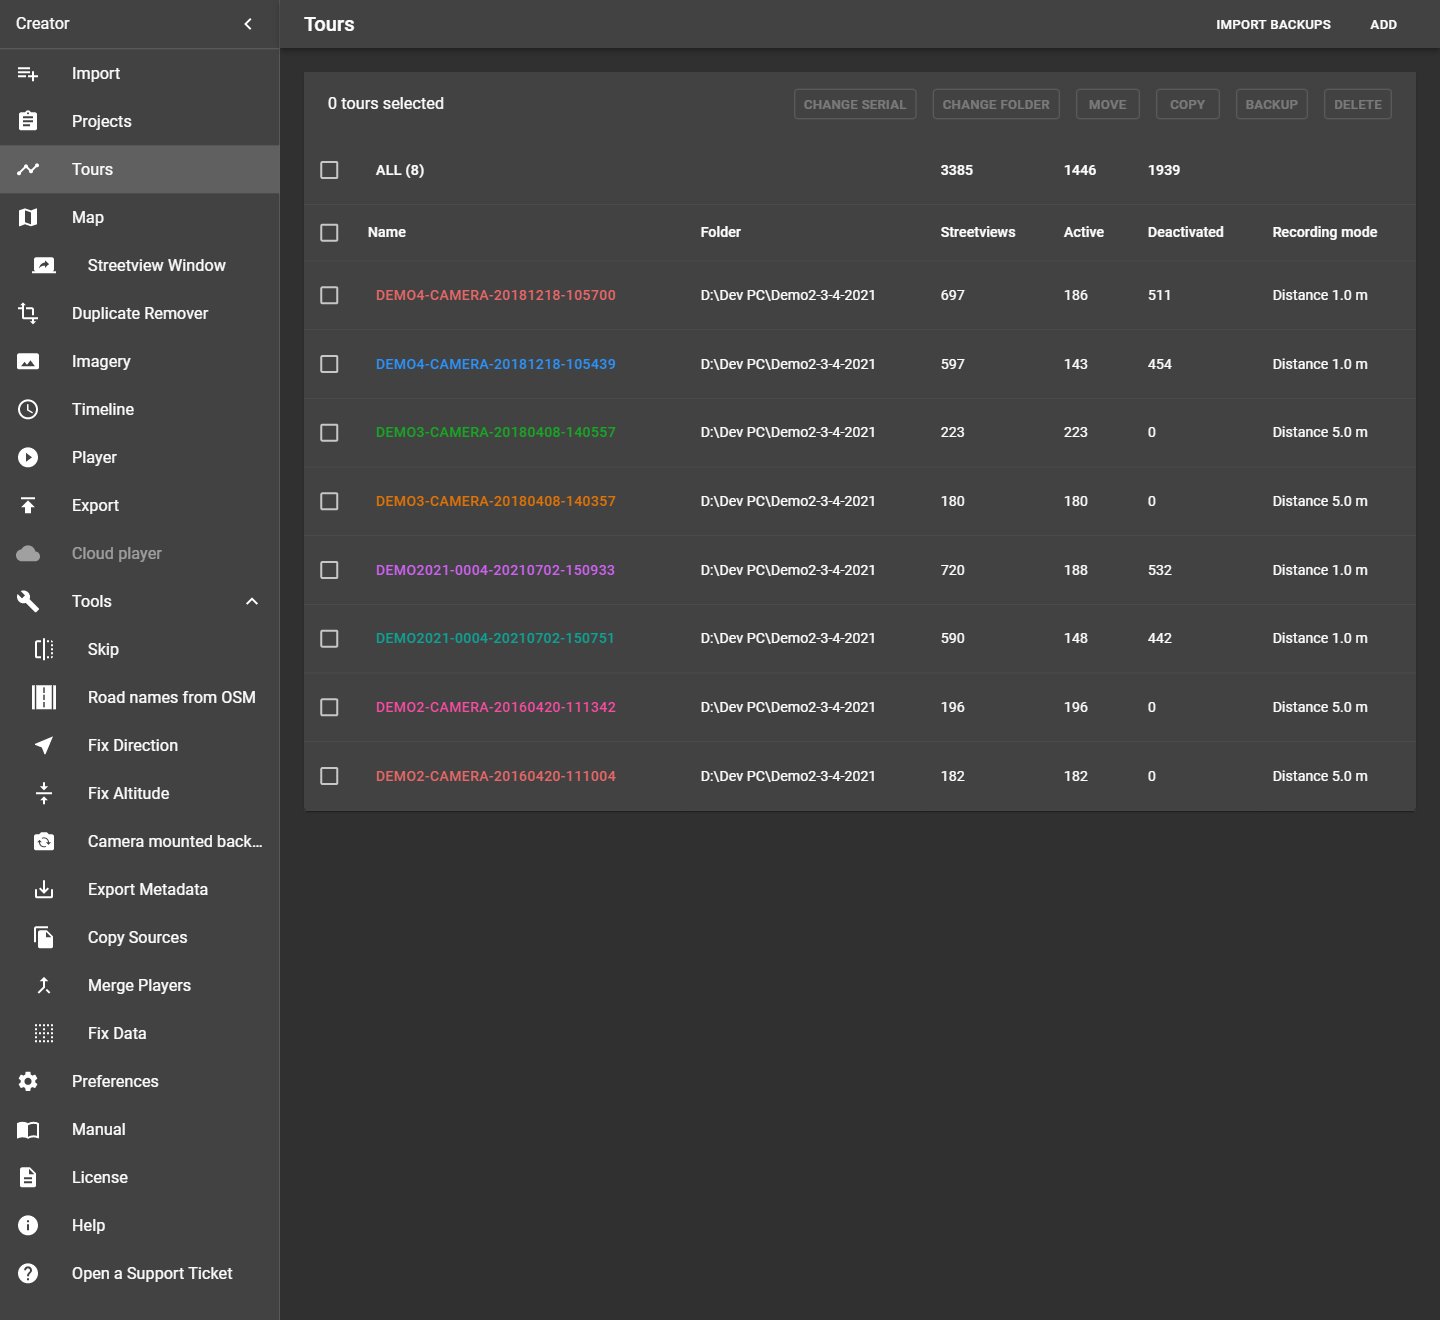
Menu → Tours lists all tours of the open project. Tours can come from different cameras.
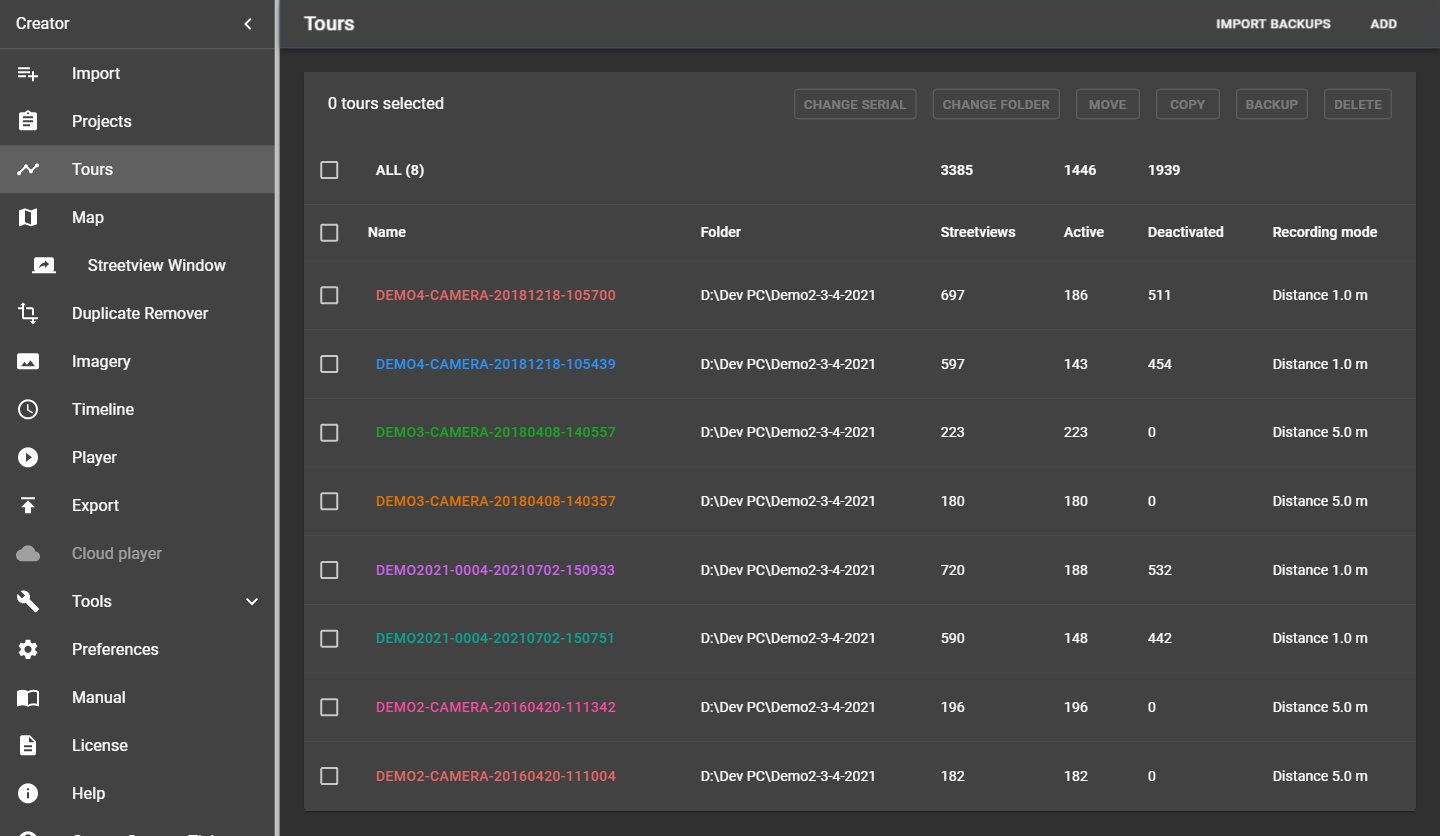
| Column | Meaning |
|---|---|
| Name | Tour name; click it to show the tour on the Map. All shows all tours. |
| Folder | Where the tour's recordings are |
| Streetviews | Number of streetviews |
| Active / Deactivated | Streetviews that will / won't be published |
| Recording mode | Distance or interval mode of the camera, for example Distance 5.0 m |
6.1 Buttons
| Button | What it does |
|---|---|
| Import backups (top right) | Restore one or many tour backups into this project. |
| Add (top right) | Add one or more tours of the Applied Streetview camera to this project, for example recordings made months later. |
| Change serial | Change the camera serial number of the selected tours. Use it only when support asks you to; the serial number selects the camera calibration file. |
| Change folder | Set a new folder for the selected tours, for example after moving recordings to another drive or PC. |
| Move | Move the selected tours to another project. |
| Copy | Copy the selected tours to another project. |
| Backup | Back up the selected tours. |
| Delete | Remove the selected tours from the project. The recordings are not deleted. |
Tick tours in the first column to select them; the buttons apply to the selected tours.
7 Map
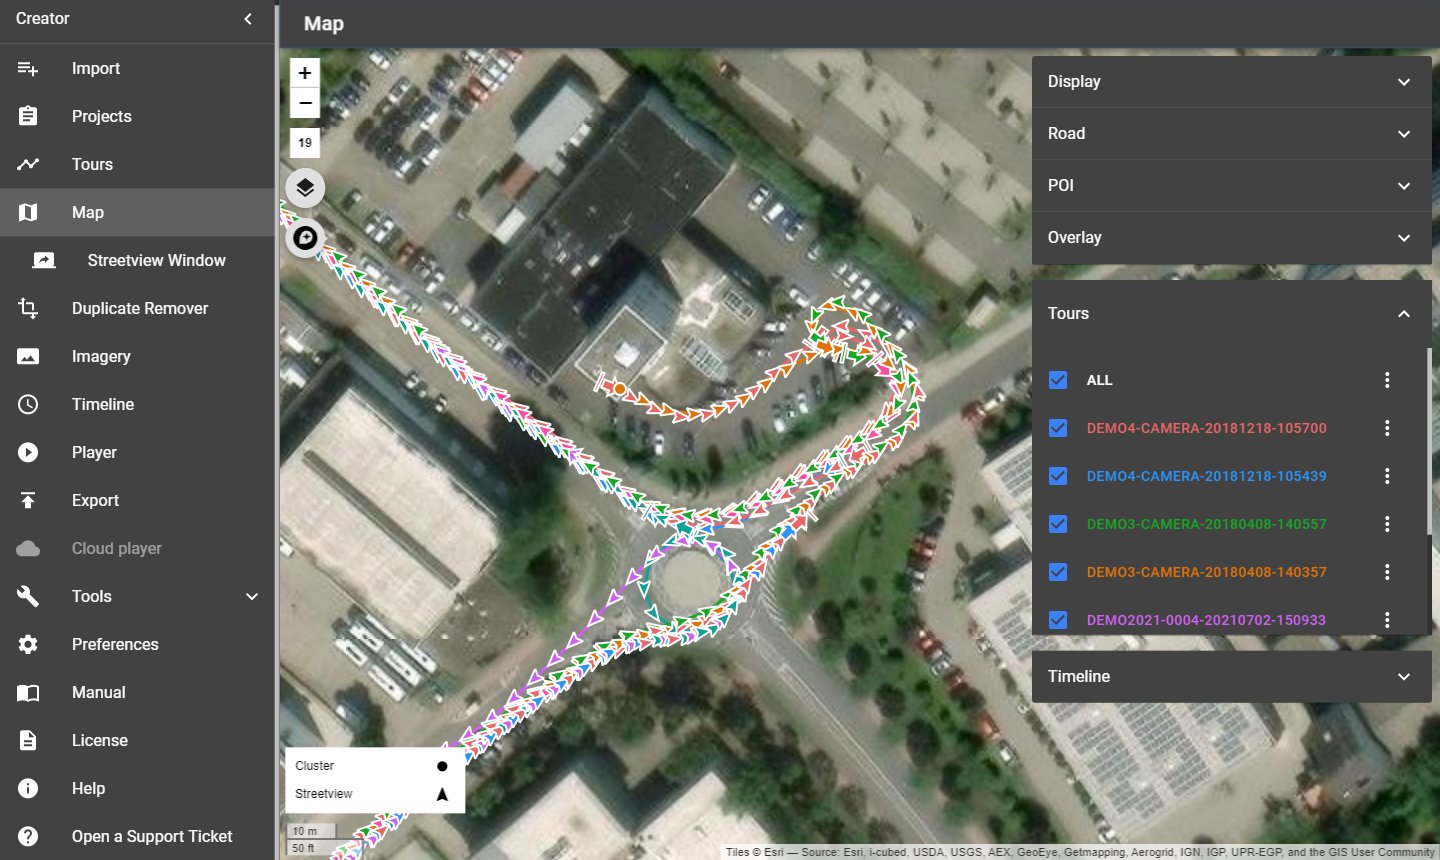
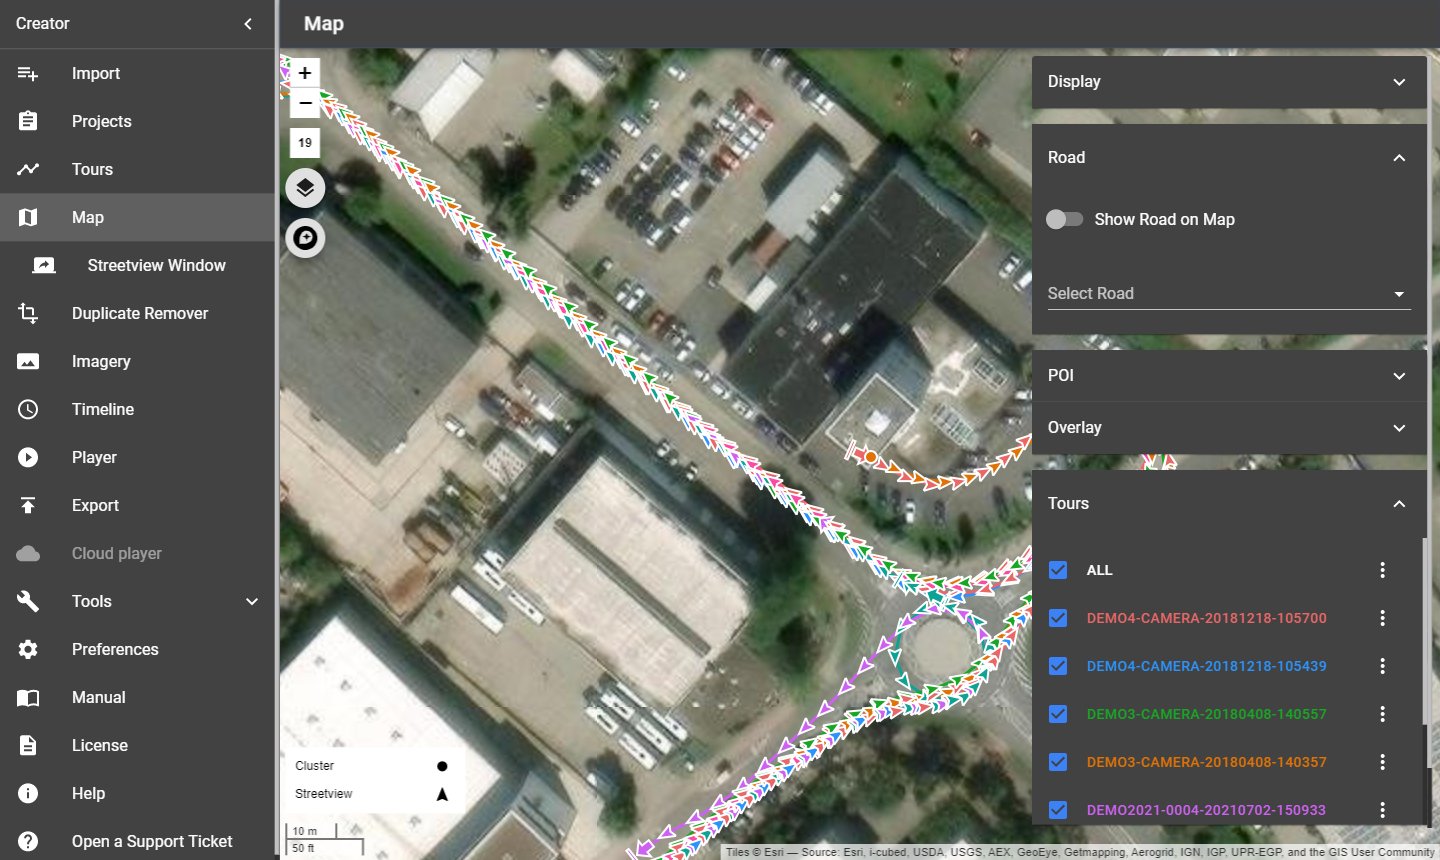
Menu → Map shows all streetviews of the project on a map. Here you check positions, select streetviews, deactivate the ones you don't want to publish, and add road names, POIs and overlays.
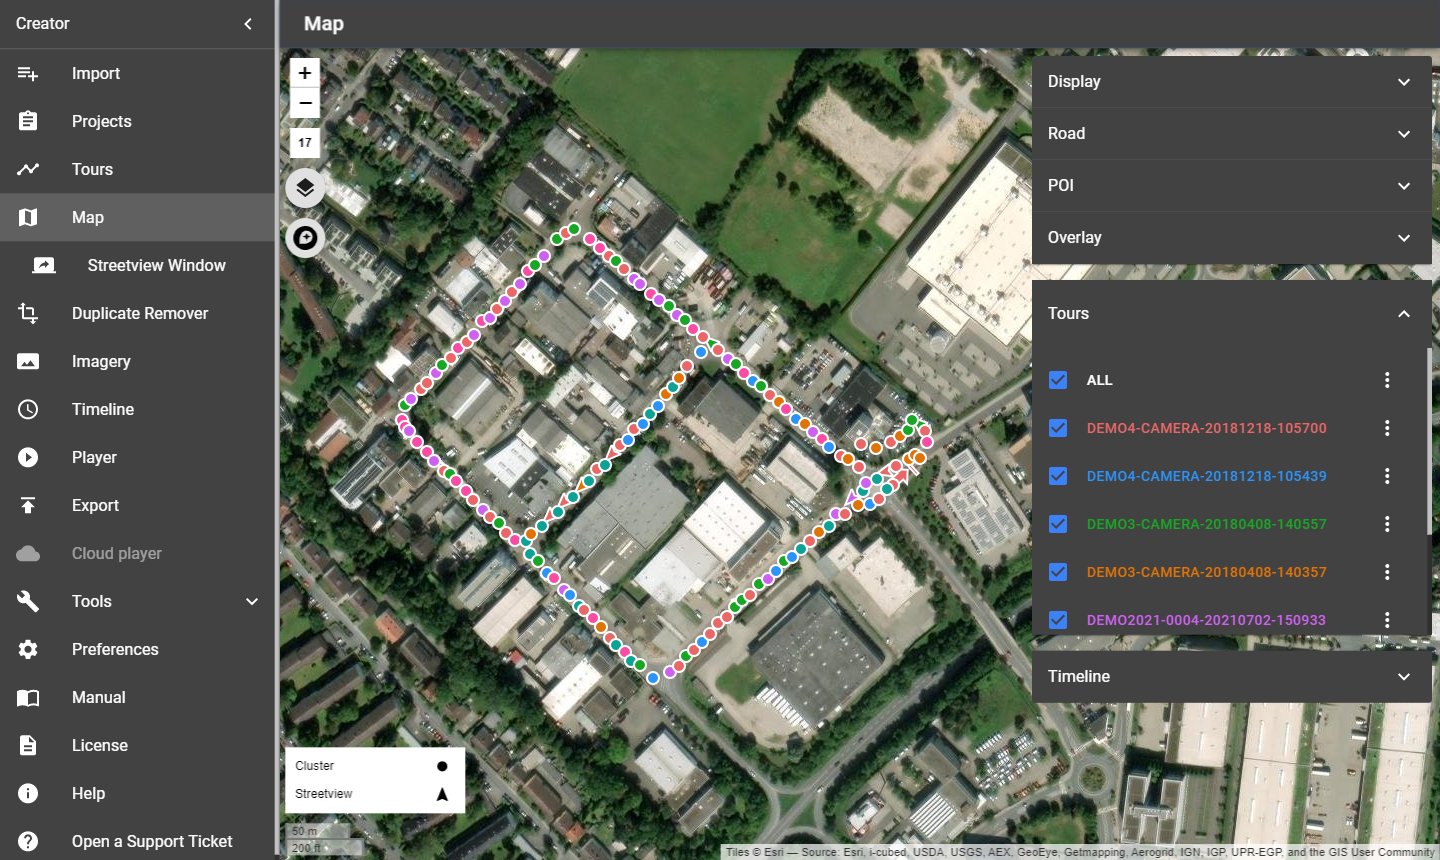
To show many streetviews quickly, Creator groups nearby streetviews into clusters (the numbers in circles) up to zoom level 19. Zoom in further to see single streetviews. The small box at the bottom left explains the symbols; the number on the left shows the current zoom level.
When the map zooms to the tours (when it opens for the first time, or with All or a tour in the Tours panel), the tours fill the left two thirds of the map, so the panels on the right don't cover them. Below Map in the menu, the Streetview Window shows the selected streetview in a second window.
7.1 Base layer
The layers button at the top left opens the list of map providers (base layers). The default is Esri.WorldImagery (aerial images).
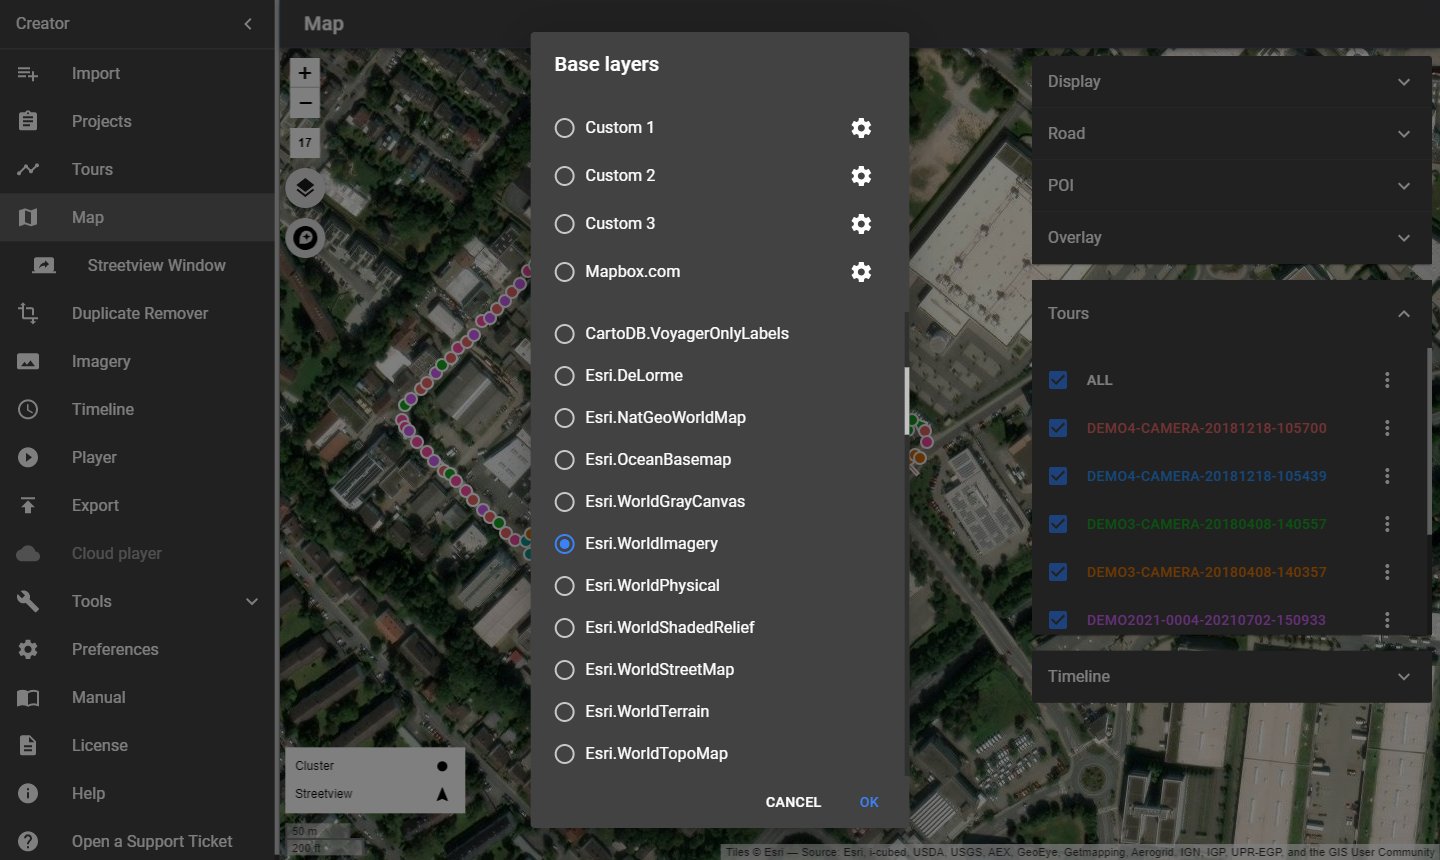
- Built-in providers: About 40 map and aerial image providers.
- Custom 1 – 3: Your own map tiles, for example from your own map server. Enter a Label, the URL and the Attribution (copyright text shown at the bottom of the map).
- Online:
https://www.your-company.com/map-tiles/{z}/{x}/{y}.png - Local folder or NAS:
file://D:\map-tiles\{z}\{x}\{y}.png {z}is the zoom level,{x}and{y}are the tile coordinates (Google/OSM scheme). For the TMS scheme use{-y}.- Mapbox.com: Your own Mapbox style: Map provider label, Style URL (vector tiles only), Access token and Map data legal notices. In Mapbox Studio, click Share to copy the style URL and the access token.
The base layers chosen here are also offered in the player, see Player → Map.
7.2 Panels
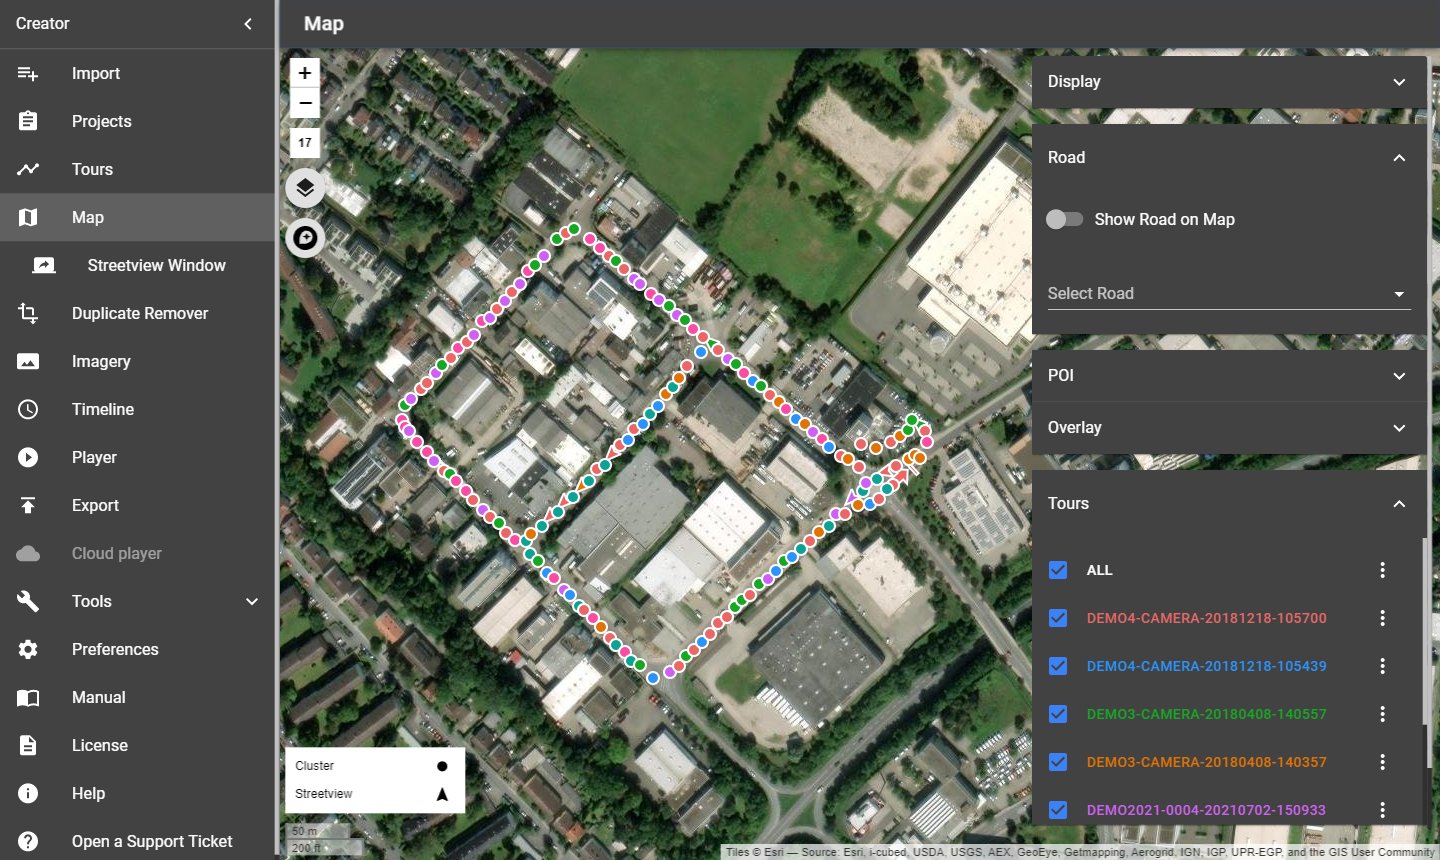
The panels on the right open and close with a click on their title.
| Panel | What it does |
|---|---|
| Display | Show or hide Activated and Deactivated streetviews. Activated streetviews have a white outline, deactivated ones a grey outline. |
| Road | Show Road on Map shows each streetview's road name. Select Road selects and zooms to all streetviews of one road. Type a Road name and click Update streetviews to give it to the selected streetviews. |
| POI | Points of interest, used like Road: Show POI on Map, Select POI, POI name, Update streetviews. One selected streetview gets a point POI, several get a line POI. |
| Overlay | Add a vector overlay to the map from a KML file, for example planned routes. The clear button next to the name removes it. |
| Tours | Show or hide tours. All zooms to all tours. The ⋮ button of a tour offers Select a streetview (by its image ID), Select all streetviews, Zoom to first streetview and Zoom to last streetview. |
| Timeline | Only with timelines: Show or hide timelines, like tours. |
7.3 Selecting streetviews
Most actions work on the selected streetviews. A selected streetview turns orange.
| Action | Mouse / keys |
|---|---|
| Select one streetview | Click it |
| Add to the selection | Hold Ctrl and click |
| Select all in a rectangle | Hold Shift and draw a rectangle |
| Add a rectangle to the selection | Hold Ctrl + Shift and draw |
| Select a line of streetviews | Select the first, hold Alt and click the last |
| Select all streetviews visible on the map | Ctrl + A |
| Clear the selection | Click on an empty spot of the map or press Esc |
When streetviews are selected, more panels appear:
| Panel | What it does |
|---|---|
| Deactivate and activate | Deactivate streetviews / Activate streetviews for the selection. Deactivated streetviews are not published. |
| History | Undo (Ctrl + Z) and Redo (Ctrl + Y) of your changes on the map. |
| Information | The data of one selected streetview: Image ID, position, altitude, direction, date and more. |
| Level | Open in Leveling and brightness opens the selected streetview in Imagery → Leveling and brightness. |
The selected streetview is also shown in the Streetview Window if it is open.
7.4 Keyboard shortcuts
Tip: Print only this page and keep it next to your keyboard for reference. In the print dialog of your PDF viewer, choose Current page.
| Keys | Action |
|---|---|
| Drag with the mouse | Move all selected streetviews |
| Ctrl + L | Align the selected streetviews in a straight line |
| Delete | Deactivate the selected streetviews |
| Insert | Activate the selected streetviews |
| Home / End | Rotate the selected streetviews anticlockwise / clockwise |
| Page Up / Page Down | Go to the next / previous streetview |
| Arrow keys | Move the map |
| Ctrl + Z / Ctrl + Y | Undo / redo |
| Esc | Clear the selection |
8 Streetview Window
Menu → Streetview Window (directly below Map in the menu) opens a second window that shows the streetview selected on the Map page or in the Player → Preview. Move it to a second monitor and switch it to full screen to see positions and images side by side.
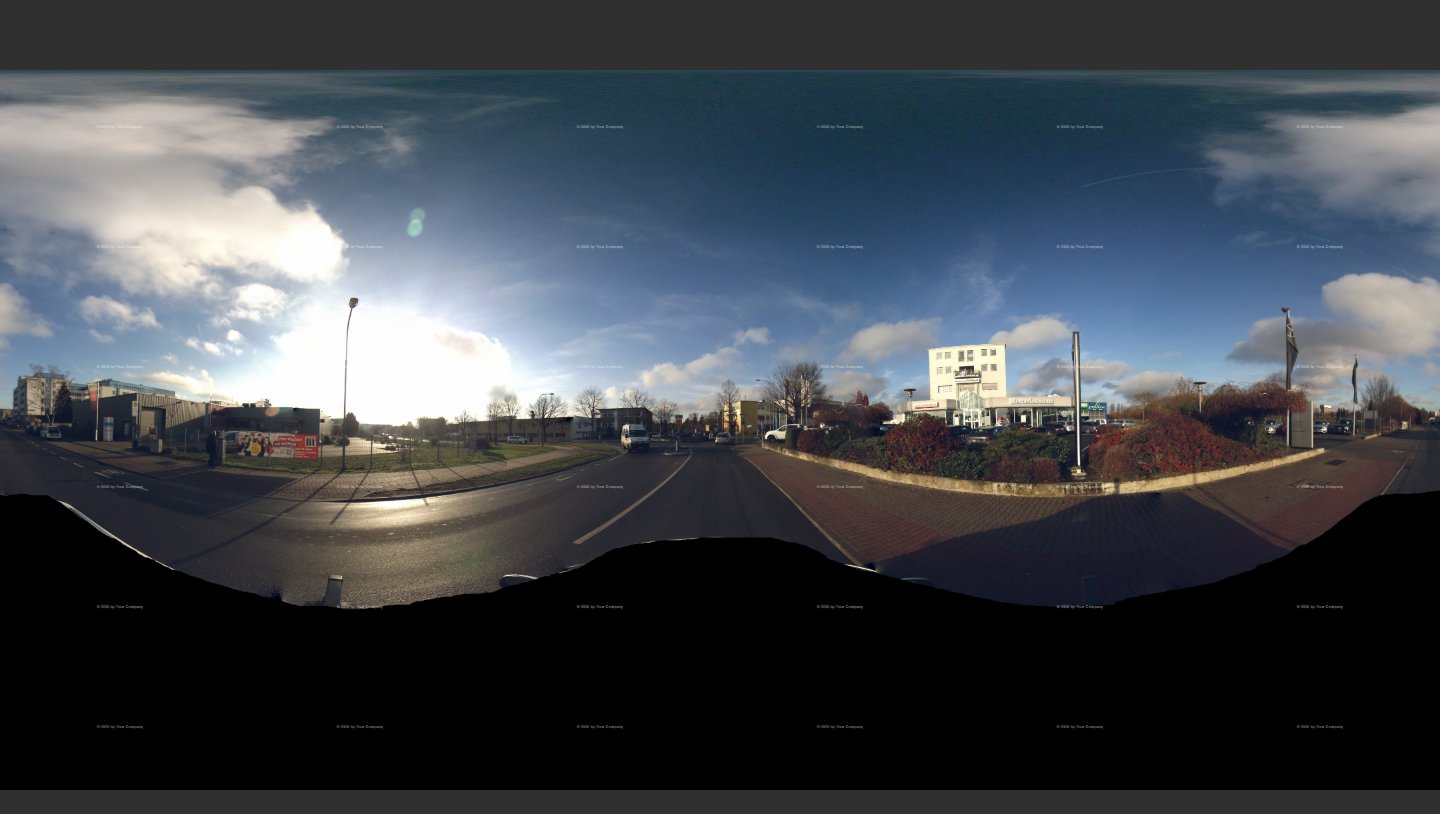
- Select a streetview on the Map: The window shows it.
- If no streetview is selected when you open the window, it shows the first active streetview. On the Map page this streetview is selected too; the map does not move.
- Zoom in and out with the mouse wheel; drag to look around.
- Changing the program language in Preferences → General closes the window.
9 Duplicate Remover
Menu → Duplicate Remover finds streets that were recorded more than once and deactivates the extra streetviews, so each street is published once.
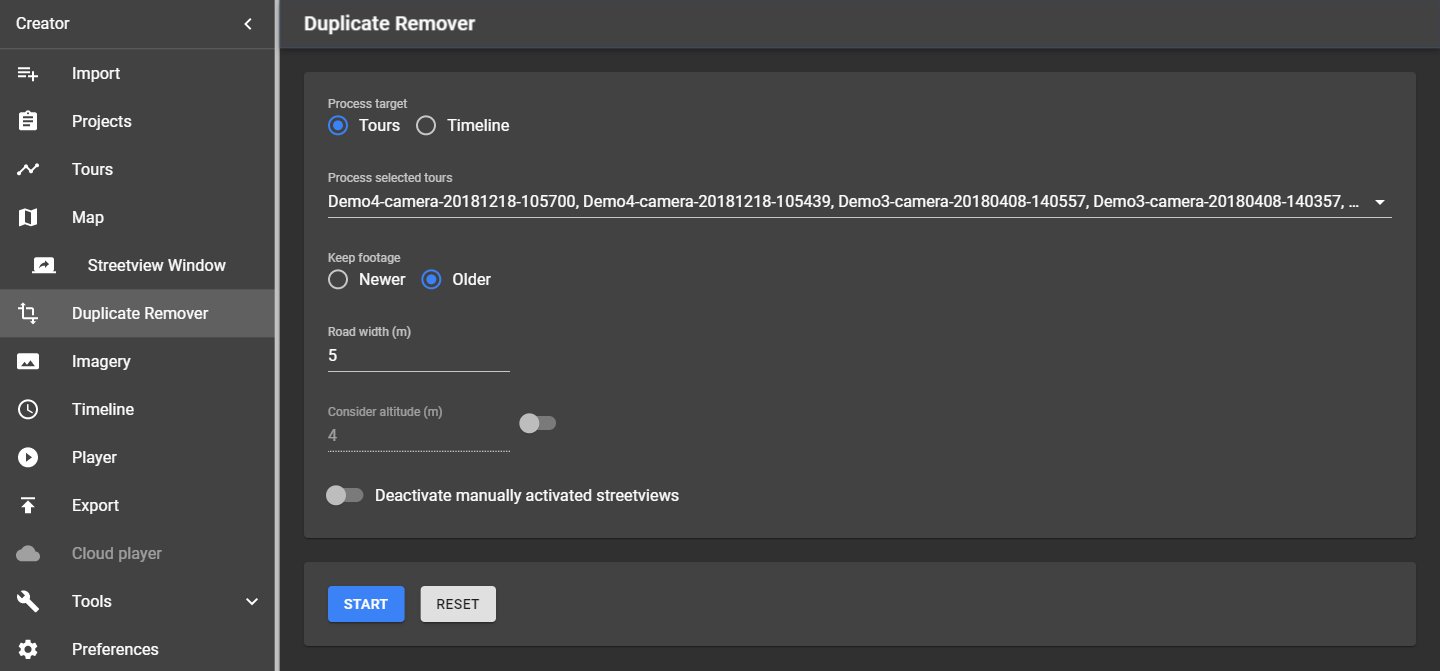
Record with the camera's distance mode set to 5 m or less (for example 1 m). After the Duplicate Remover, use Tools → Skip to thin out dense recordings. Always run Skip after the Duplicate Remover.
| Setting | What it does |
|---|---|
| Process target | Only with timelines: Process the selected Tours or the selected Timelines. With timelines, duplicates are removed within each timeline, so every timeline keeps its own streetviews. |
| Tours / Timeline | The tours or timelines to process. |
| Keep footage | Older (best for most projects): Keeps the existing, older streetviews and adds new streetviews only for newly recorded roads. Newer: Replaces existing streetviews with newer footage; the data is more up to date, but reversing out of a dead-end road leaves the bad footage. |
| Road width (m) | Streetviews closer than this distance count as the same road. |
| Consider altitude (m) | Off by default. Use it for bridges and tunnels: Streetviews more than this height apart are not duplicates. |
| Deactivate manually activated streetviews | Off by default: Streetviews you activated by hand on the Map stay active. On: They are deactivated too. |
Click Start to remove duplicates. The page then shows how many streetviews were marked as duplicates, for the project and for each tour. Try a few settings to find the best result for your footage.
Reset activates all streetviews deactivated by the Duplicate Remover and by Skip.
10 Imagery
Menu → Imagery sets what the streetview images look like: Watermarks and masks, the leveling of the camera, and the brightness. The page has two tabs: Watermarks and Leveling and brightness.
10.1 Watermarks
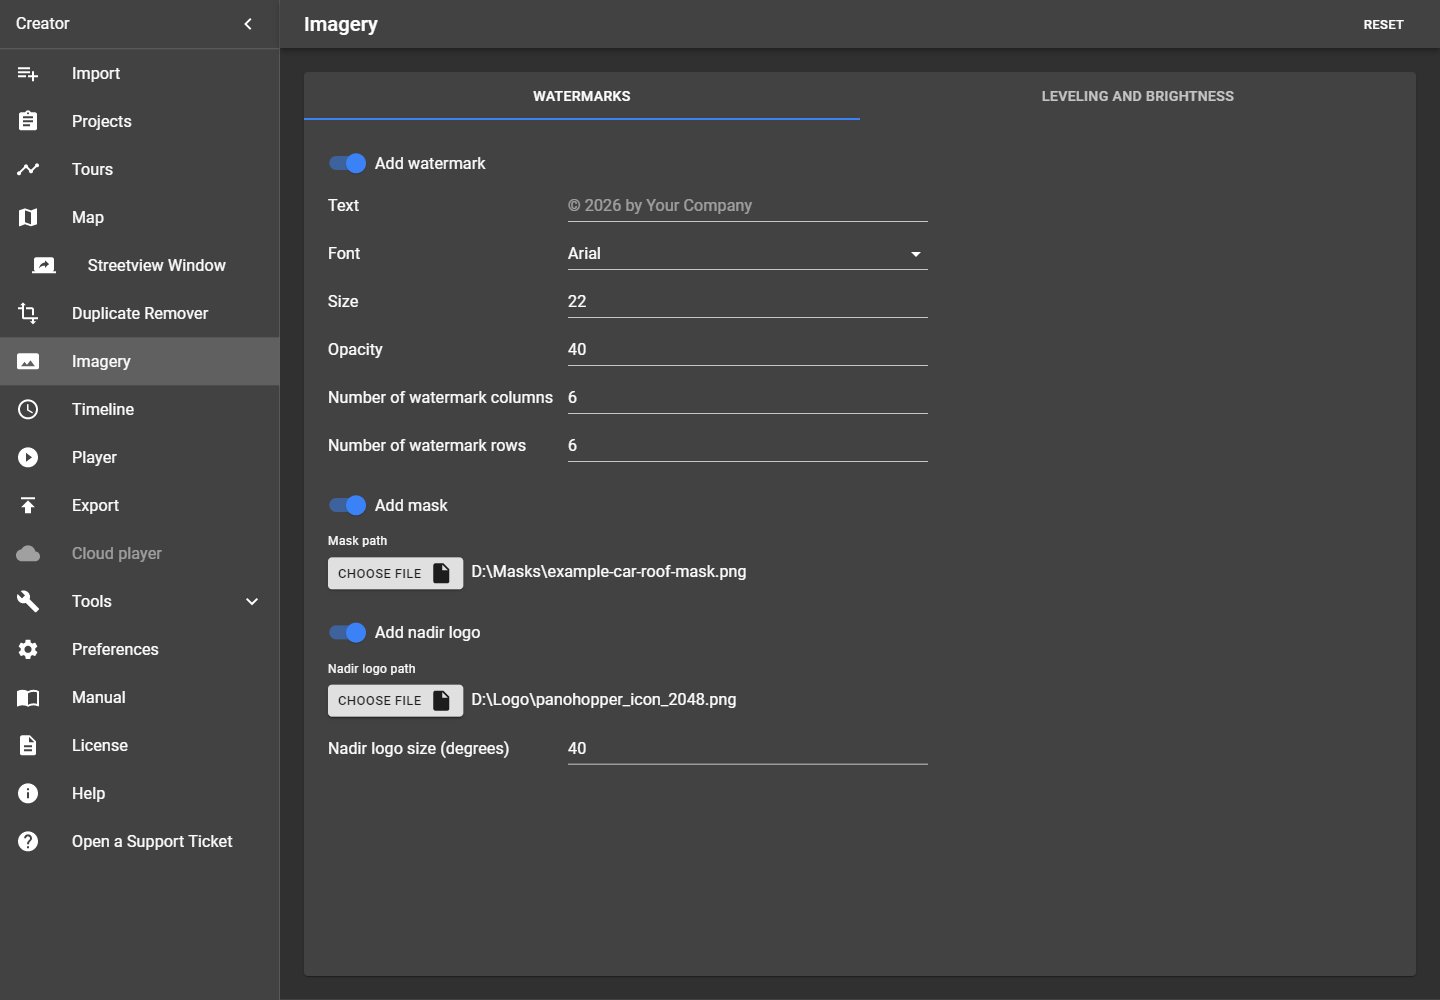
| Setting | What it does |
|---|---|
| Add watermark | Writes a text into every streetview, for example your copyright. |
| Text | The watermark text, for example © 2026 by Your Company. |
| Font | One of the fonts installed in Windows. |
| Size | Text size. |
| Opacity | How visible the text is. |
| Number of watermark columns / rows | How often the text repeats from left to right / top to bottom. |
| Add mask | Lays a transparent PNG image over every streetview, usually to hide the car roof at the bottom (nadir). |
| Mask path | The PNG image. An example is in Creator's folder: resources\vendor\masks. |
| Add nadir logo | Puts your logo straight below the camera, on top of the mask. See Nadir logo. |
| Nadir logo path | Your logo as PNG (with transparency) or JPEG. |
| Nadir logo size (degrees) | How wide the logo appears from the camera, edge to edge. Default 40. |
Reset (top right) sets the tab back to its defaults. Check the result in the Leveling and brightness preview.
10.2 Nadir logo
A nadir logo is your logo at the bottom of the streetview, where the car roof is. It is also the only addition Google allows for 360° photos ("superimposed content must be limited to either the zenith or nadir").
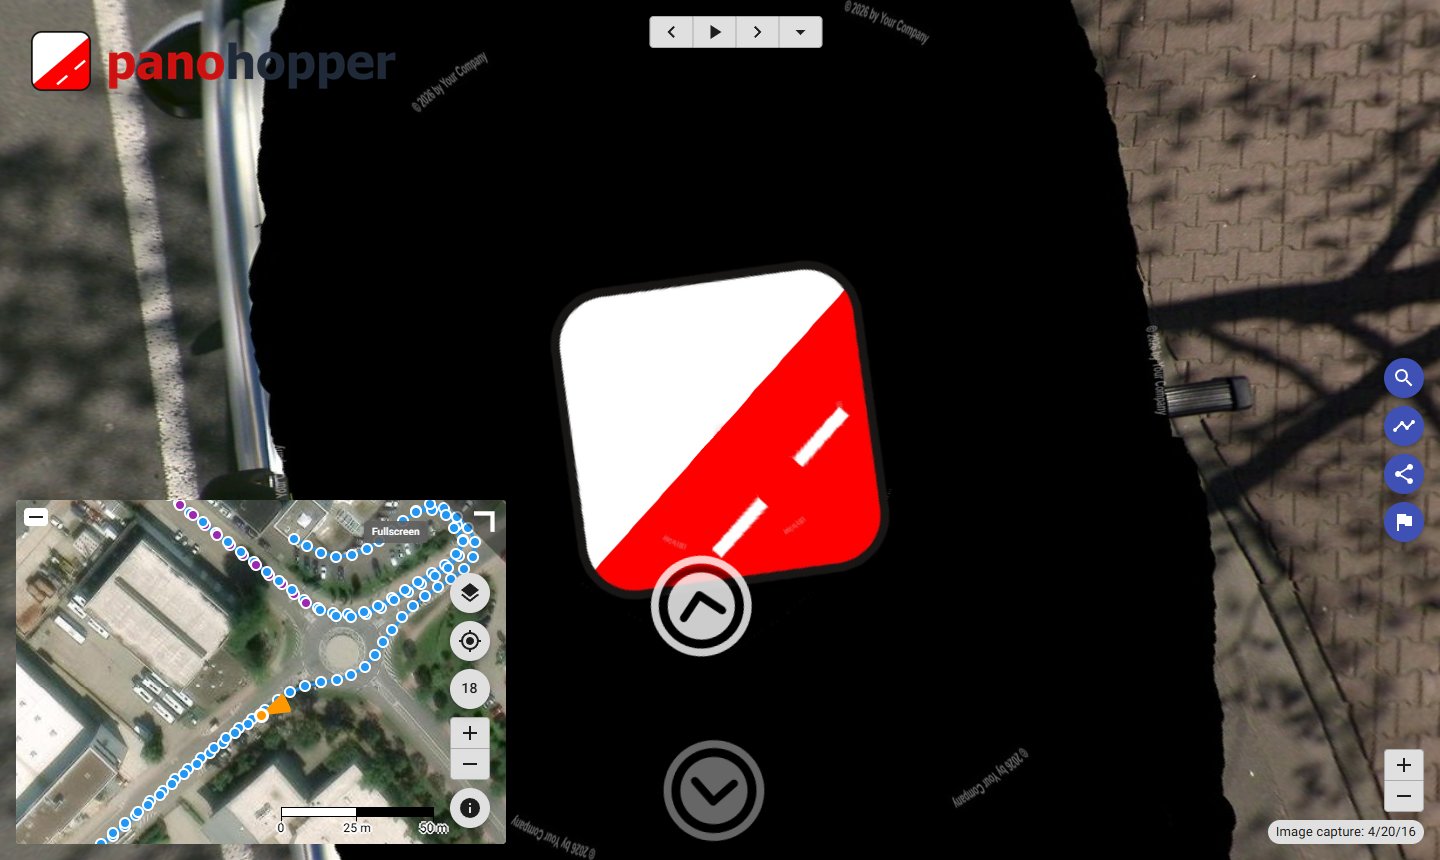
- Have your logo ready: a square PNG with a transparent background, at least 1024 × 1024 pixels.
- On the Watermarks tab, switch on Add nadir logo and choose the file as Nadir logo path.
- Set the Nadir logo size: 40 degrees covers the middle of the car roof; use a larger value to cover more of it.
- Check the result in the Leveling and brightness preview.
- In Player → Streetview, set Look down limit to -90. The default (-50) hides the car roof and the logo. Check the result in the Player → Preview. Don't forget to change the Look down limit back to -50.
- Export with Skip existing streetviews switched off. Streetviews created before keep their old look until they are processed again.
Creator projects the flat logo onto the panorama, so it looks flat and undistorted when you look straight down. The top of the logo points in driving direction. With Add mask switched on as well, the logo is placed on top of the mask.
10.3 Leveling and brightness
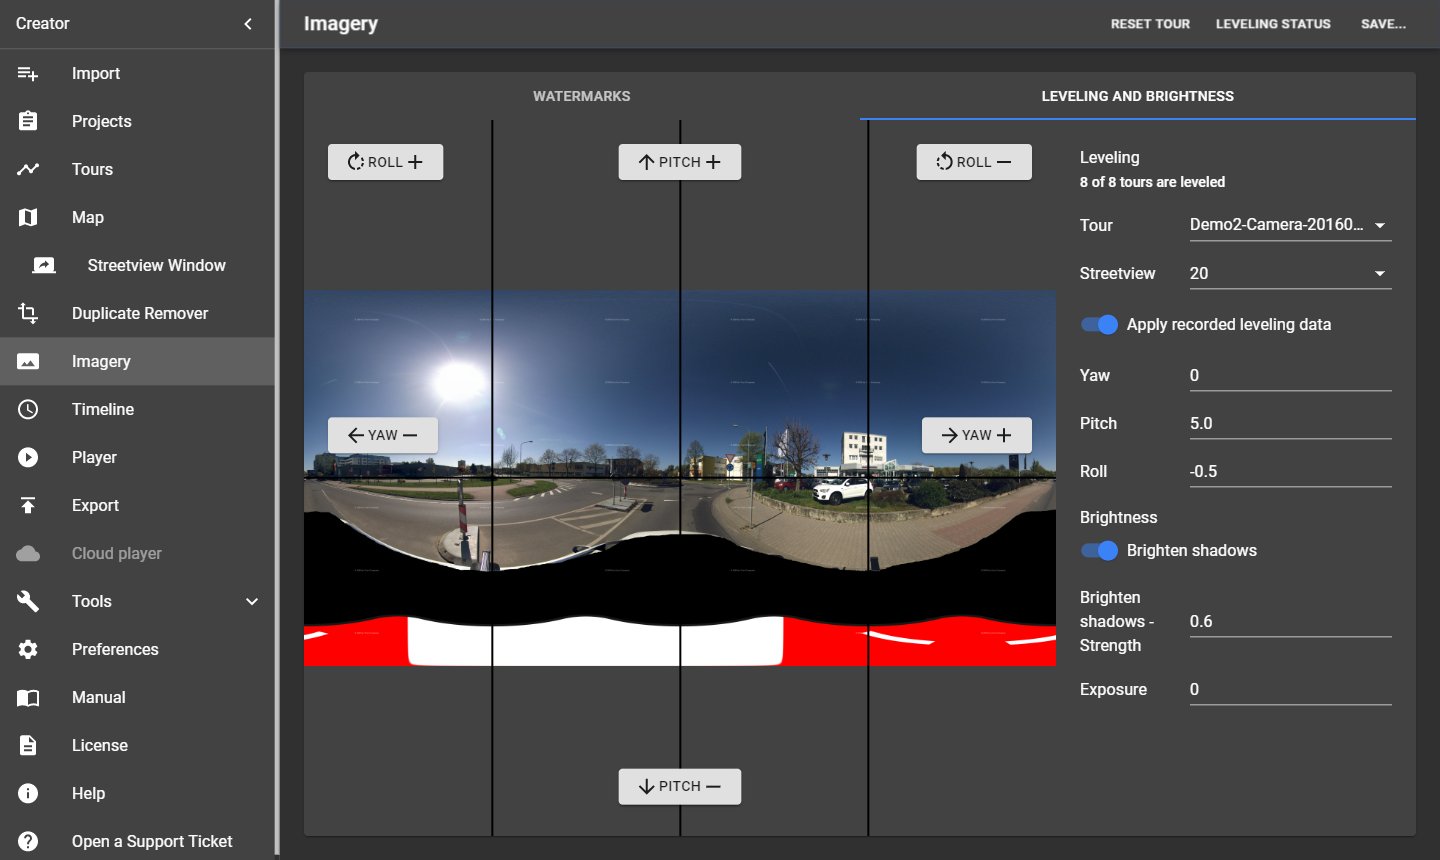
The preview shows one streetview, stitched with the current settings. It is available for recordings of the Applied Streetview camera.
Leveling
The camera on the roof and the leveling sensor in the car are never mounted perfectly straight. Leveling corrects the three angles between them, so the horizon is level.
- Choose a Tour and a Streetview on the right.
- Use Roll +/−, Pitch +/− and Yaw +/− around the preview until the streetview is level, or enter the values in Yaw, Pitch and Roll.
- Check a few other streetviews of the same tour.
- Click Save… (top right) and choose where the values apply:
| Save option | Applies to |
|---|---|
| Save to this tour | the current tour |
| Save to all tours | all tours of the project |
| Save to all tours of the same day | all tours recorded on the same day |
| Save to all tours of this timeline | all tours of the current timeline |
If the camera mount and the sensor holder stay on the car, the same values usually fit all tours.
Apply recorded leveling data uses the angles that the camera recorded while driving (on by default).
Brightness
| Setting | What it does |
|---|---|
| Brighten shadows | Brightens dark areas automatically. |
| Brighten shadows – Strength | How much, from 0.1 to 1. Default 0.6 (the standard look). |
| Exposure | Overall brightness, from 0 (no change) to 5. Default 0. |
Leveling Status and Reset tour
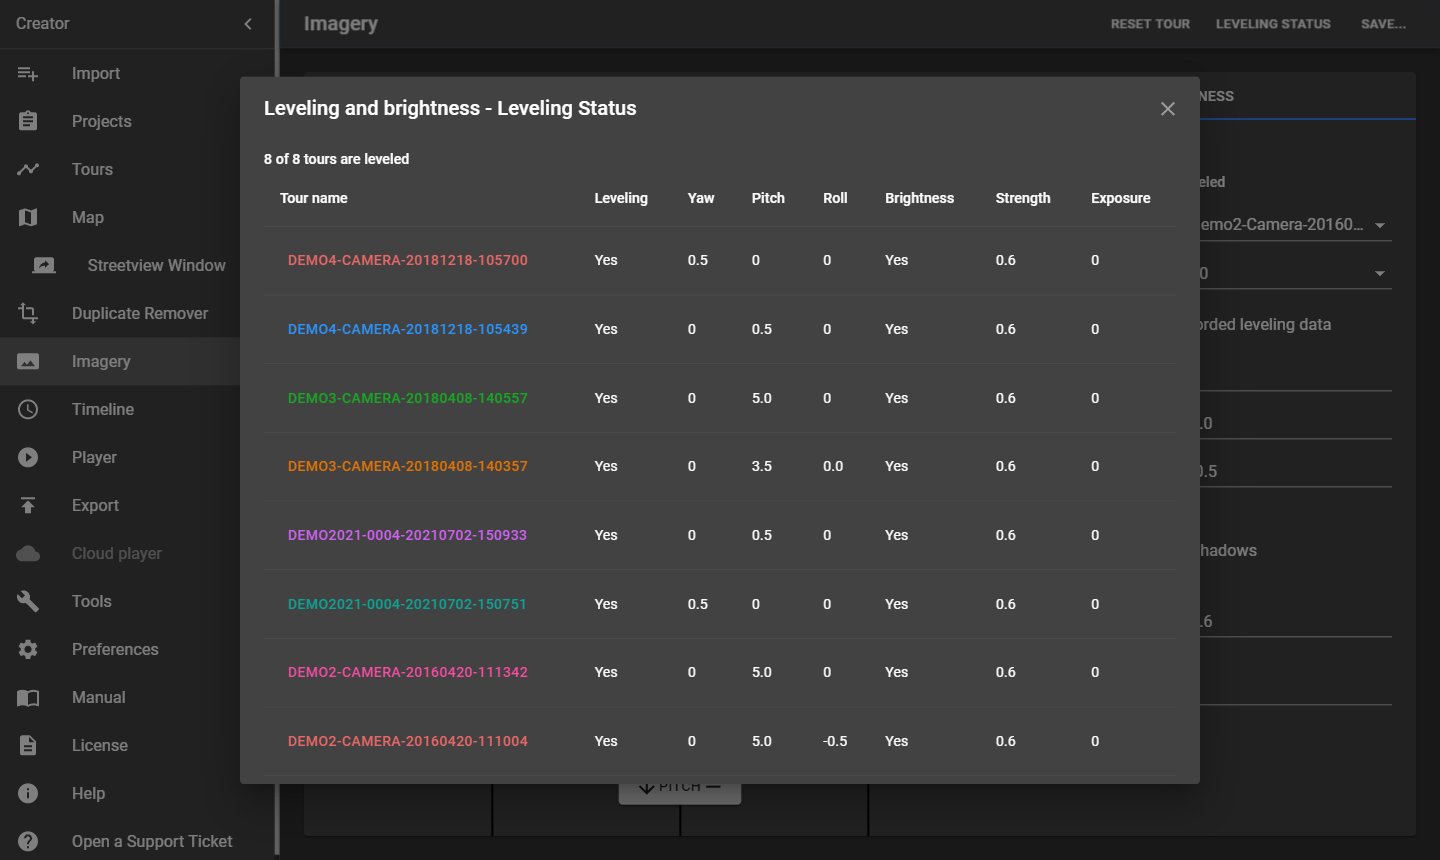
- Leveling Status (top right) lists all tours with their leveling and brightness values and shows how many tours are leveled.
- Reset tour sets the current tour back to its defaults.
Missing or damaged photos
If photos of the shown streetview are missing or can't be read, the page lists their full paths with a Copy to Clipboard button instead of the preview. See Troubleshooting.
11 Timeline
Menu → Timeline groups tours by recording date, so users can compare the same streets recorded at different times, for example 2021 and 2023. In the player, users switch between the timelines.
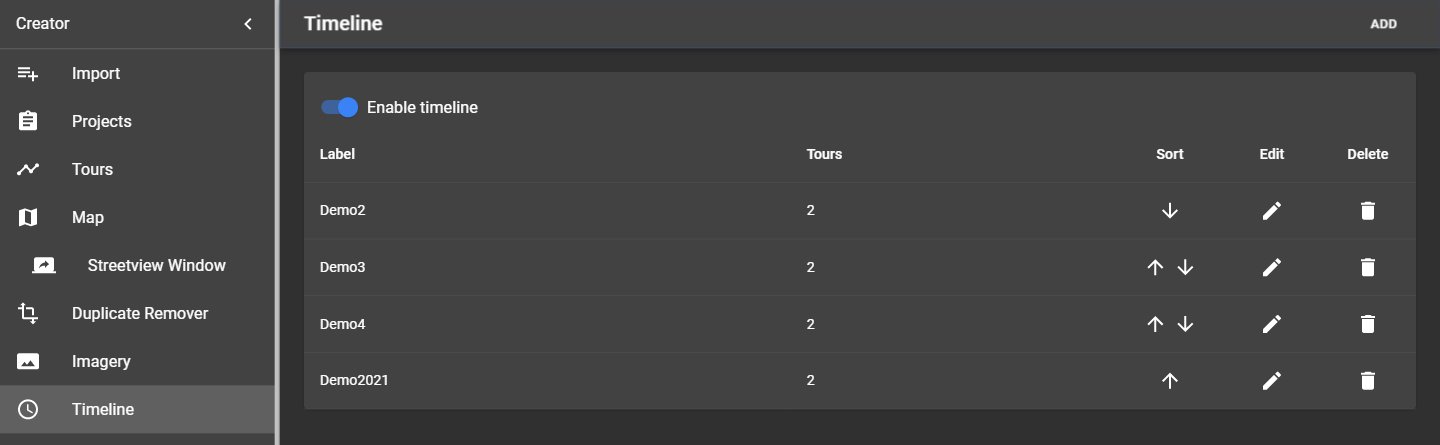
| Item | What it does |
|---|---|
| Enable timeline | Switches timelines on for this project. |
| Add (top right) | Creates a new timeline. |
| List | Label, the Tours of each timeline, and Sort, Edit and Delete buttons. |
11.1 Add or edit a timeline
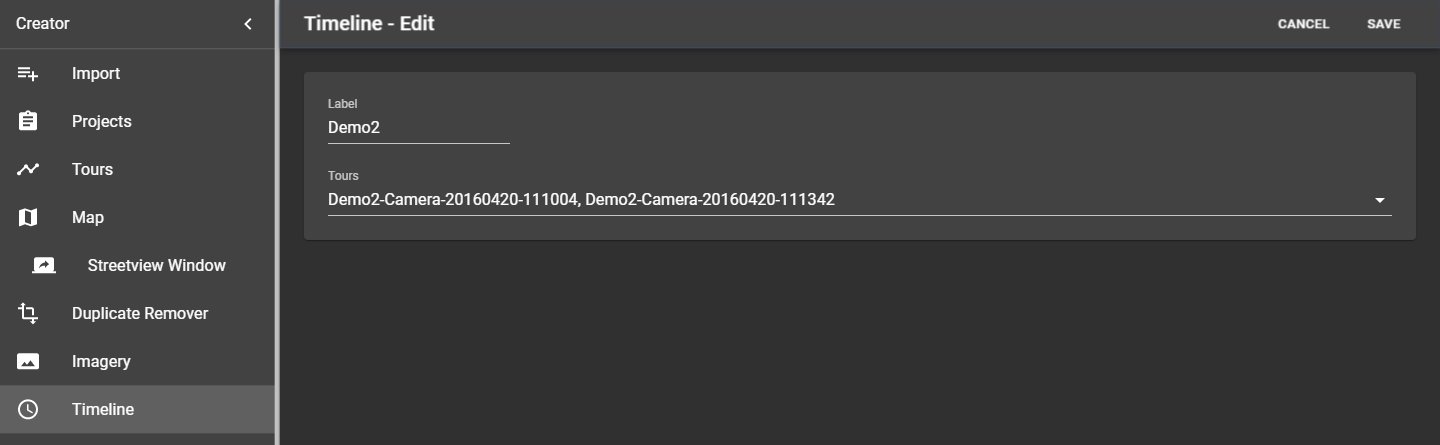
- Click Add, or Edit next to a timeline.
- Enter the Label, for example 2021.
- Select the Tours that belong to it.
- Click Save (top right). Cancel discards the changes.
Delete removes a timeline after a confirmation; its tours stay in the project.
11.2 Tips
- After assigning all tours, run the Duplicate Remover with Process target → Timeline, so duplicates are removed within each timeline.
- The Map has a Timeline panel to show timelines one by one.
- In the player, the timeline panel can start opened: Player → Layout.
12 Player
Menu → Player sets up the player that Export creates: Its look, its map and its texts. Which player is created (Player 3, Player 2 or Legacy) is chosen in Preferences → Player. The page has two tabs: Preferences and Preview. Go back and forth between them until the player looks the way you want.
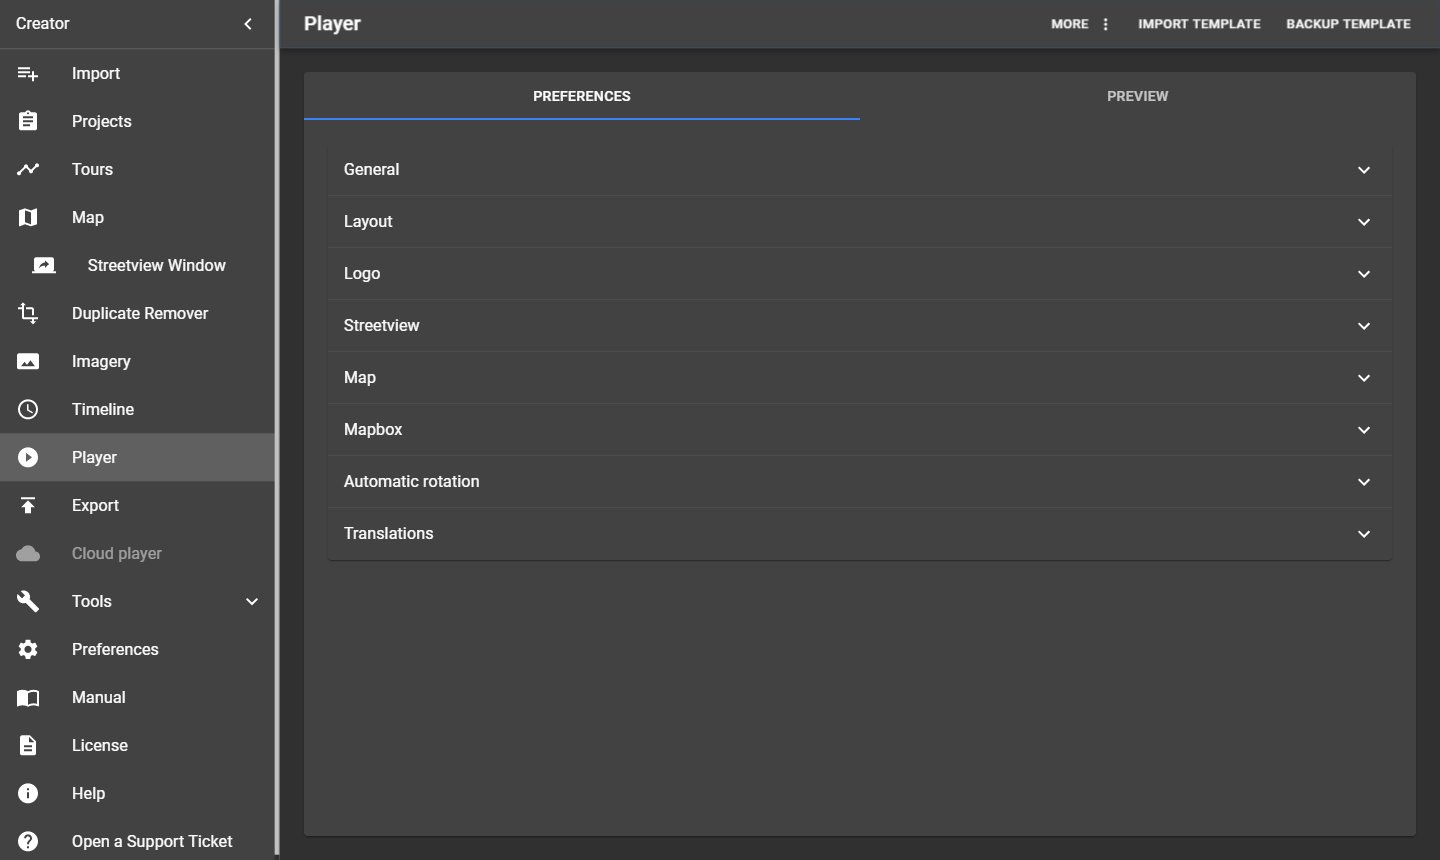
The settings are grouped in panels; click a panel's title to open it. Settings are saved at once.
12.1 General
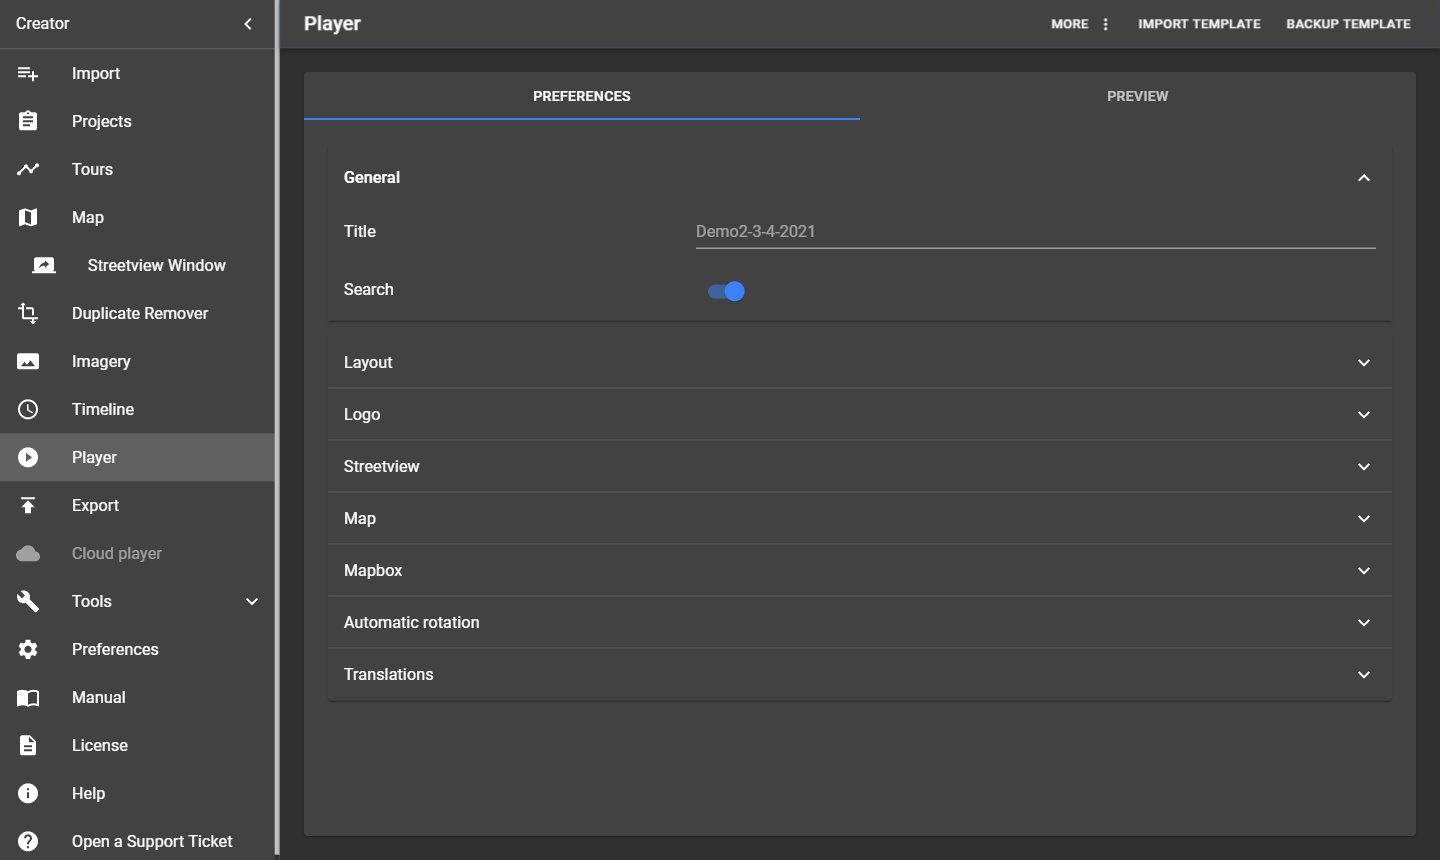
| Setting | What it does |
|---|---|
| Title | Title of the player page (browser tab). Empty: The project name. |
| Search | Shows a search field for places and addresses. |
12.2 Layout
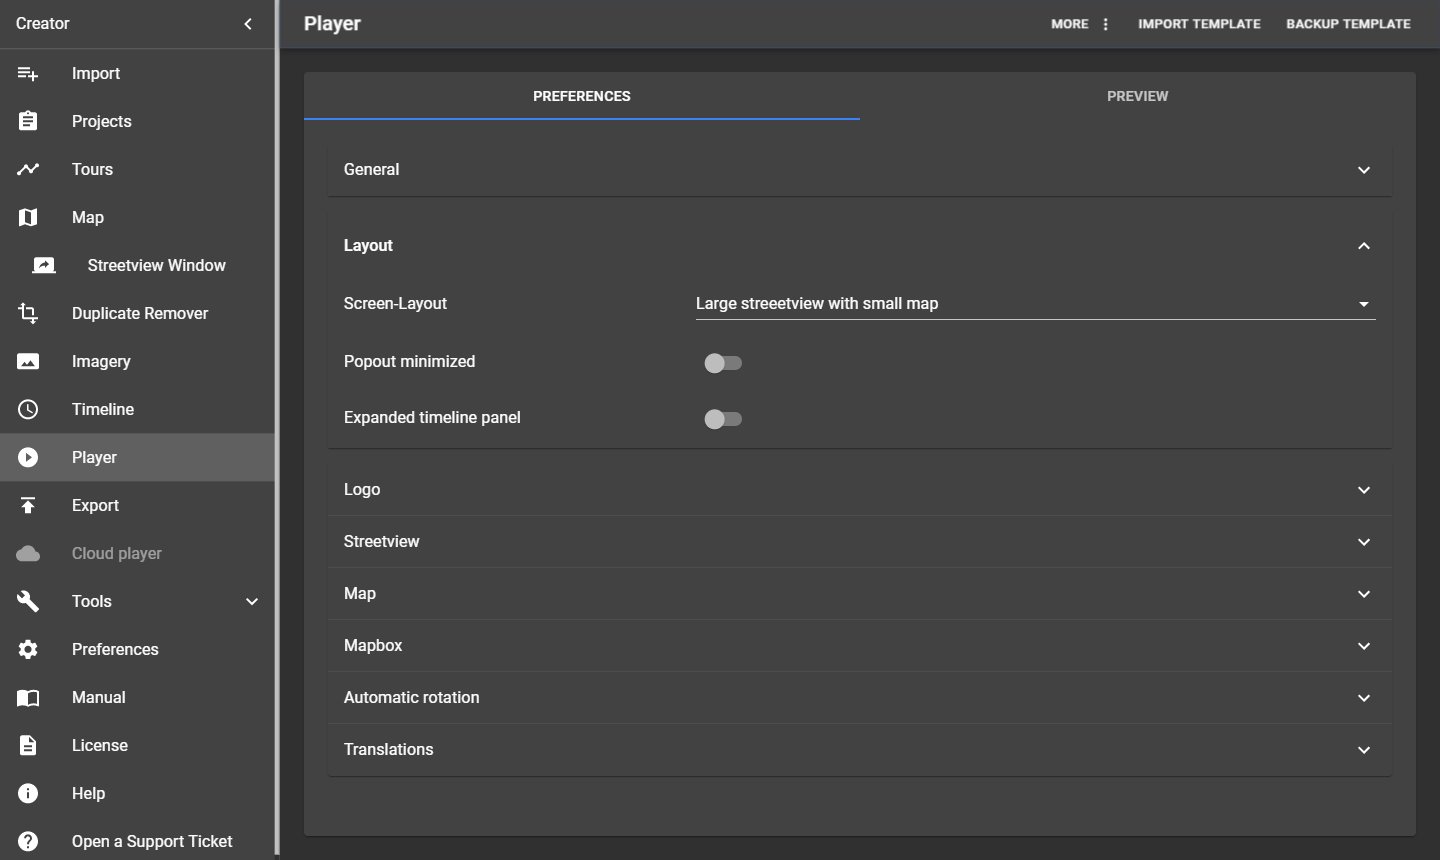
| Setting | What it does |
|---|---|
| Screen-Layout | Start layout: Large map with small streetview, Large streetview with small map, Top: Map, Bottom: Streetview, Top: Streetview, Bottom: Map, or Streetview only. |
| Popout minimized | The small window starts minimized. |
| Expanded timeline panel | The timeline panel starts opened. |
12.3 Logo
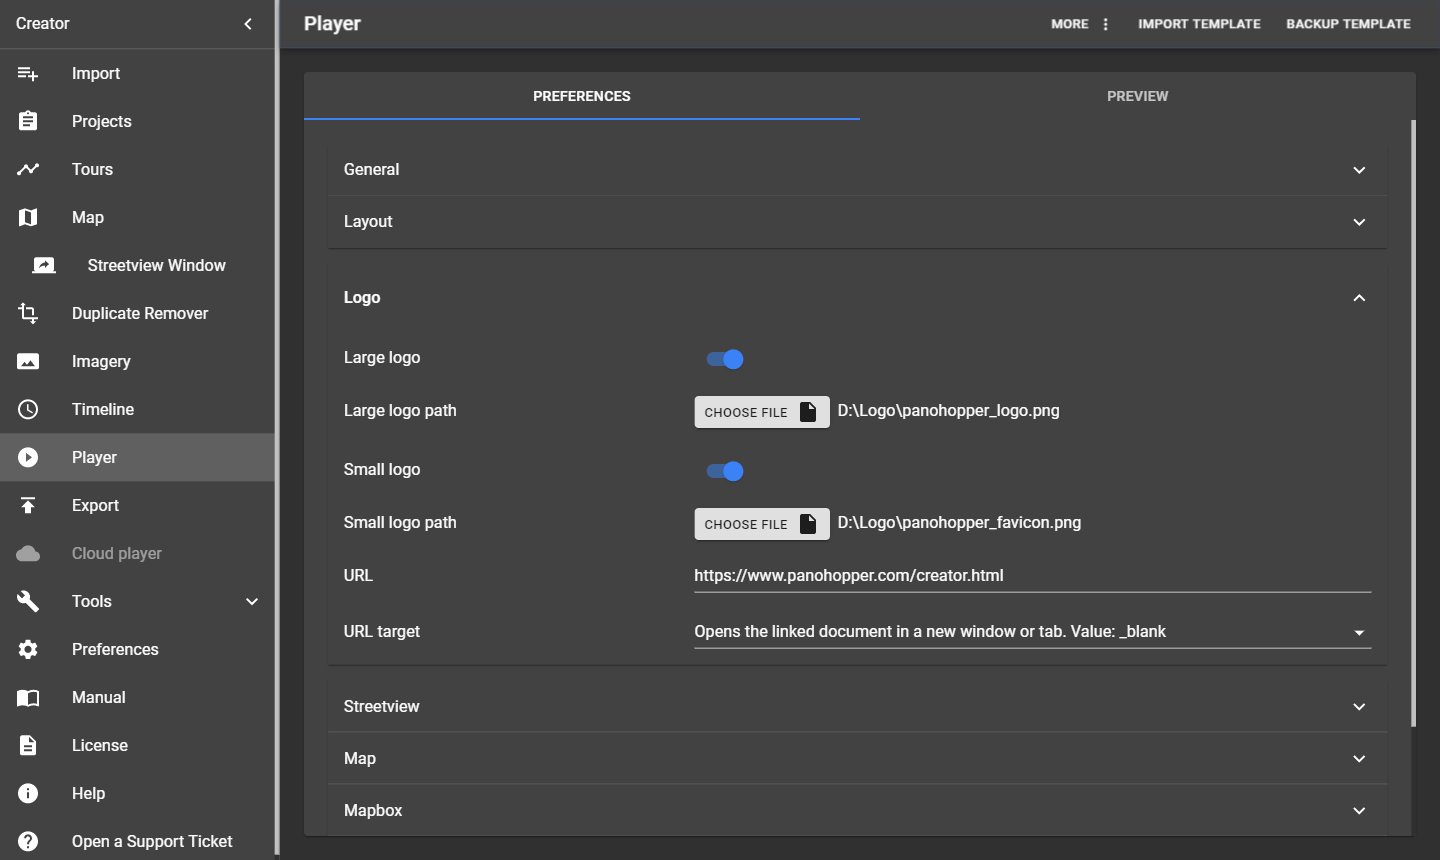
| Setting | What it does |
|---|---|
| Large logo / Large logo path | Your logo for large screens (PNG or JPEG). |
| Small logo / Small logo path | Your logo for small screens and phones. |
| URL | Web page that opens when users click the logo. |
| URL target | Where it opens: New window or tab (_blank), same frame (_self), parent frame (_parent), full window (_top). |
12.4 Streetview
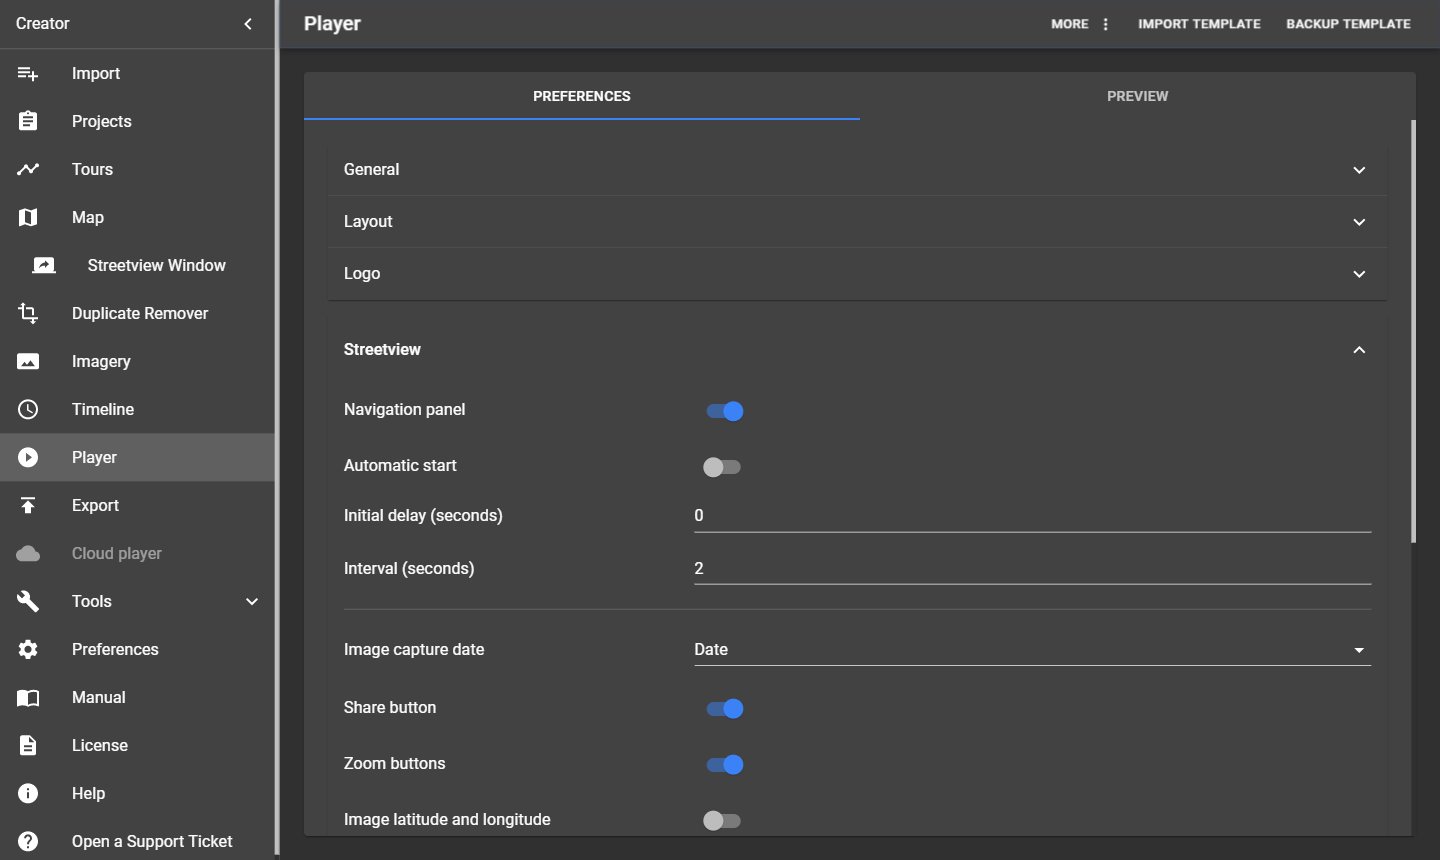
| Setting | What it does |
|---|---|
| Navigation panel / Automatic start / Initial delay / Interval | Shows the buttons to drive through the streetviews; optionally starts driving automatically after the delay, one step per interval (seconds). |
| Hotspots / Hotspot label / Minimum and Maximum display distance (m) | Player 2 and Legacy: Clickable markers for nearby streetviews, labelled by None, Auto, POI, Road or Streetview ID, shown between the two distances. |
| Arrows / One streetview per section (degrees) / Minimum and Maximum display distance (m) | Player 2 and Legacy: Navigation arrows on the street. |
| Click navigation / Streetviews available from / to (m) | Player 2: Click anywhere on the street to go there. |
| Image capture date / Image capture time | Shows when the streetview was recorded: None, Date, Date and time or Month and year. |
| Share button | Users can copy a link to the current view. |
| Zoom buttons | Shows + and − buttons. |
| Image latitude and longitude | Shows the position of the streetview. |
| Max Zoom-in / Max Zoom-out (degrees) | Limits of the zoom (field of view). |
| Look down limit / Look up limit (degrees) | How far users can look down or up. Default -50 hides the car roof; use -90 to look straight down, for example at a nadir logo. |
12.5 Map
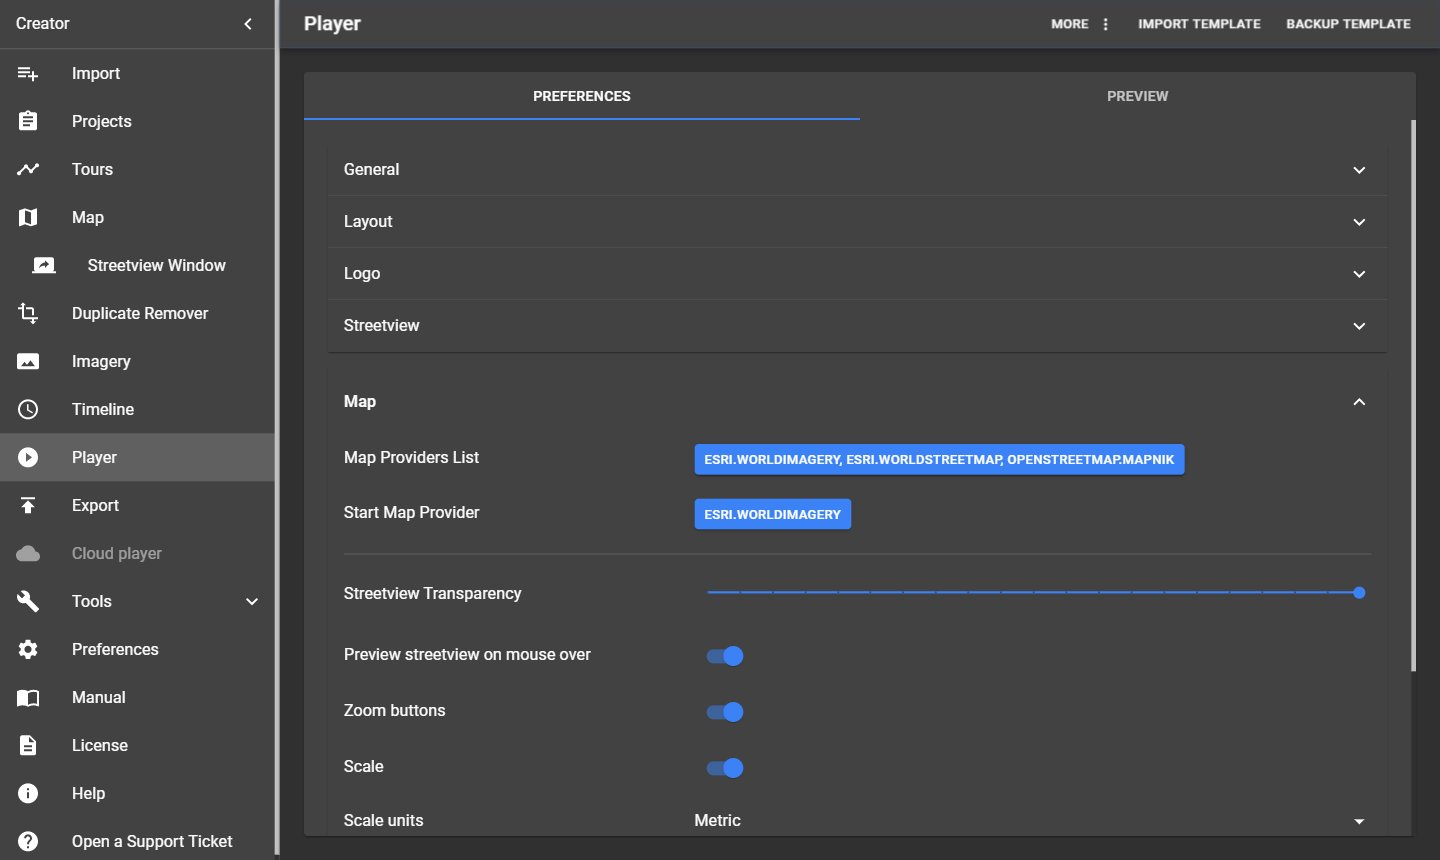
| Setting | What it does |
|---|---|
| Map Providers List | The base layers users can choose in the player. They are set on the Map page. |
| Start Map Provider | The base layer the player starts with. |
| Streetview Transparency | How transparent the streetview dots and lines are on the map. |
| Preview streetview on mouse over | Shows a small preview image when the mouse is over a streetview. |
| Zoom buttons | Shows + and − on the map. |
| Scale / Scale units | Shows a scale bar in Metric, Imperial inch, US inch, Nautical mile or Degrees. |
Above the zoom level where the map provider has no more detail, the player enlarges the last available level instead of showing "Map data not yet available".
12.6 Mapbox
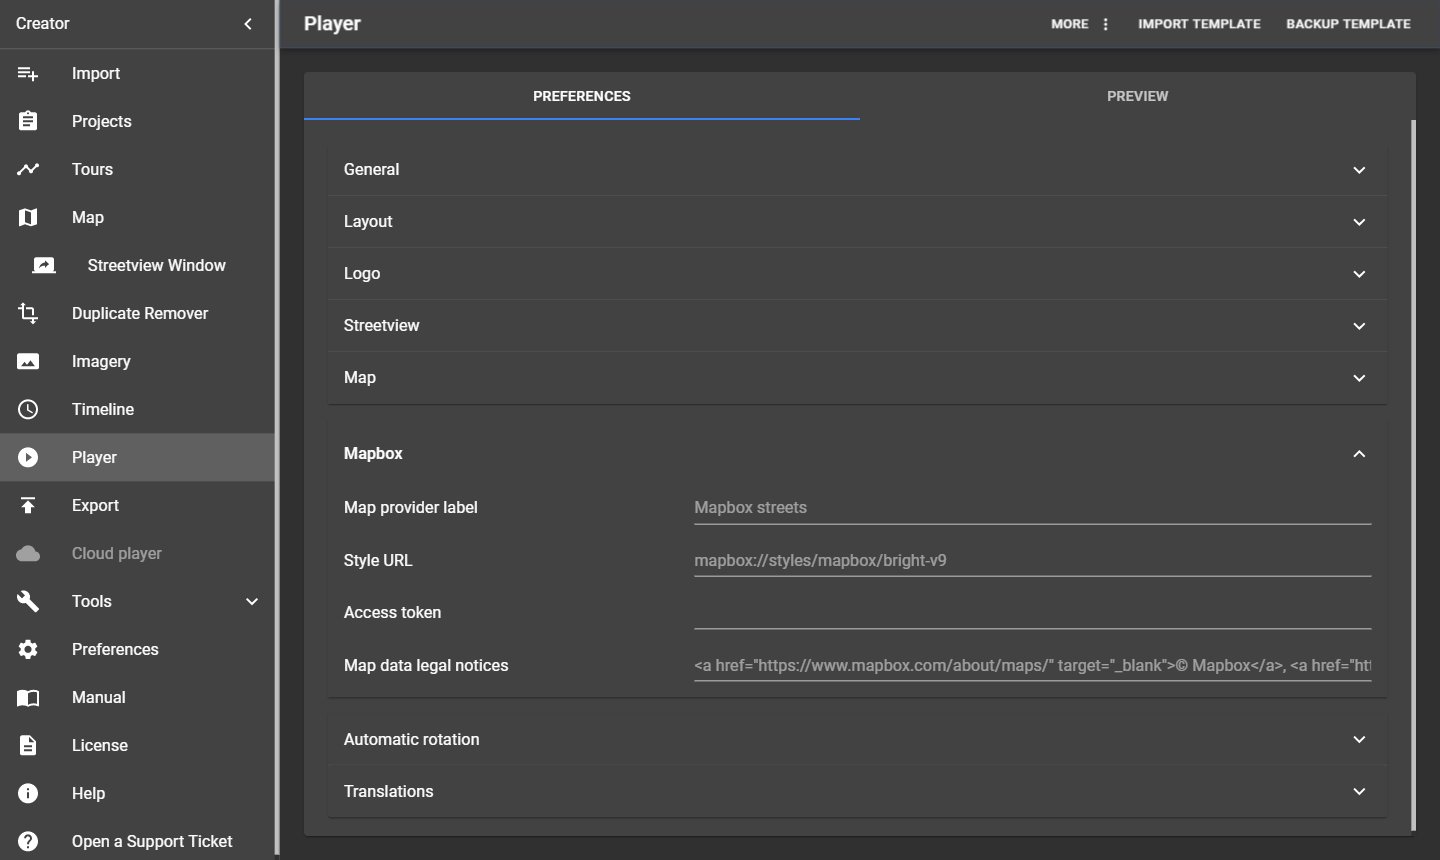
Your own Mapbox style as a base layer in the player: Map provider label, Style URL, Access token and Map data legal notices. In Mapbox Studio, click Share to copy the style URL and the access token. Then tick the Mapbox base layer on the Map page.
12.7 Automatic rotation
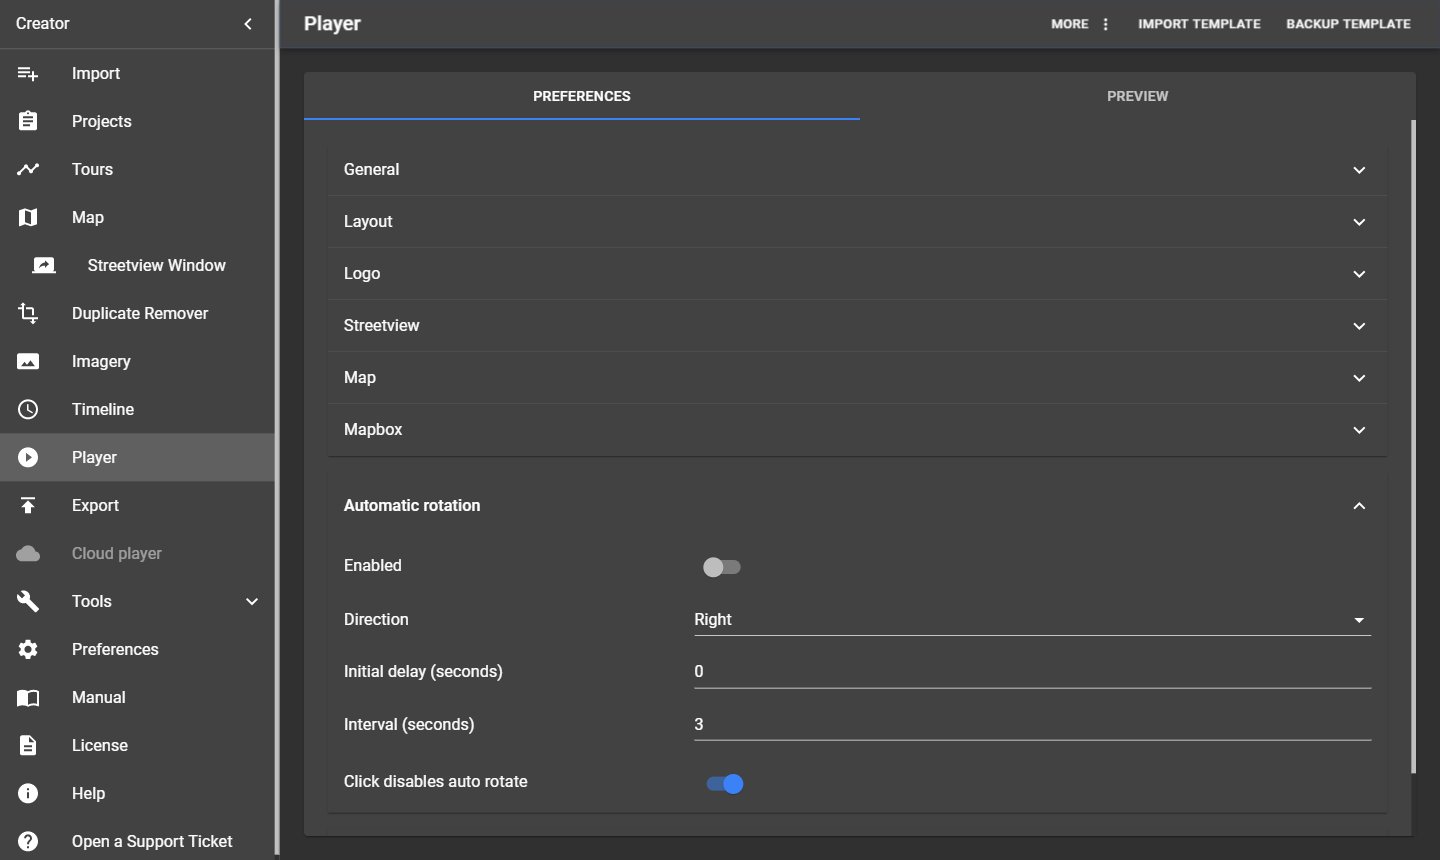
| Setting | What it does |
|---|---|
| Enabled | The streetview turns slowly by itself, for example on a screen in a shop window. |
| Direction | Left or Right. |
| Initial delay (seconds) | Wait time before the rotation starts. |
| Interval (seconds) | Speed of the rotation. |
| Click disables auto rotate | A click by the user stops the rotation. |
12.8 Translations
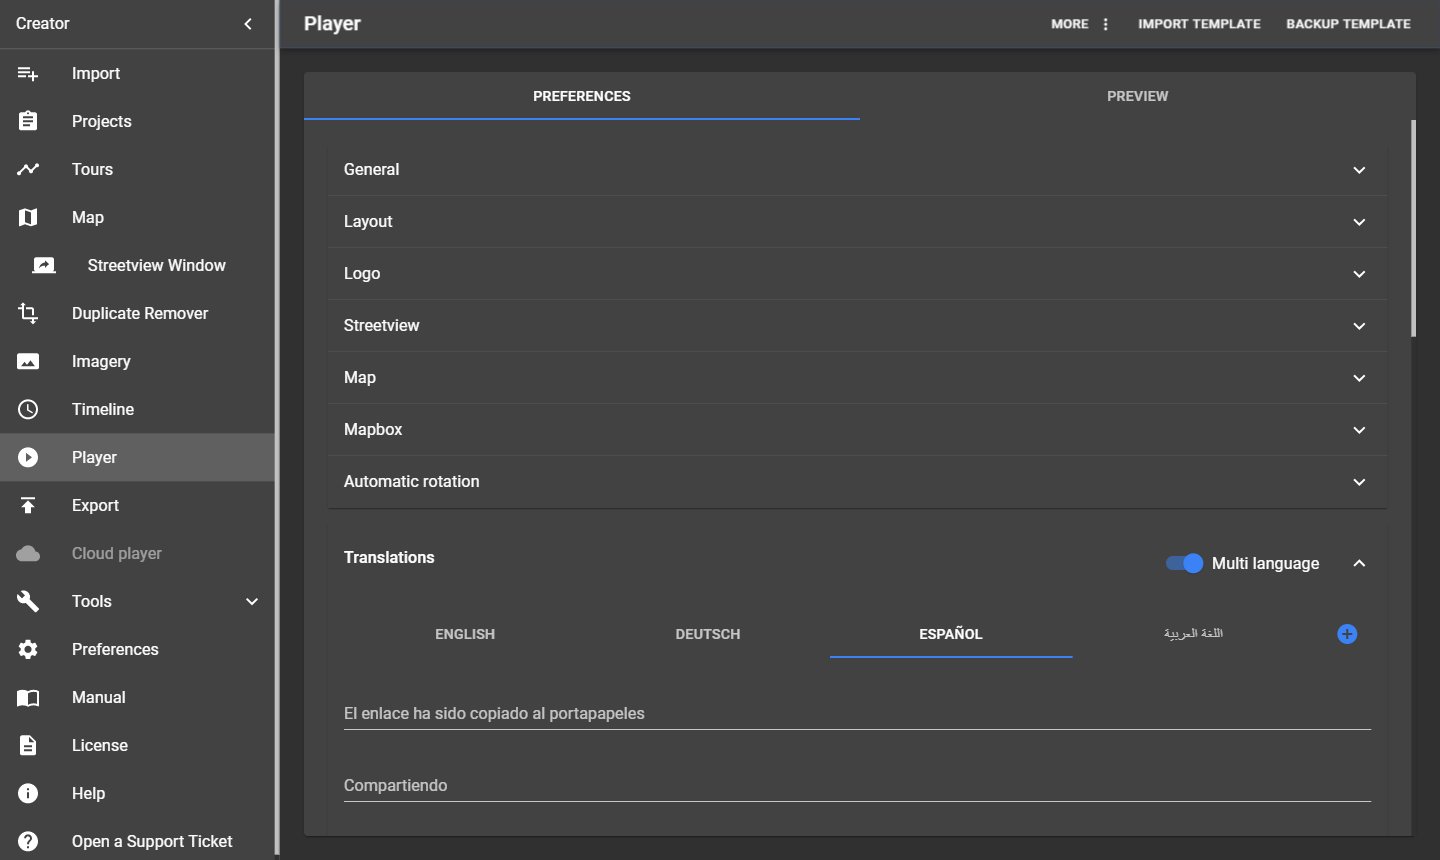
The player comes in English, German, Spanish, Arabic and Greek. Each text of the player can be changed here, one tab per language.
| Item | What it does |
|---|---|
| Multi language | Shows a language button in the player. The player picks the language of the user's browser; if there is no match, it uses the first language. |
| Add a new Language | Adds a language: Two letter code (ISO 639-1, for example fr) and Label (for example Français). |
| Delete Language | Deletes a language and all its texts. Back up the player settings first with Backup template (see Templates and Legacy Player). To bring back a built-in language, add it again with its code (en, de, es, ar, el). |
12.9 Preview
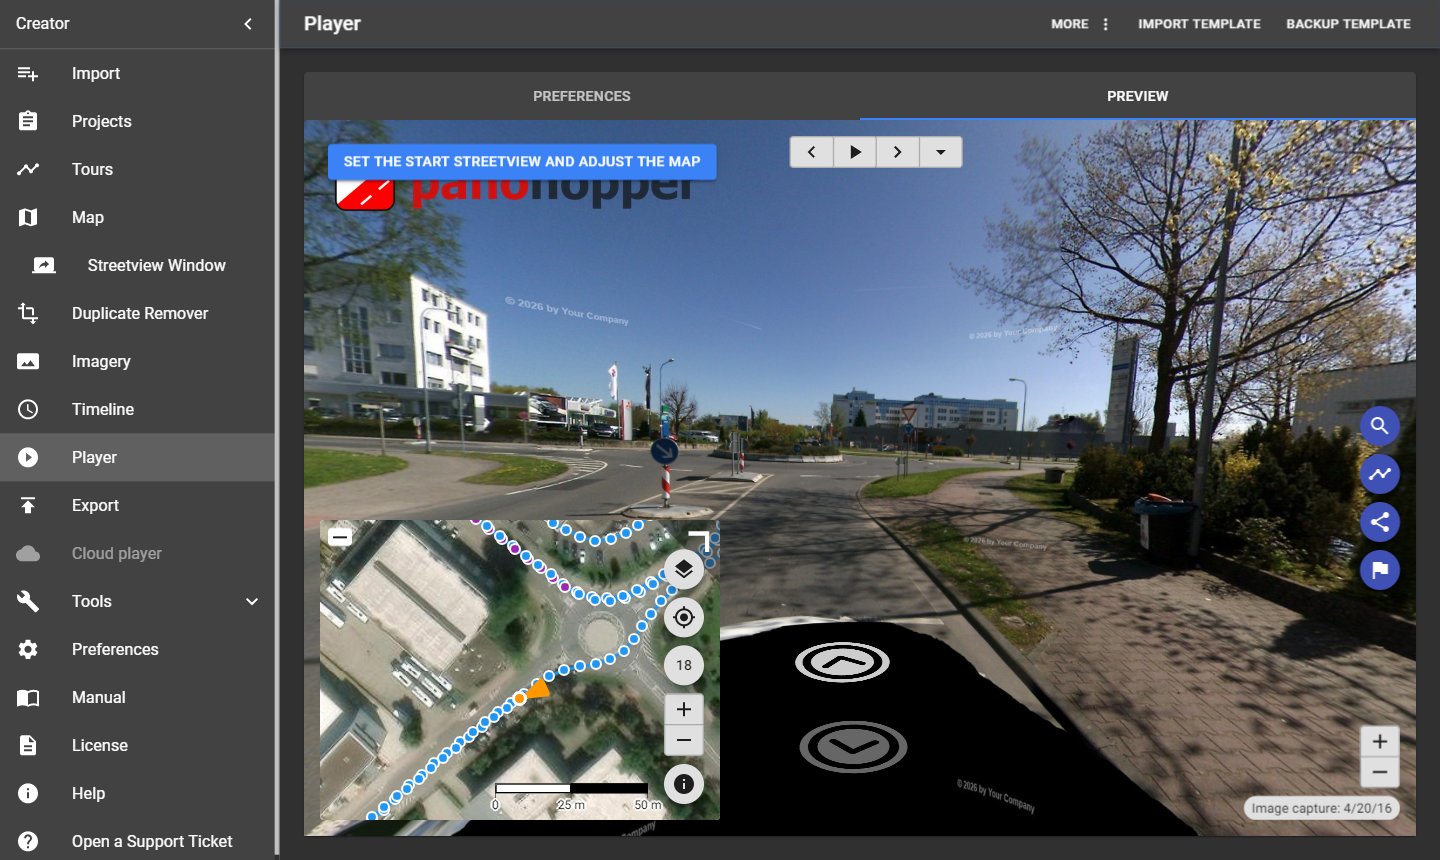
The Preview tab shows the player as it will be exported, with your settings and the chosen player. Streetviews shown here are stitched on the fly.
Note: Player 2 and Legacy use krpano. Without a krpano licence, the preview and the exported player show a small "krpano demo version" mark. See Help.
12.10 Templates and Legacy Player
The buttons in the top right corner:
| Button | What it does |
|---|---|
| Backup template | Saves all player settings (not the streetviews) as a file, to reuse them in other projects. |
| Import template | Loads player settings from such a file. |
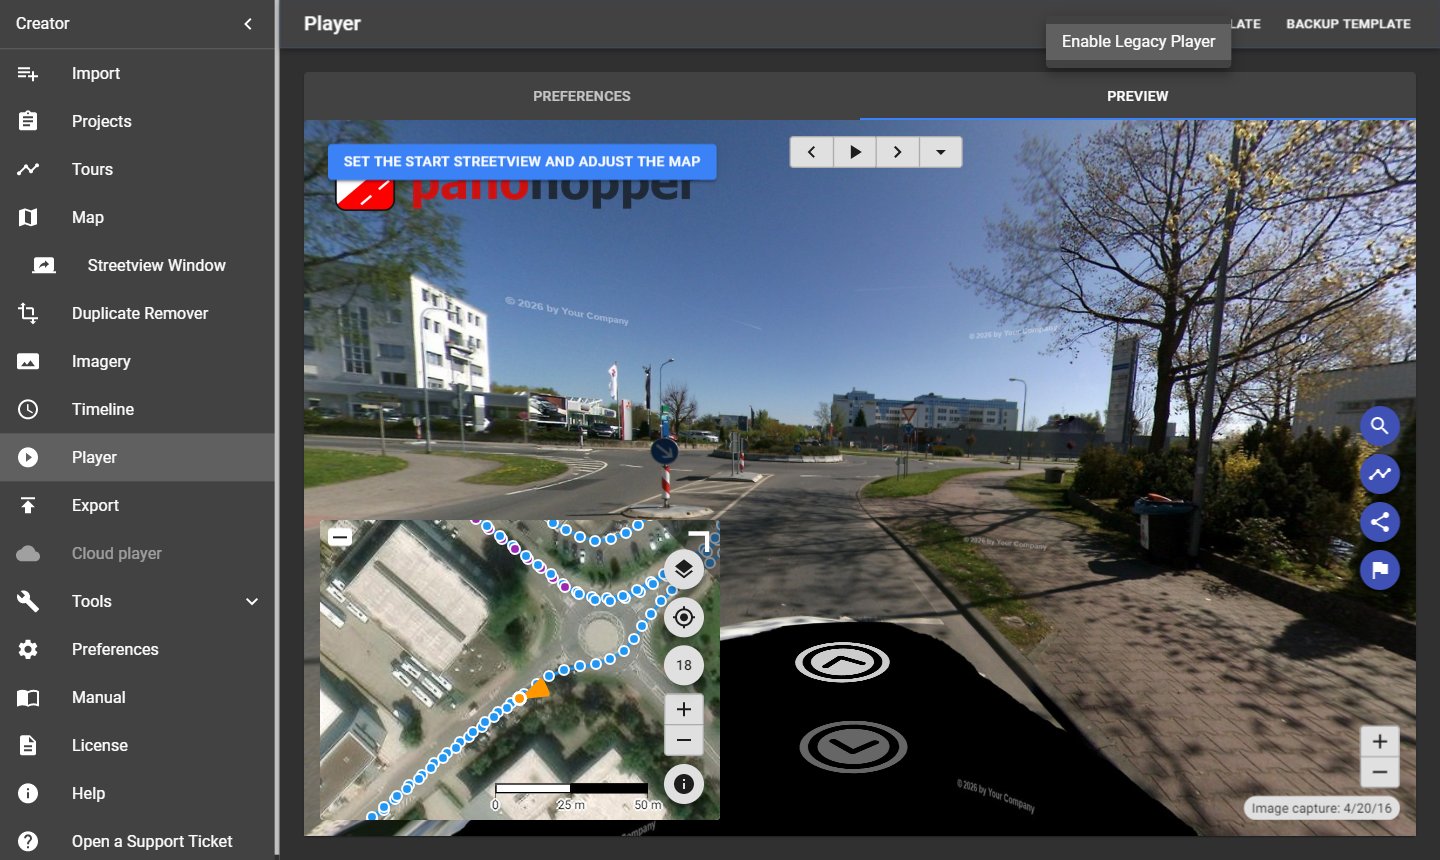
| More → Enable Legacy Player | Switches this project to the old Legacy Player of Creator 5 (folder player, for Windows Instant Player, Linux/LAMP and Android). The page then shows that player's settings. More → Disable Legacy Player switches back. |
12.11 Keyboard shortcuts in the player
Player 2 and Legacy: Page Up / Page Down go to the next / previous streetview, the arrow keys look around, and Ctrl + Shift + H hides the hotspots and arrows for screenshots.
13 Export
Menu → Export creates the streetviews and the player, and publishes them to the Amazon cloud if you want. The page has two cards, Process and Publish, and the buttons Start and View Player.
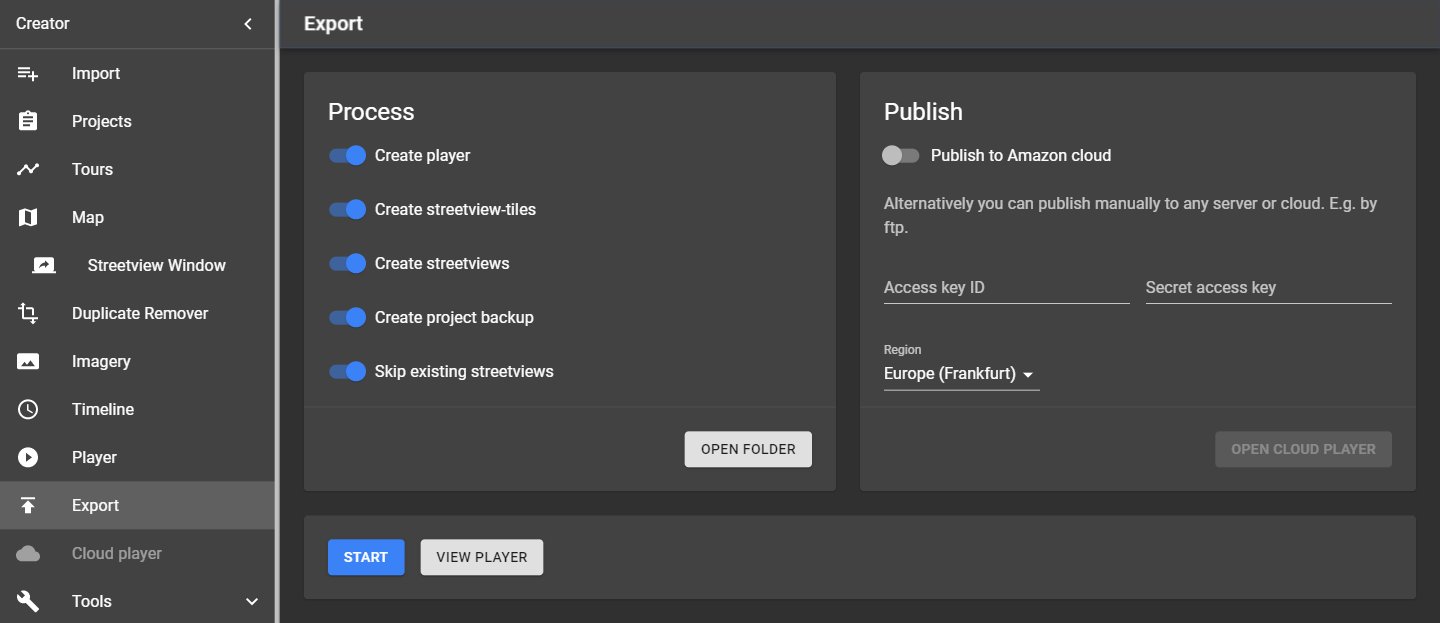
13.1 Process
| Setting | What it does |
|---|---|
| Create player | Creates the player chosen in Preferences → Player with your Player settings. With Legacy, Export also creates the old Legacy Player in the folder player. |
| Create streetview-tiles | Stitches the photos and cuts each streetview into tiles for the player. Needed by all players. |
| Create streetviews | Also saves each streetview as one 8192 × 4096 pixel image with position data (EXIF), for review, for G-Publisher or for other programs. |
| Create project backup | Saves a project backup each time you start, in the project's backups folder. Recommended. |
| Skip existing streetviews | When you export a project again, streetviews that already exist are not stitched again. Saves a lot of time. |
Open folder opens the project's output folder.
13.2 Start, stop and the log
- Start begins the export. A progress bar shows the remaining time; the log below lists every step.
- Stop ends the export; you can continue later with Start (use Skip existing streetviews).
- Streetviews with missing or damaged photos are skipped and listed in the log with the full path of the
photo, for example
…\camera-20210624-100101\2\000000026.jpg. See Troubleshooting.
13.3 What Export creates
All files go into the output folder, in a subfolder named after the project:
| Folder | Content |
|---|---|
player3, player2 or player2-legacy |
The player of your choice (static web files, no database). |
panorama-tiles (Player 3 and 2) or panorama-tiles-legacy (Legacy) |
The streetview tiles. |
player |
Only with Legacy: The old Legacy Player (Windows Instant Player, Linux/LAMP, Android). |
panoramas |
The 8192 × 4096 streetview images (Create streetviews). Not needed for a working player. No need to publish. |
backups |
Project backups (Create project backup). Not needed for a working player. No need to publish. |
The player's map gets a zoom limit for each built-in base layer: For Esri maps, Creator asks Esri which detail levels exist at your streetviews (internet needed, otherwise fixed limits are used). Zooming in further enlarges the last available level instead of showing "Map data not yet available".
13.4 View Player
View Player opens the exported player in your web browser, straight from the output folder.
If you exported the project with more than one player, there is one button per player instead: View player3, View player2 and View legacy player: Krpano.
13.5 Publish
| Setting | What it does |
|---|---|
| Publish to Amazon cloud | Uploads the player and the active streetview tiles to your Amazon Web Services account at the next Start. |
| Update existing Cloud player / Publish a new Cloud Player | When the project was published before: Update the existing player (same address, only new streetviews are uploaded) or create a new one. |
| Access key ID / Secret access key | Your AWS keys, see Publishing on Amazon Web Services. |
| Region | The AWS region; choose the one closest to your users. |
| Open Cloud player | Opens the published player in your browser. |
Only active streetviews are uploaded. You can also publish by hand: Copy the player folder and the tiles folder to any web server, see Publishing on your own web server.
13.6 Export without an open project
Without an open project, Menu → Export asks you to open a project first.
14 Publishing on Amazon Web Services
The easiest way to publish a player is the Amazon cloud: One click on Export, no server to run, low cost, and it scales by itself. The player's address contains a random part (UUID); only people who get the link can find it.
14.1 Create an AWS account and keys
You need this only once.
- Go to https://aws.amazon.com/console/ and sign in, or create an Amazon Web Services account.
- Open IAM → Users → Create user, for example with the name creator.
- Give the user the permissions to publish (for example the policy AdministratorAccess, or a narrower policy for S3, CloudFront and Lambda if your IT prefers).
- Open the user → Security credentials → Create access key. Choose Application running outside AWS.
- Copy the Access key ID and the Secret access key into Creator: Export → Publish or Preferences → Amazon cloud.
- Download the keys as a
.csvfile and keep it in a safe place; the secret key is shown only once.
Some regions (for example Africa (Cape Town), Asia Pacific (Hong Kong), Europe (Milan), Middle East (Bahrain)) must be enabled in your AWS account settings before you can publish there.
Note: Anyone with both keys can use your AWS account. Don't share them.
14.2 Custom domain and CDN (CloudFront)
For your own domain name or for high traffic from many regions, put a CloudFront distribution in front of the player:
- Open https://console.aws.amazon.com/cloudfront/ → Create distribution.
- Origin domain: The player's address from Creator (S3 bucket), for example
demo3-….s3.eu-central-1.amazonaws.com. - Viewer protocol policy: Redirect HTTP to HTTPS. Create the distribution.
- Wait until its status is Deployed. The address looks like
https://d2z6fc2o2b33zp.cloudfront.net/index.html.
A new distribution can take up to 24 hours until it works everywhere. Web address parameters such as
v_lat and v_lng (Player API) work once it is deployed.
14.3 Embed the player in a web page
Add this to your page, with your player's address:
<iframe src="https://d2z6fc2o2b33zp.cloudfront.net/index.html"
  width="100%" height="600" frameborder="0" style="border:0" tabindex="0"></iframe>
14.4 Publishing on your own web server
The player is a set of static files (HTML, JavaScript, CSS, images), with no database. It runs on any web server: Apache, NGINX, IIS, or any cloud storage.
- Copy the player folder (
player3,player2orplayer2-legacy) and its tiles folder (panorama-tilesorpanorama-tiles-legacy) side by side to your server, for examplehttps://www.your-server.com/projects/Demo3/player3/and…/Demo3/panorama-tiles/. - Open
https://www.your-server.com/projects/Demo3/player3/in a browser.
To embed it, use an iframe with that address, as above.
15 Cloud player
Menu → Cloud player manages the player published to the Amazon cloud with Export → Publish. The menu item is available after the project has been published. The tabs Users and Statistics appear once the cloud player exists; the screenshot below shows a project before publishing.
15.1 General
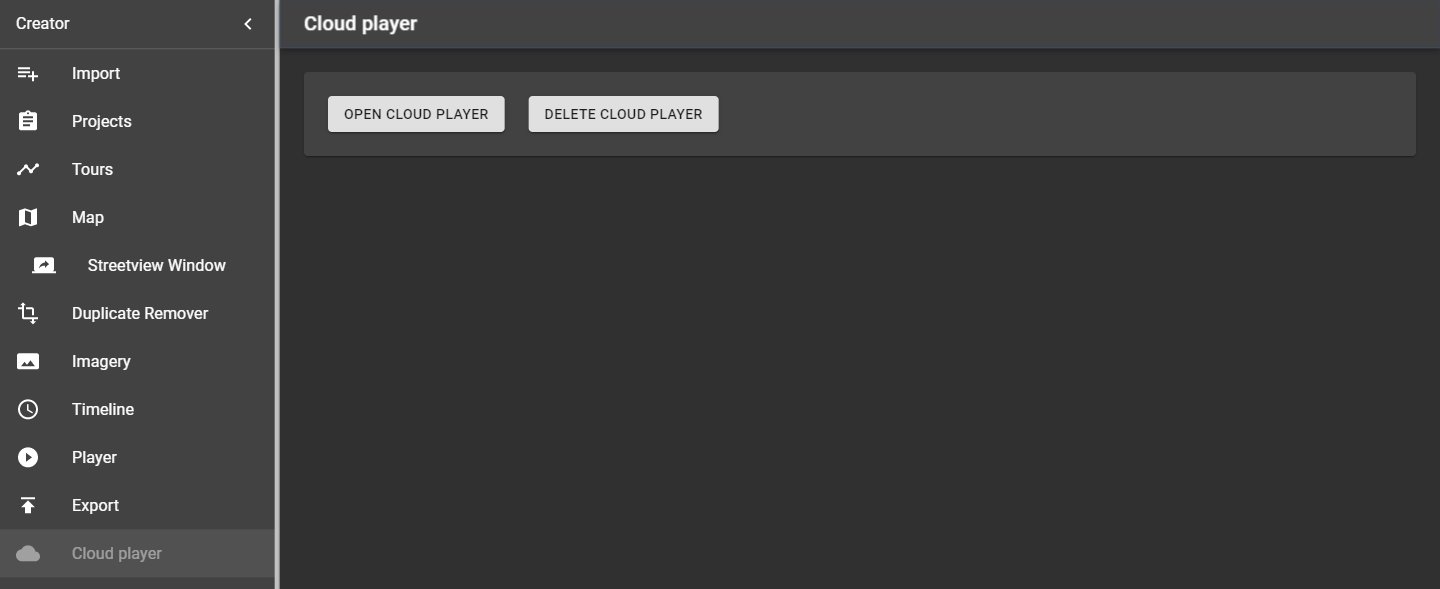
| Button | What it does |
|---|---|
| Open Cloud player | Opens the published player in your browser. |
| Delete Cloud player | Deletes the player and its streetview tiles from the Amazon cloud and from the project. You confirm by typing the project name. The same address can't be restored. |
To delete the player only from the cloud and keep its address in the project (to publish again to the same address later), use Preferences → Amazon cloud instead.
15.2 Users
| Item | What it does |
|---|---|
| Enable authentication | The player asks for a user name and password. |
| Add user (top right) | Adds a user: Username and Password, then Save. |
| Edit / Delete | Change or remove a user. |
Changes take effect after publishing again (Export → Start). Only the player is updated; the streetviews are not uploaded again, so this is fast.
15.3 Statistics
After publishing, the cloud player collects visitor statistics (Amazon CloudWatch). By default the last 7 days are shown; change From and To in the top right corner for another period. In your AWS account you can build more charts from the same CloudWatch data.
16 Tools
Menu → Tools opens a submenu with nine tools; the menu scrolls so that all of them are visible. Most of them change many streetviews at once; most have a Reset button to undo their changes.
16.1 Skip
Tools → Skip thins out the streetviews, for example to turn a recording made every 1 m into one streetview every 5 m, or an interval recording into a distance recording. This greatly reduces the number of streetviews to process. Always run it after the Duplicate Remover.
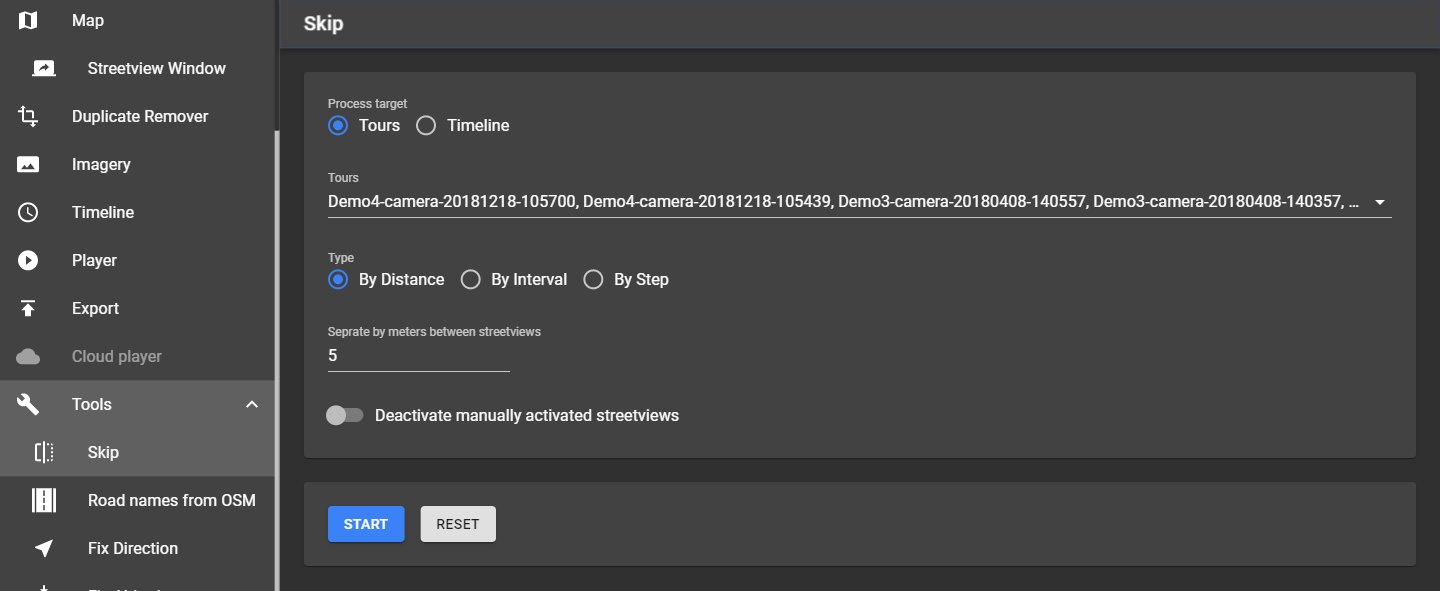
| Setting | What it does |
|---|---|
| Process target | Only with timelines: Selected Tours or selected Timelines. |
| Tours | The tours to process. The list shows each tour's recording mode (for example Distance 1.0 m), as on the Tours page. |
| Type | By Distance: Metres between streetviews. By Interval: Seconds between streetviews. By Step: Keep every x-th streetview. |
| Deactivate manually activated streetviews | Off by default: Streetviews activated by hand stay active. |
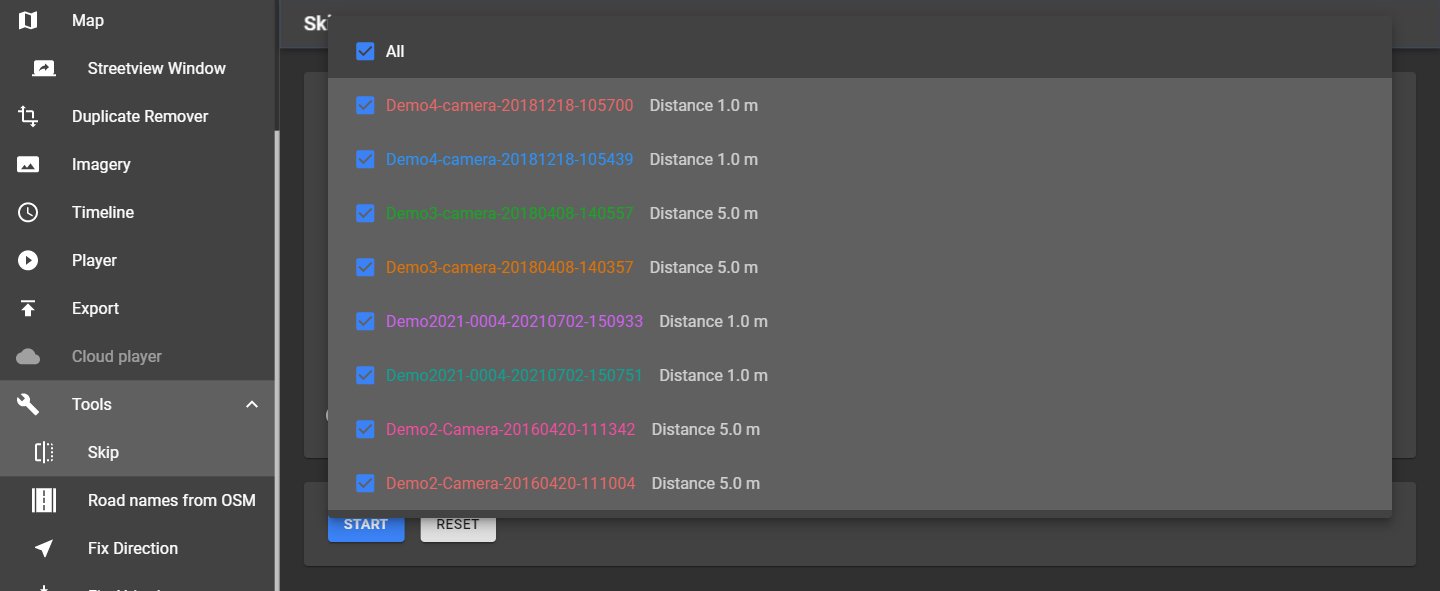
Start applies it; try a few values. Reset activates all streetviews deactivated by Skip and the Duplicate Remover.
16.2 Road names from OSM
Tools → Road names from OSM gives every streetview the name of the nearest road in OpenStreetMap. Road names can be shown in the player as hotspot labels and selected on the Map.
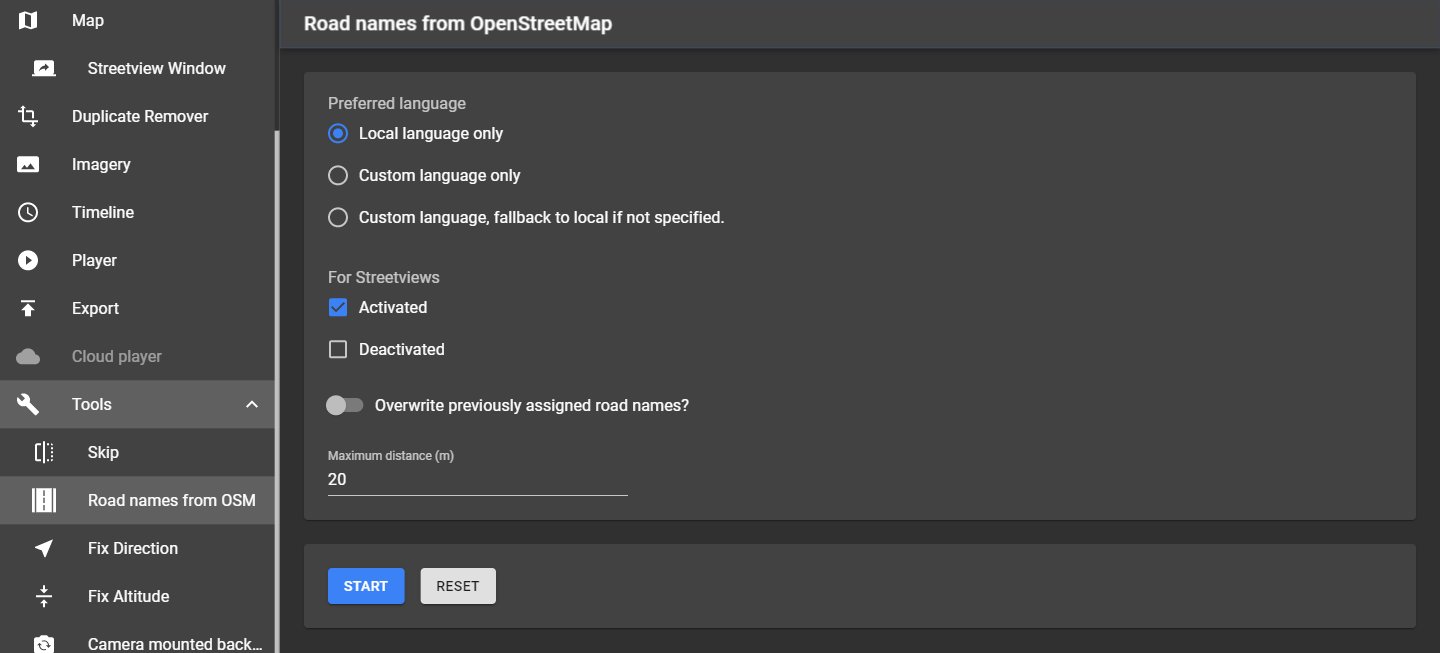
| Setting | What it does |
|---|---|
| Preferred language | Local language only (OSM "name"), Custom language only ("name:xx"), or Custom language, fallback to local if not specified. Custom language is the two-letter code, for example en. |
| For Streetviews | Activated and/or Deactivated streetviews. |
| Overwrite previously assigned road names? | Off: Streetviews that already have a road name are skipped. |
| Maximum distance (m) | Roads farther away are ignored. |
Needs an internet connection. Reset removes all road names, also those entered by hand on the Map.
16.3 Fix Direction
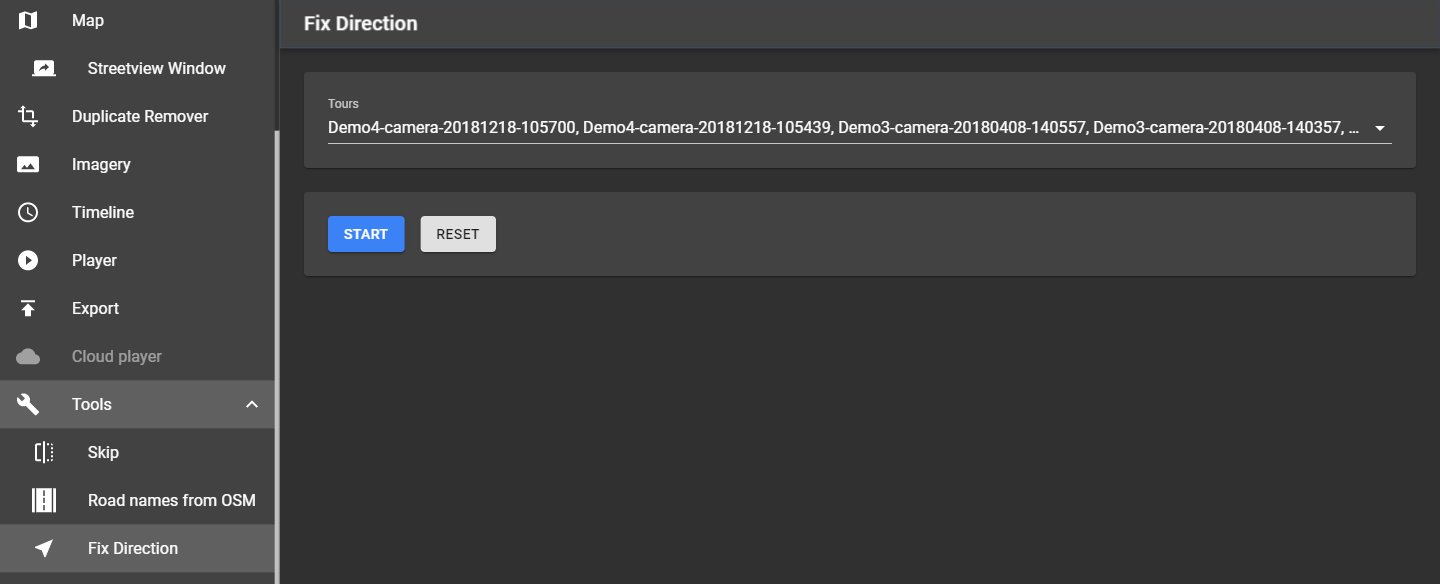
Tools → Fix Direction calculates the driving direction of each streetview from the positions of its neighbours. Use it when the recorded directions of most streetviews are wrong. Select the Tours, click Start. Reset restores the recorded directions.
16.4 Fix Altitude
Tools → Fix Altitude replaces the recorded heights with heights from a terrain model (NASA SRTM, about 90 m grid). Use it when the recorded heights are wrong. Select the Tours, click Start. Reset restores the recorded heights.
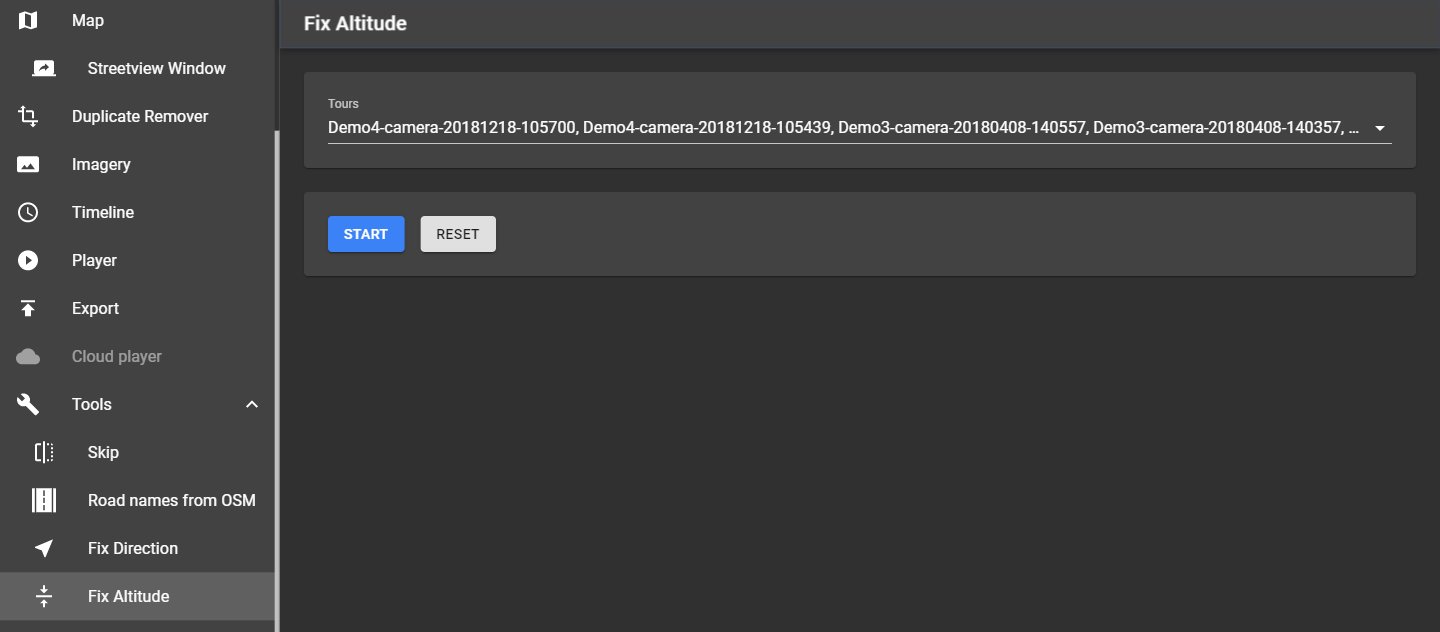
Needs an internet connection: Creator downloads the terrain data for the project area once (about 3 MB per 1° × 1° area). The area covers all streetviews, active and deactivated; move streetviews with wrong positions closer first.
16.5 Camera mounted backwards
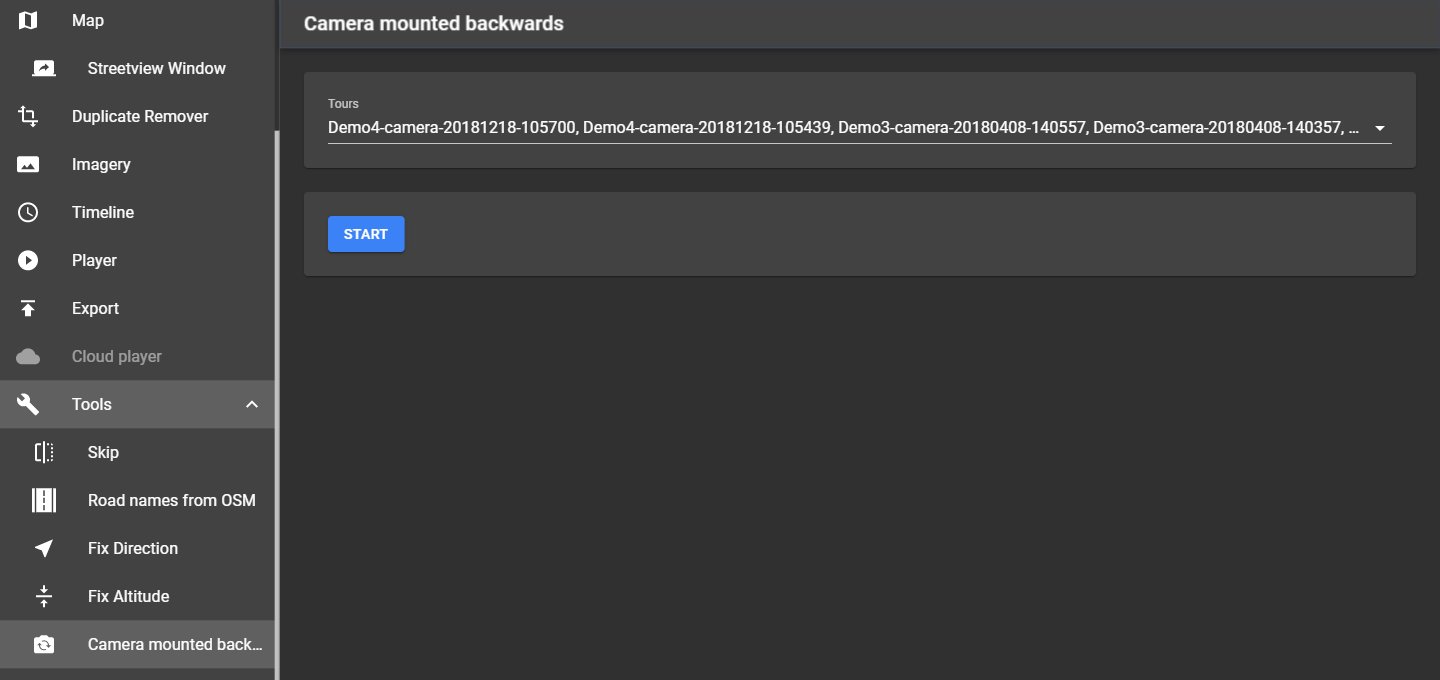
Tools → Camera mounted backwards turns all streetviews of the selected tours by 180°, for recordings made with the camera accidentally mounted backwards. Click Start again to undo. Only for recordings of the Applied Streetview camera.
16.6 Export Metadata
Tools → Export Metadata saves the data of the streetviews (ID, position, altitude, direction, date, road, POI …) as a file, for example for a GIS or another program.
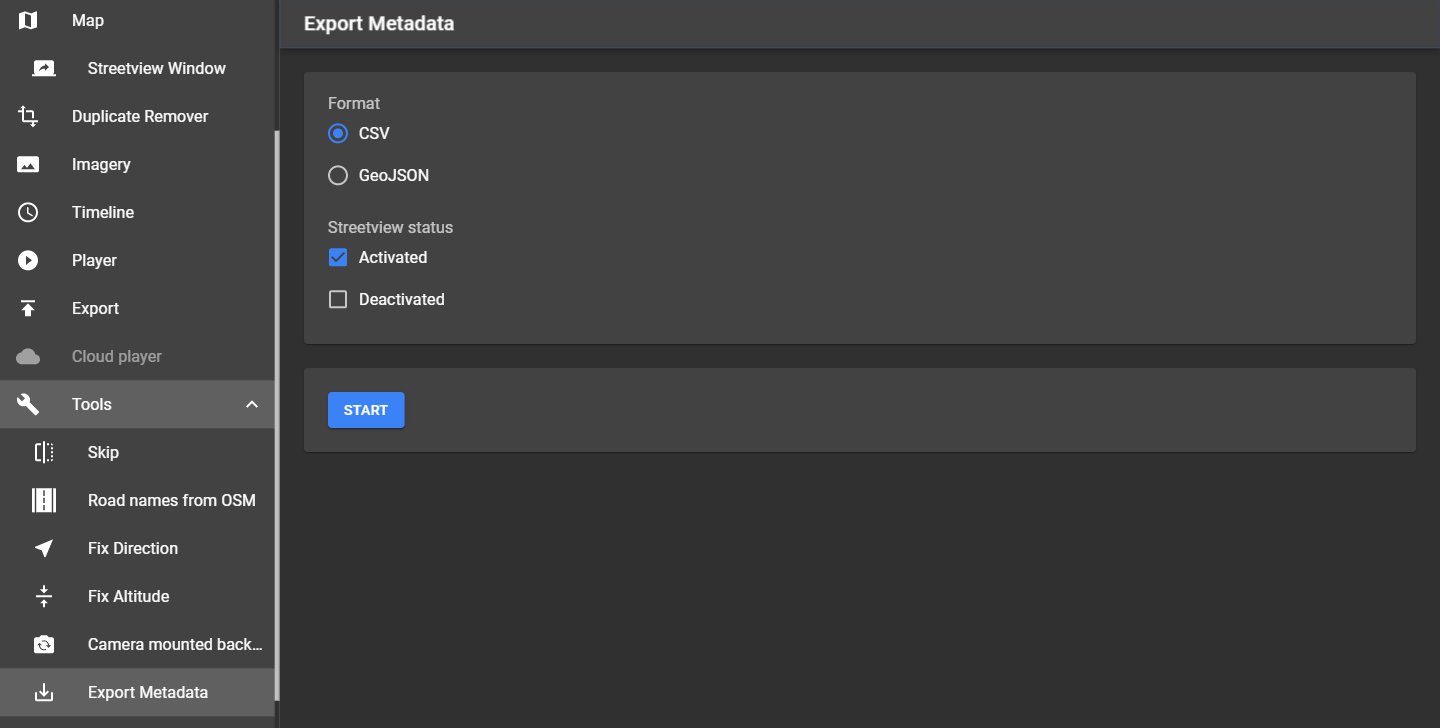
| Setting | What it does |
|---|---|
| Format | CSV (comma-separated, text in double quotes) or GeoJSON. |
| Streetview status | Activated and/or Deactivated streetviews. |
Start asks for the file name (default: The backup folder). Open output file opens it.
16.7 Copy Sources
Tools → Copy Sources packs parts of the project into a zip archive, for example to send it to support or to copy only some of the data.
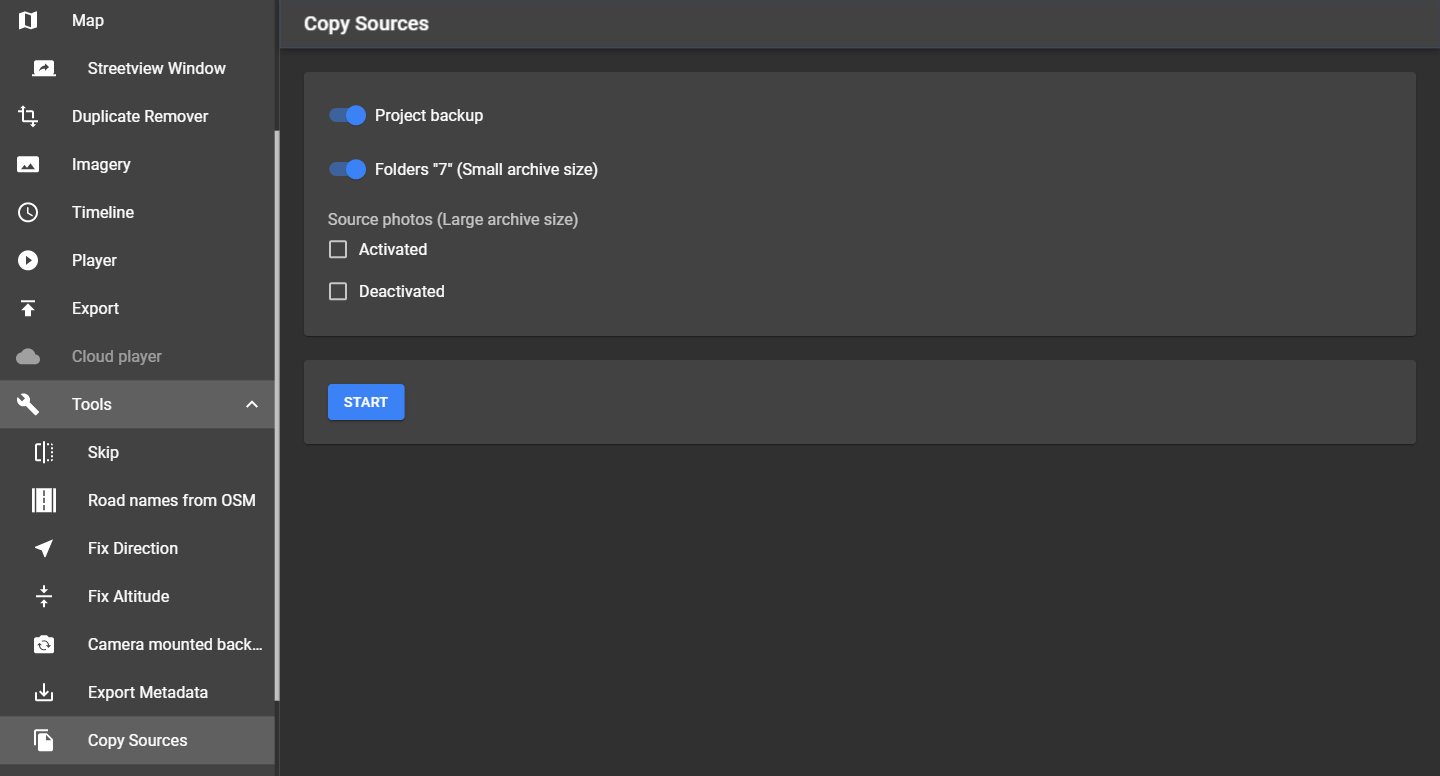
| Option | What is added |
|---|---|
| Project backup | The Creator project backup. |
| Folders "7" (Small archive size) | The position and log data of all tours, no photos. |
| Source photos (Large archive size) | The photos of the Activated and/or Deactivated streetviews. |
Start creates the archive; Open output folder opens its folder.
16.8 Merge Players
Tools → Merge Players combines the players of several projects into one player, for example the city projects of a whole country.
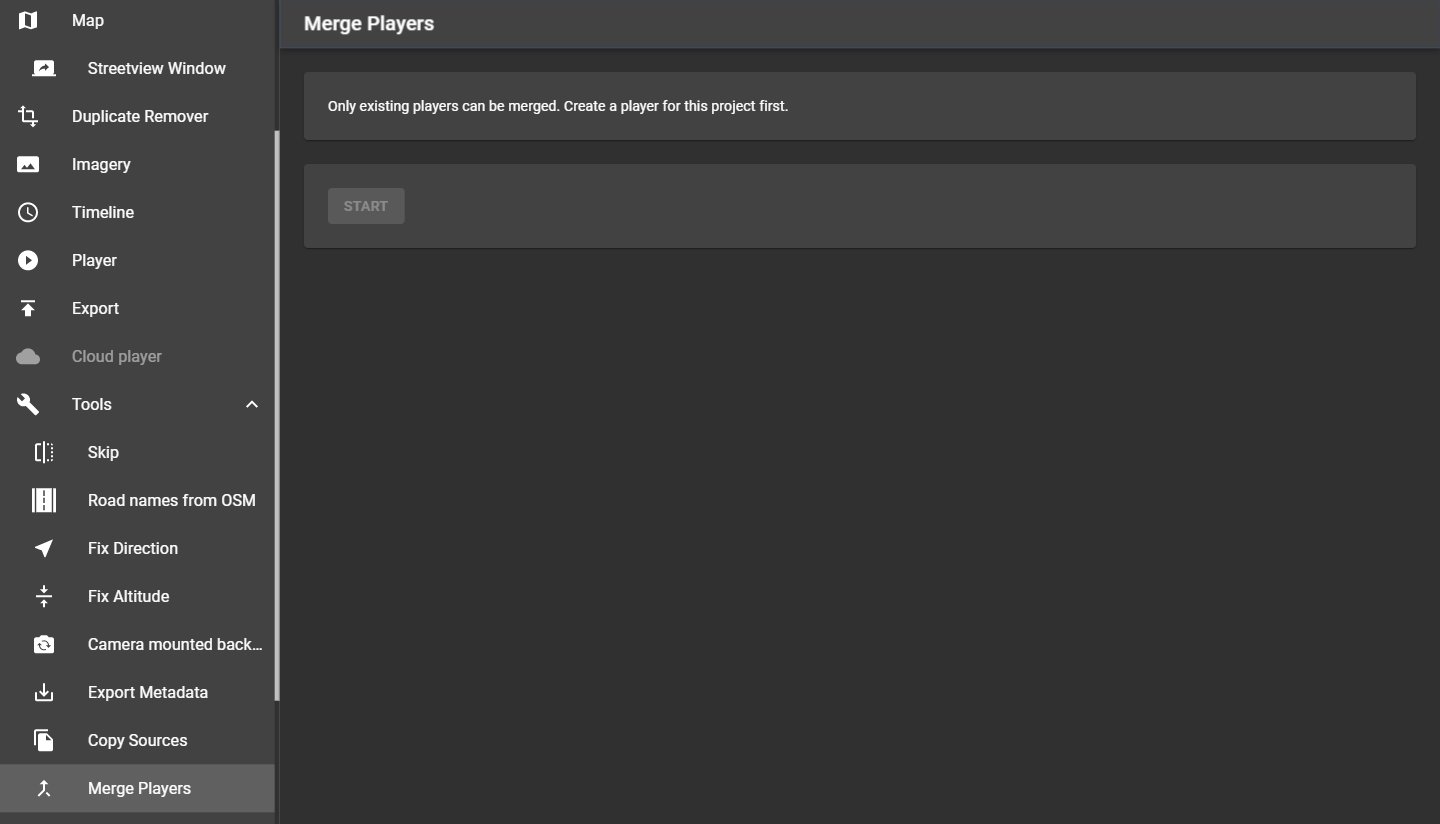
- Export a player in every project first. Projects without a player can't be selected.
- Tick the Players to merge.
- Copy panoramas-tiles: Also copies the streetview tiles of all projects into the merged player's folder, so it can be published as one.
- Start creates the merged player in a new folder in the output folder. The projects are not changed. Open output folder opens it.
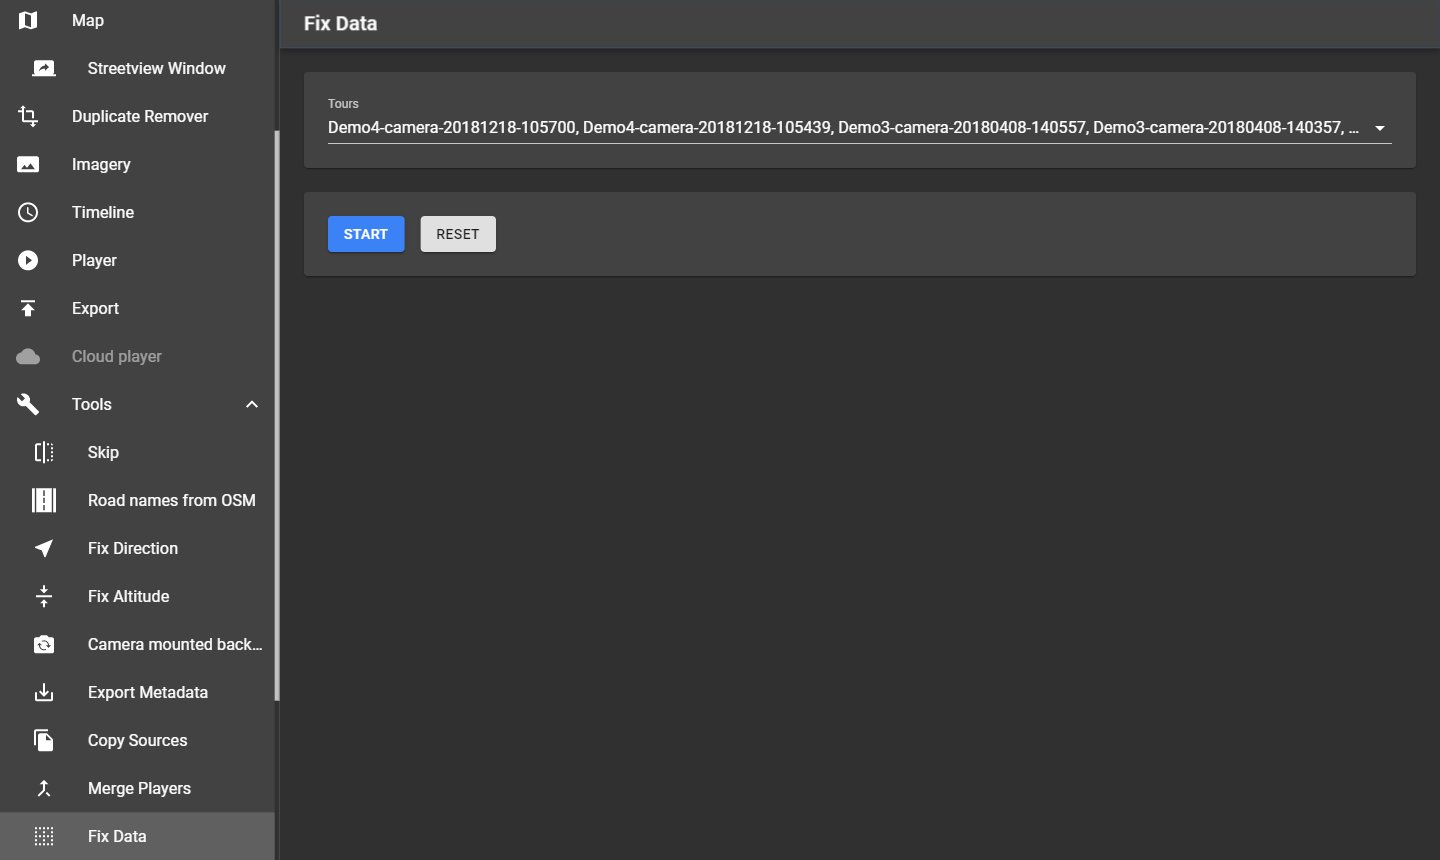
16.9 Fix Data
Tools → Fix Data deactivates streetviews whose photos are missing, and writes them to the log. Select the Tours and click Start. Reset activates them again; it also resets the changes of Skip and the Duplicate Remover.
17 Preferences
Menu → Preferences holds the settings that apply to all projects. Changes are saved at once; there is no Save button. The page has five tabs: General, Player, Folders, Amazon cloud and Advanced.
17.1 General
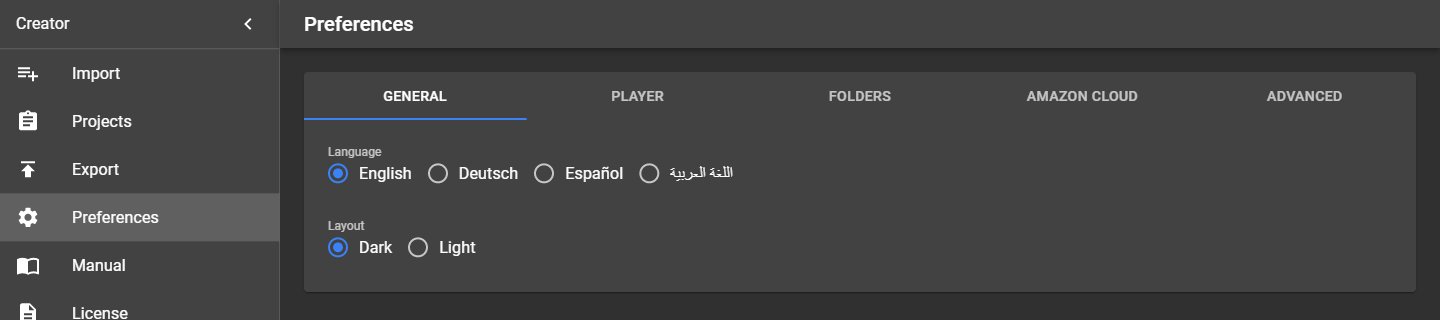
| Setting | What it does |
|---|---|
| Language | Language of Creator: English, Deutsch, Español or العربية (Arabic, written right to left). The exported players have their own language settings, see Player → Translations. Changing the language closes the Streetview Window. |
| Layout | Colours of Creator. Dark (default): dark, with blue buttons and switches. Light: the light look of earlier Creator versions. The change applies immediately and has no effect on projects or exports. |
The same page in both layouts:
17.2 Player
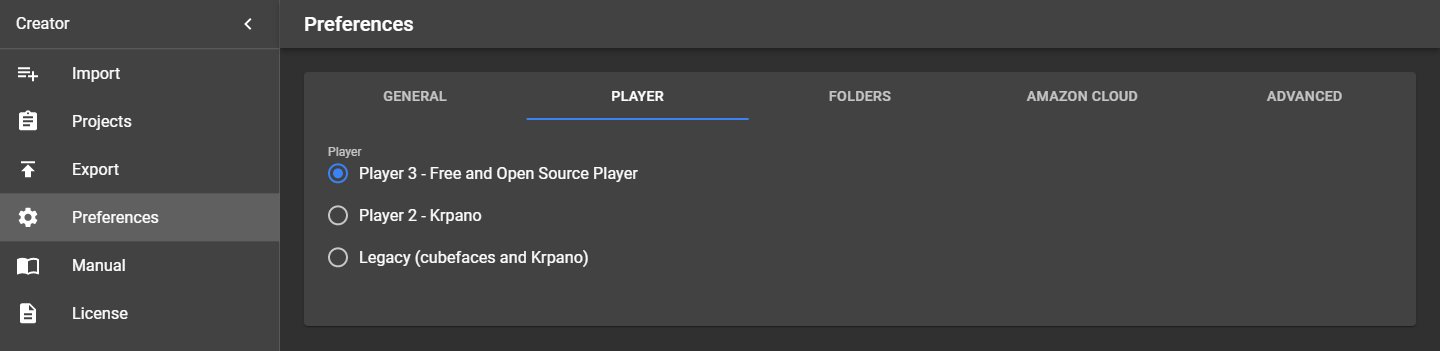
Choose the player that Export creates. The choice applies to all projects and to the next export.
| Player | What it is | Player folder | Streetview tiles |
|---|---|---|---|
| Player 3 – Free and Open Source Player (default) | Player built from free open-source parts (Photo Sphere Viewer, OpenLayers). No licence costs. | player3 |
panorama-tiles |
| Player 2 – Krpano | Player based on krpano, with hotspots, arrows and click navigation. | player2 |
panorama-tiles |
| Legacy (cubefaces and Krpano) | The player of Creator 8.0.5, for projects that must look as before. | player2-legacy |
panorama-tiles-legacy |
The folders are created inside the project's output folder, for example
D:\Creator output\Demo3\player3. Player 3 and Player 2 use the same streetview tiles, so switching
between them does not create the tiles again. Legacy uses its own tile format.
Tip: If you export the same project with several players, Export shows one View button per player, for example View player3 and View legacy player: Krpano.
17.3 Folders
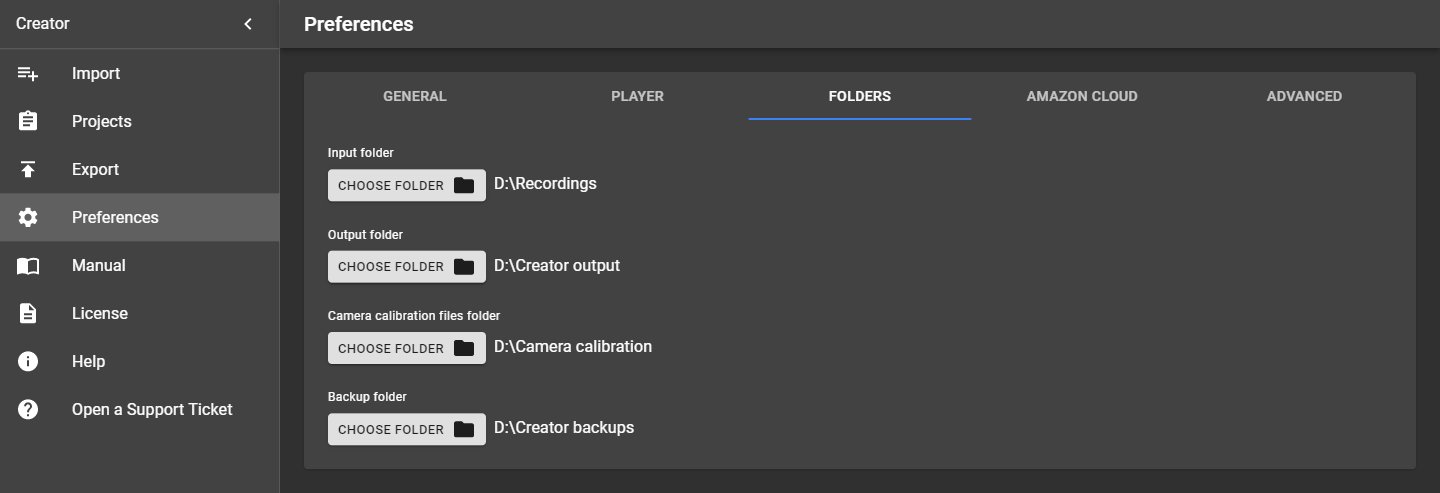
| Folder | Used for |
|---|---|
| Input folder | Where Creator starts looking when you import a new recording. |
| Output folder | Where Export writes players, streetview tiles and panoramas. Each project gets its own subfolder with the project name. A project can also have its own output folder. |
| Camera calibration files folder | Holds the camera calibration files (<camera serial number>.pto). Creator looks for a tour's calibration file here first, then in the folder that holds the tour folders. Required before Export and Imagery can stitch. See Troubleshooting → Camera calibration files. |
| Backup folder | Default folder for project and tour backups and for Tools → Copy Sources and Tools → Export Metadata. |
Click a folder field to choose the folder.
17.4 Amazon cloud
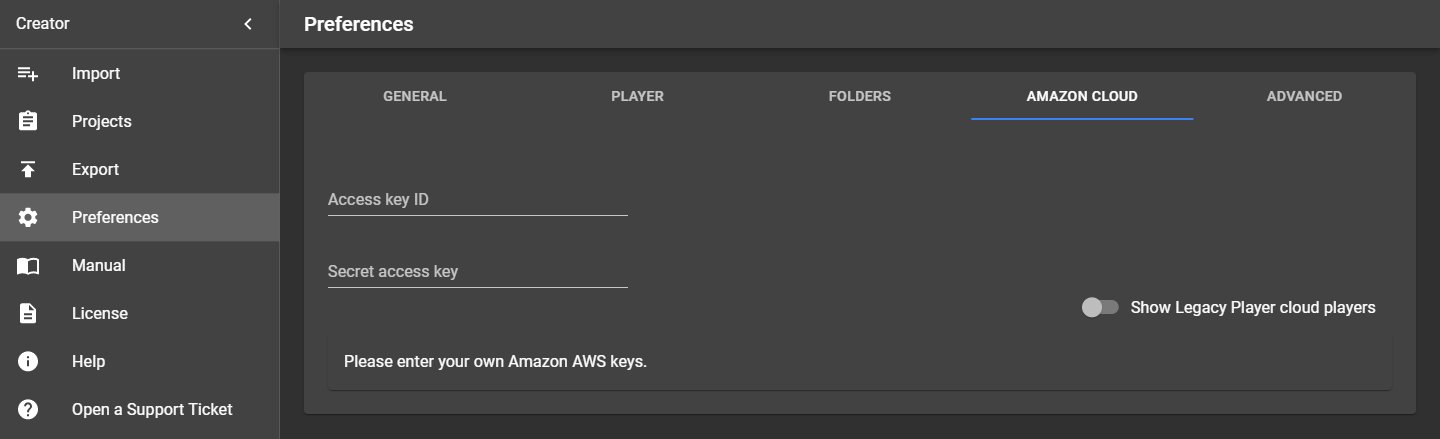
Your Amazon Web Services (AWS) keys for publishing players to the Amazon cloud:
| Setting | What it does |
|---|---|
| Access key ID | Identifies your AWS access key. |
| Secret access key | The secret part of the key. It is shown as dots. |
The same keys can also be entered on the Export page. Without keys, the tab shows Please enter your own Amazon AWS keys. With keys, it lists the players already published in your AWS account. Switch on Show Legacy Player cloud players to list the cloud players published with the Legacy Player (Player → More → Enable Legacy Player); delete old ones you no longer need, because they cost money in your AWS account. How to create an AWS account and keys is described in Publishing on Amazon Web Services.
Note: Keep the secret access key private. Anyone with both keys can use your AWS account.
17.5 Advanced
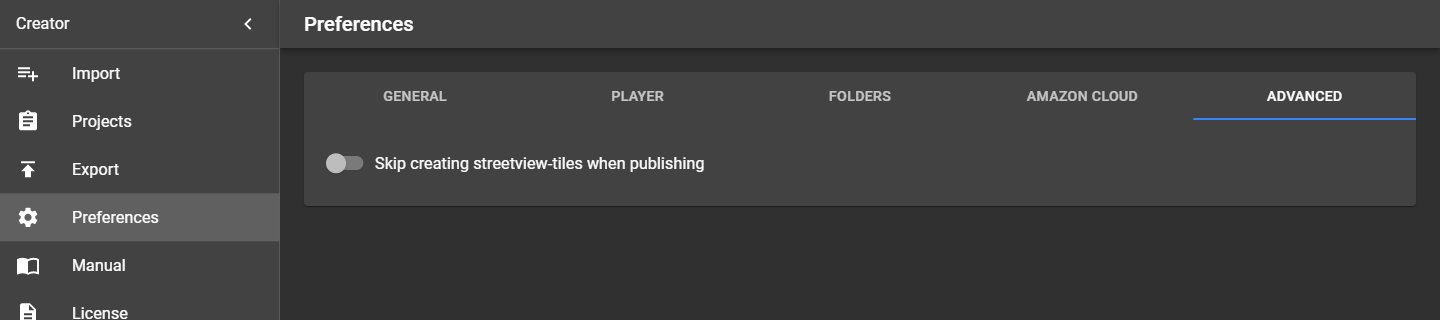
| Setting | What it does |
|---|---|
| Skip creating streetview-tiles when publishing | Off (default): Export creates the streetview tiles that the players need. On: Export creates only the panorama images and skips the tiles. Use it only if you need the panoramas alone, for example for another program. The Windows, Linux, Android and Cloud players need the streetview tiles. |
18 Manual, License and Help
18.1 Manual
Menu → Manual lists the available manuals. Click English to open this manual (PDF) in your PDF viewer.
18.2 License
Creator uses your panohopper account. Menu → License shows your account and your plan. Without a valid licence, Creator opens only this page.
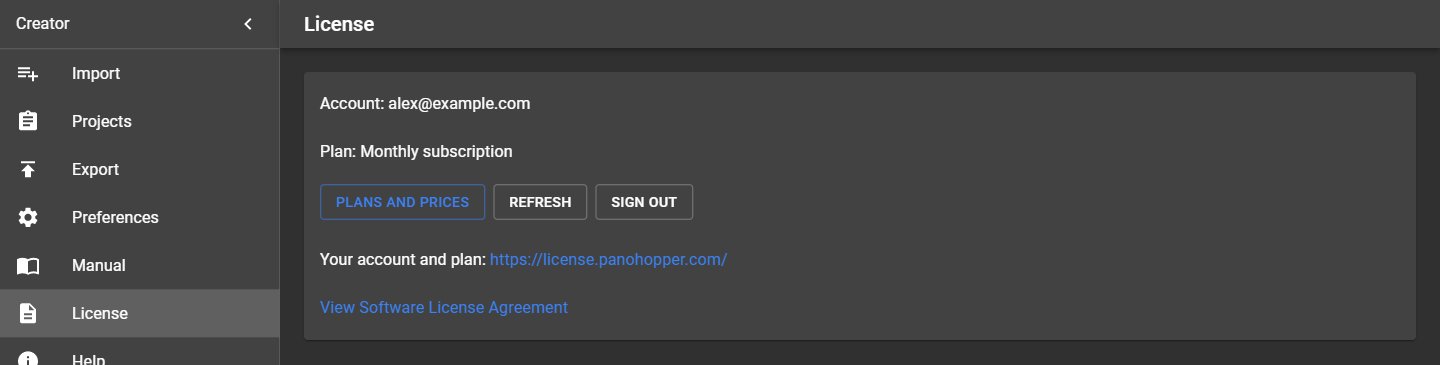
- Click Sign in. Your web browser opens the panohopper sign-in page. Sign in, or create an account. Then return to Creator.
- A new account gets the Free Trial: 10 days, no credit card. The 10 days start the first time you sign in to Creator. The Free Trial is available once per e-mail address and once per PC.
- To buy a plan, click Plans and prices: Monthly, Annual, 30 days, 1 year or Perpetual. Use the same e-mail address as in Creator. Creator shows the new plan within 10 minutes, or at once when you click Refresh.
| Field / Button | What it does |
|---|---|
| Account | The e-mail address of your panohopper account. |
| Plan | Your plan. On the Free Trial, also the days left. |
| Use on this PC | One licence runs on one PC. When you sign in to Creator on another PC, the licence moves there. Click this button to move it back to this PC. |
| Plans and prices | Opens the Creator plans on panohopper.com. |
| Refresh | Checks your plan now. Creator also checks it every 10 minutes. |
| Sign out | Signs out on this PC. Your plan stays with your account. |
| Your account and plan | Opens https://license.panohopper.com/. |
| View Software License Agreement | The licence agreement of Creator. |
Creator works offline for up to 7 days. After that, it needs an internet connection once to renew the licence.
18.3 Help
Menu → Help has these sections:
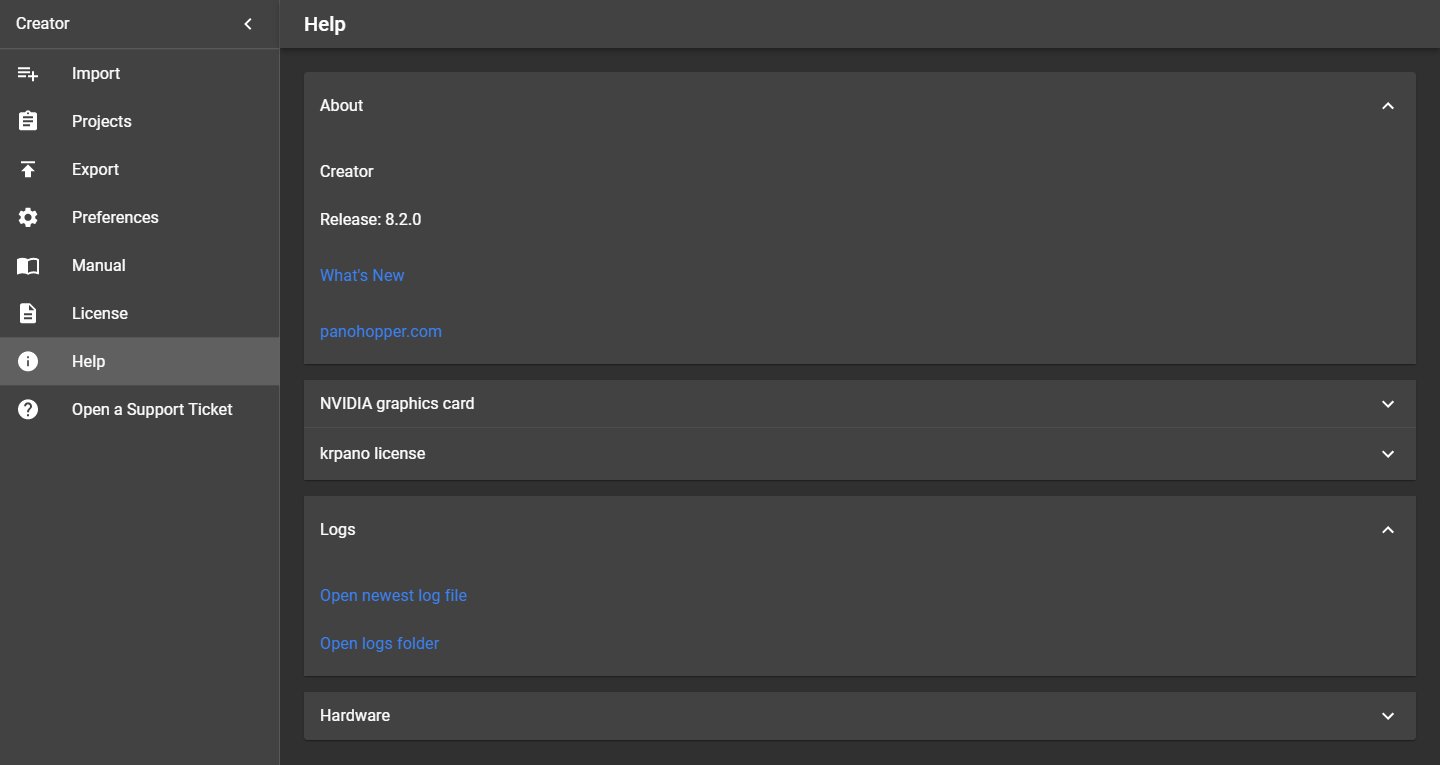
| Section | What it shows |
|---|---|
| About | The installed Creator version, the release notes (what changed in each version) and a link to panohopper.com. |
| NVIDIA graphics card | The graphics card of this PC, the requirements of the stitcher (NVIDIA RTX 20 series or newer, current driver, no CUDA installation) and the list of compatible cards. |
| krpano license | Player 2 and the Legacy players use krpano. Without a licence they show a small "krpano demo version" mark. Buy a licence at https://krpano.com/buy, click Add activation key, paste your key and confirm. Then export the players again. Player 3 doesn't need krpano. |
| Logs | Opens the newest log file or the folder with all log files. The log lists every step, warning and error, for example missing photos. |
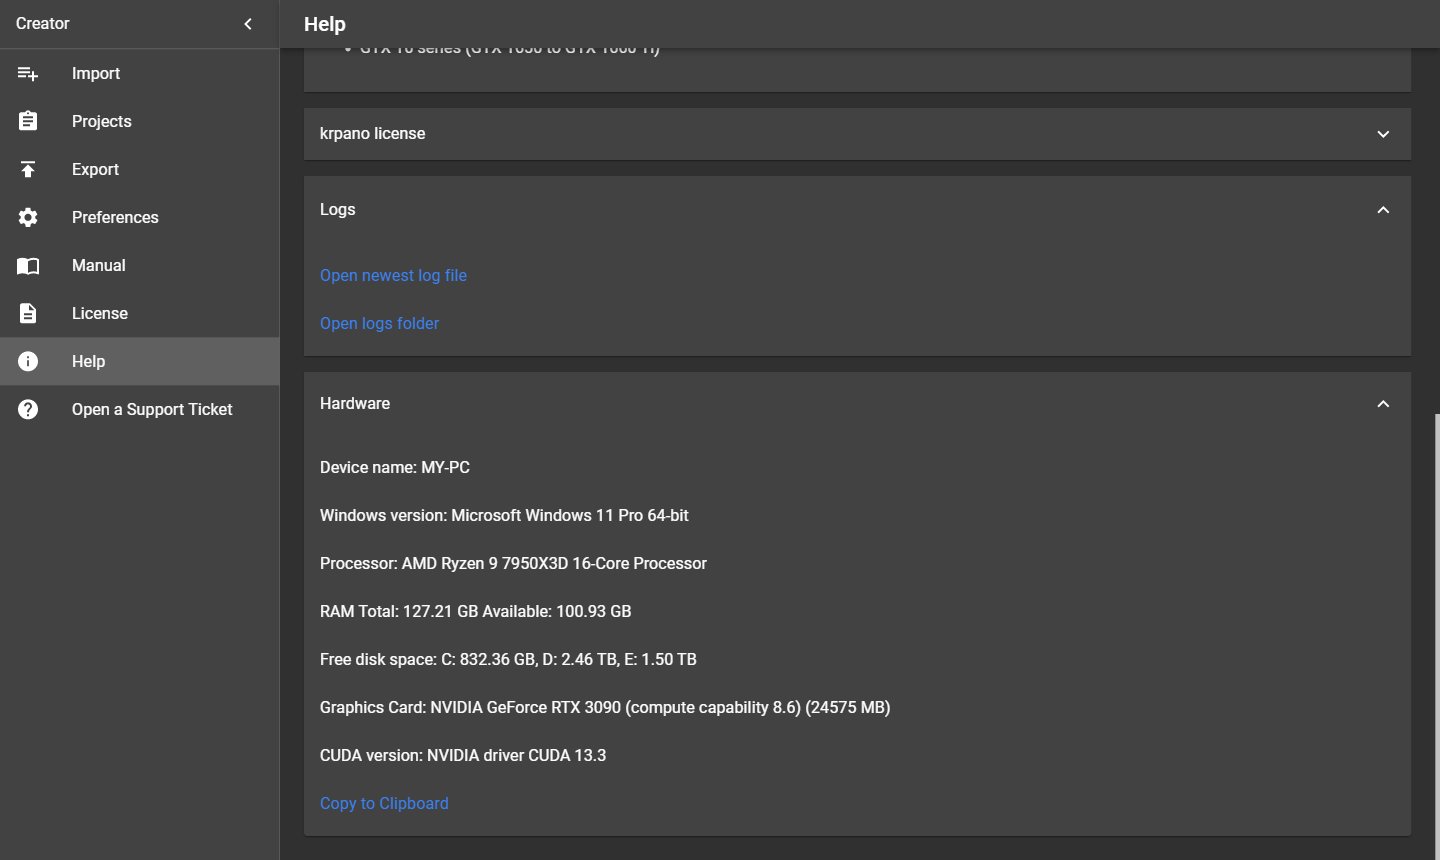
| Hardware | Data of this PC: Windows version, processor, memory, free disk space, graphics card and driver (CUDA version). Copy to Clipboard copies it, for example for a support request. |
19 Open a Support Ticket
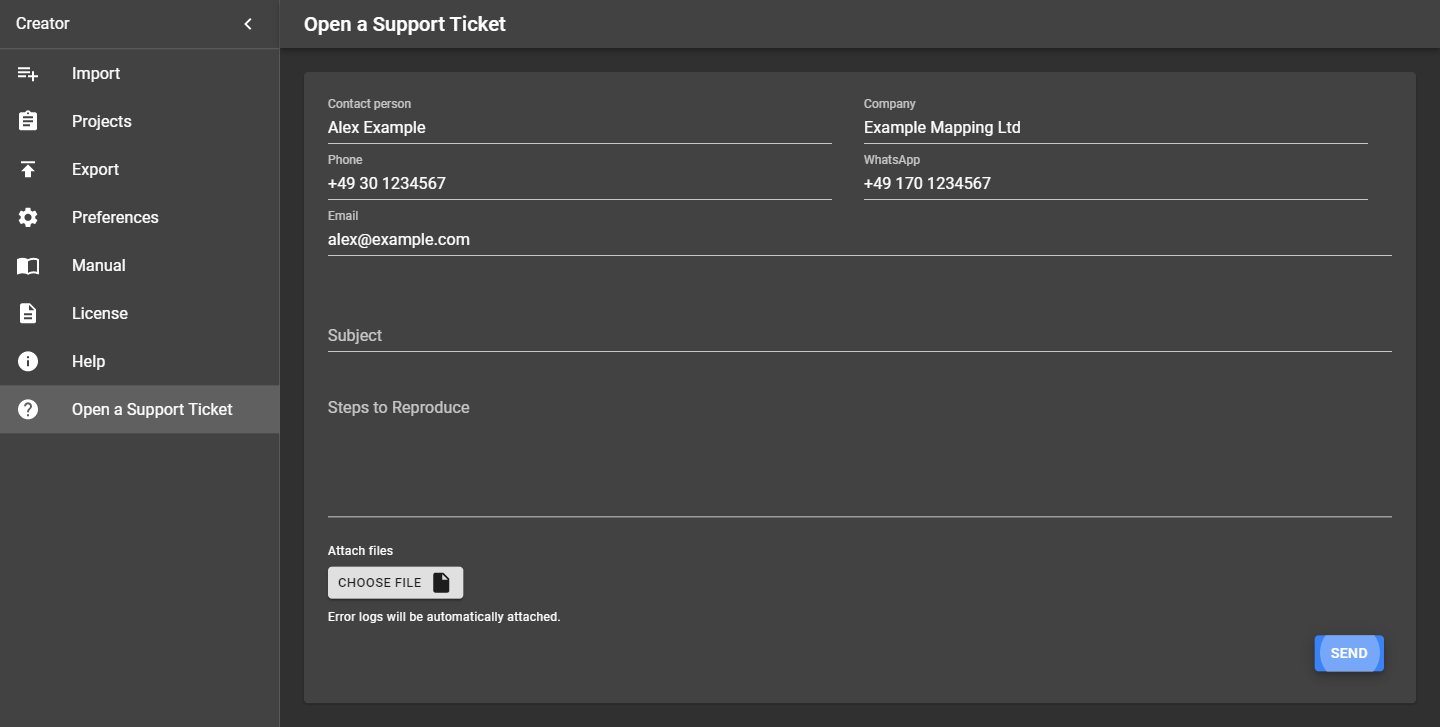
Menu → Open a Support Ticket sends a support request with everything the support team needs to help you. Please make sure you use the newest Creator version first; maybe the problem is already solved.
| Field | What to enter |
|---|---|
| Contact person, Company, Phone, WhatsApp, Email | How support can reach you. Creator remembers them for your next request (the first time it takes them from your licence registration). The answer goes to the e-mail address. |
| Subject | A short title, for example Export stops at tour 3. |
| Steps to Reproduce | What you did, what happened and what you expected. |
| Attach files | Optional files, for example annotated screenshots, up to 10 MB in total. |
Click Send. Creator shows Your Support ticket has been received. Support answers by e-mail.
19.1 What is sent automatically
- The last three Creator log files.
- PC information: Windows version, processor, memory, disk space, graphics card and driver (as in Help → Hardware).
- Your licence registration data.
- The program name and version, for example Creator v8.2.0.
No photos or project data are sent unless you attach them. To send a part of your data, create an archive with Tools → Copy Sources and share it by a link (for example from a cloud drive) in the text.
Support is available in English and German.
20 Troubleshooting
20.1 Missing or damaged photos
Sign: The Export log shows lines like
Missing or corrupt images in data-set D:\Recordings\Demo3\camera-20180408-140357\2\000000026.jpg
and Imagery → Leveling and brightness lists missing photos instead of the preview.
Cause: A photo of one of the six lenses is missing, empty or damaged. The folder number (2 above) is
the lens.
What to do:
- Check the listed files. Copy them again from the original recording if you have it.
- If the photos are lost, deactivate the affected streetviews: Tools → Fix Data does this for all of them at once.
- Export again with Skip existing streetviews.
20.2 Camera calibration files
Each tour needs the calibration file of the camera that recorded it: <camera serial number>.pto, for
example 220003131.pto. The serial number is in the tour's 7\panoramas.csv and on the
Tours page.
Creator looks for the file in this order:
- the camera calibration files folder,
- the project folder (the folder that holds the tour folders).
When a .pto file is found, Creator creates a .xml file next to it once.
| Message | What to do |
|---|---|
| Camera calibration files folder is not set | Set it in Preferences → Folders. |
| Camera calibration file "…" does not exist for tour "…" | Copy the camera's .pto file into the camera calibration files folder. |
| Camera rig file not found: … (Creator needs the .pto file next to …) | A .xml file exists without its .pto file. Copy the .pto file next to it, or delete the leftover .xml file. |
20.3 Graphics card not supported
Sign: Imagery and Export report that the stitcher can't run.
What to do: Check Help → NVIDIA graphics card. Creator 8.2.0 needs an NVIDIA RTX 20, 30, 40 or 50 series card (or GTX 16 series) with an up-to-date driver. Update the driver from https://www.nvidia.com/drivers. On older cards, use Creator 8.1.0.
20.4 Creator is already open
Only one Creator can run at a time. Starting it again brings the open window to the front.
20.5 Slow processing
- Use SSDs for the input and output folders, ideally on separate drives.
- Exclude the input and output folders from the virus scanner, see Windows settings for speed.
- Use Skip existing streetviews when exporting again.
- Thin out dense recordings with Tools → Skip.
20.6 Not enough disk space
Creator checks the free space on its drive at start and every 5 minutes, and warns when less than 1 GB is left. Free up space or move the output folder to another drive.
20.7 Collecting information for support
Use Open a Support Ticket: It sends the logs and PC data automatically.
21 Good housekeeping
21.1 Backups
- Back up often: Projects → Backup all. After a mistake, import the last good backup and continue.
- Turn on Create project backup in Export, so every export saves the project's state.
- Keep backups in a safe place, ideally also on a disconnected drive.
- Creator backups contain only Creator's data. Back up your recordings and the created files (output folder) separately.
21.2 Data safety
- Creator never changes or deletes your recordings.
- Keep up-to-date backups of the recordings, the Creator backups and the created data.
21.3 Free disk space
Keep enough free space on the drive where Creator is installed and on the output drive. Creator warns when less than 1 GB is free.
22 Player API
You can link and control the players (Player 3, Player 2 and Legacy) from your own systems and web pages.
22.1 Show an asset by its position
Your system can open the player at any position with a web address, without a database. The player opens the nearest streetview and looks at the position. This works with timelines too.
Simplest example:
https://your-player-address/index.html?v_lat=50.001217&v_lng=8.651100
| Parameter | Meaning |
|---|---|
v_lat, v_lng |
Latitude and longitude of the asset (required) |
v_alt |
Altitude of the asset |
v_label |
Text shown for the asset; may contain <br> |
v_timeline |
Name of an existing timeline |
v_layout |
Start layout: map, streetview, streetviewBottom (map top, streetview bottom), streetviewTop (streetview top, map bottom), streetviewOnly |
v_minimized |
1: Small window minimized, 0: Shown |
v_htmlTitle |
Title of the browser tab |
v_label, v_timeline and v_htmlTitle must be URL-encoded (spaces as %20 and so on), for example with
https://www.urlencoder.org/.
22.2 Example pages
Each exported player contains working example pages in its examples folder, for example
player3\examples\:
| Example | What it shows |
|---|---|
map.html |
A map of your own (here Leaflet) next to the player: Click the map to open the streetview, move in the player to update the map. |
asset.html |
Open the streetview nearest to an asset by its latitude and longitude. |
timeline.html |
Switch timelines from your page, for "before and after" comparisons. |
screenshot.html |
Take a screenshot of the visible part of the streetview, for reports or a database. |
data.html |
Read the data of the current view: Streetview ID, label, timeline, position, direction, zoom, date and time. |
external-osm.html, external-google.html |
Open another web page (OpenStreetMap, Google Maps) at the current position, with a button you can rename, move and style. |
Use them as a starting point for your own integration. The pages talk to the player in an iframe, so the
player and your page can be on different servers.